2.Stoptheengineandwaitforallmovingpartsto
stopbeforeleavingtheoperatingposition.
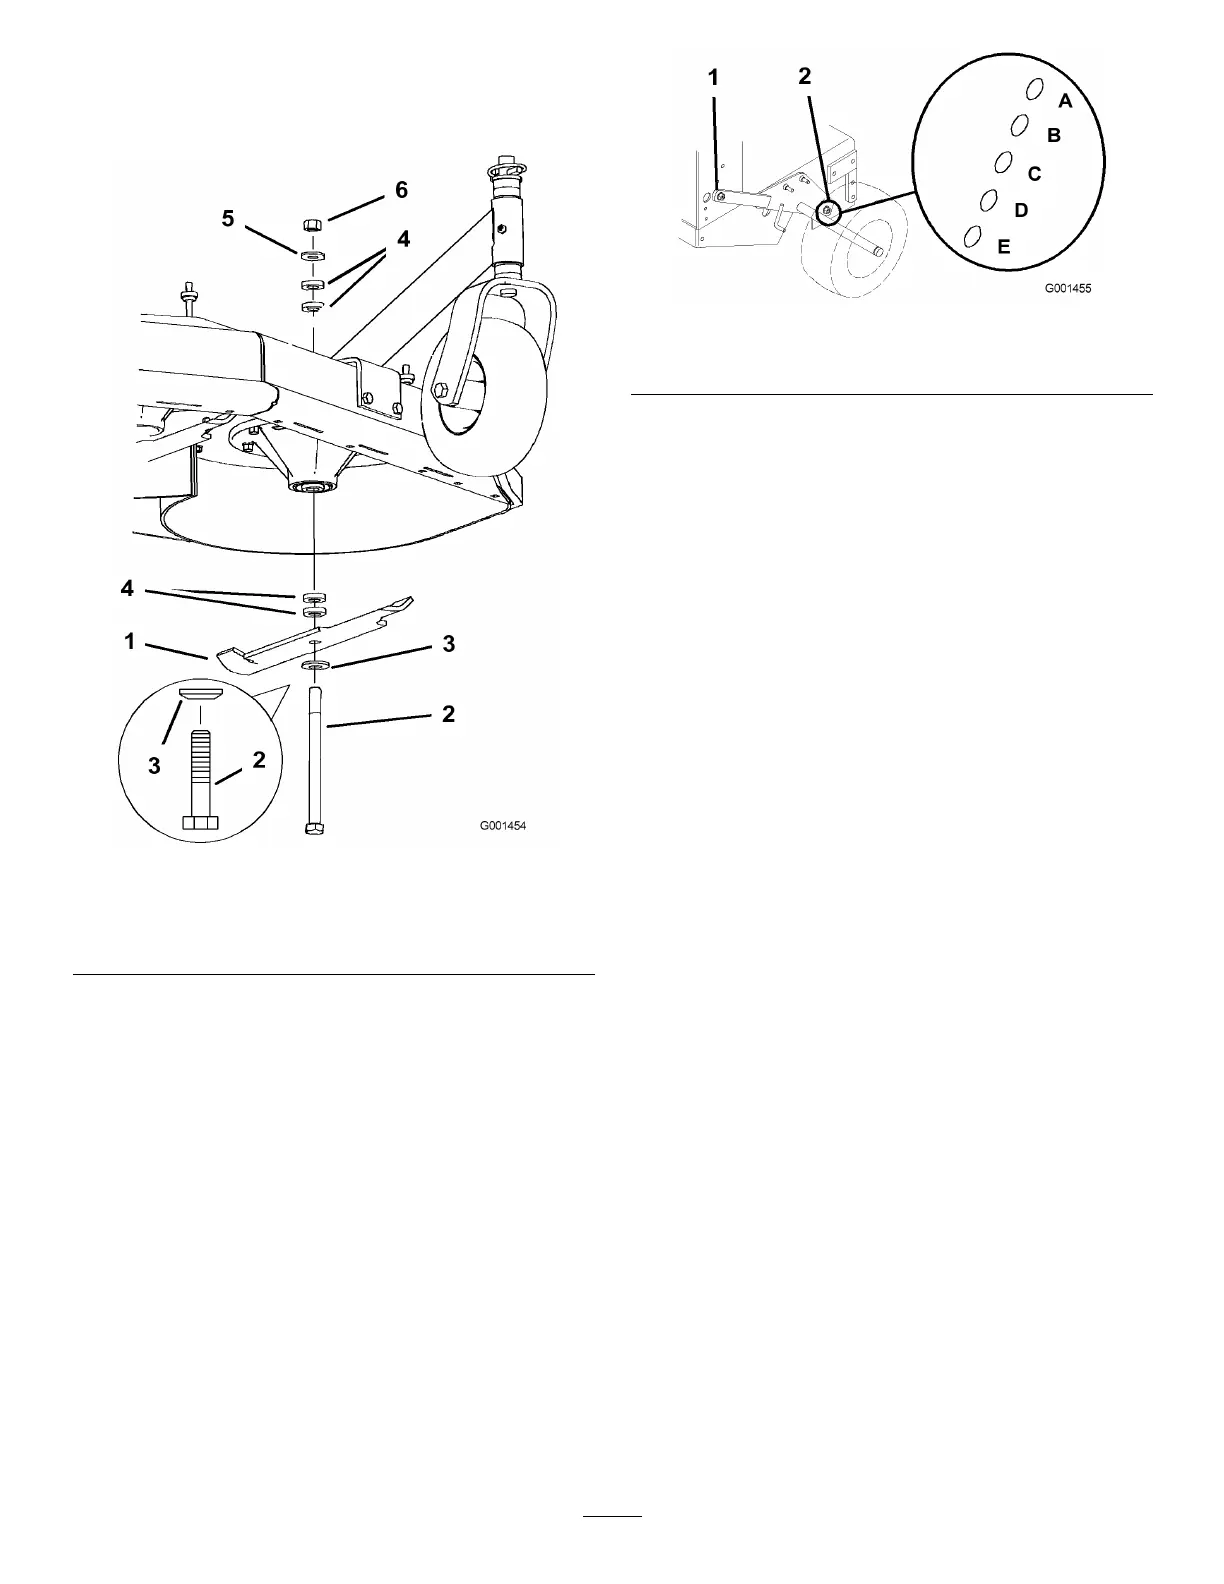
3.Holdthebladeboltandremovethenut(Figure10).
Figure10
1.Blade
4.Spacer
2.Bladebolt5.Thinwasher
3.Curvedwasher
6.Nut
4.Slidetheboltdownthroughthespindle,andchange
thespacersasneeded(Figure10).
5.Installtheboltandcurvedwasher,addextra
spacer(s),andsecurethemwithathinwasheranda
nut(Figure10).
6.Torquethebladeboltto75-80ft-lb(101-108N•m).
AdjustingtheAxleHeight
Adjusttheaxlepositiontotheselectedheight-of-cut
setting.RefertotheHeight-of-CutChart.
1.Disengagethebladecontrol(PTO)leverandset
theparkingbrakes.
2.Stoptheengineandwaitforallmovingpartsto
stopbeforeleavingtheoperatingposition.
3.Loosen,butdonotremove,the2axlepivotbolts
andthe2axleadjustmentbolts(Figure11).
Figure11
1.Axlepivotbolt2.Axleadjustmentbolt
4.Placeajackundertherearcenteroftheengine
frame.Raisethebackendoftheengineframeup
enoughtoremovethefront2axleadjustmentbolts
(Figure11).
Note:Usejackstandstosupportthemachine.
5.Raiseorlowertheengineframewiththejackso
thatyoucaninstallthefront2axleadjustmentbolts
inthedesiredholelocation(Figure11).
Note:Useataperedpunchtohelpaligntheholes.
6.Tightenall4boltsandlowerthemower.
7.Adjustthecontrolrodsandthebrakelinkages
asrequired.RefertoServicingtheBrakesand
AdjustingtheControlRods.
Important:Youmustadjustthecontrolrods
andthebrakelinkagewhenyouchangethe
axlepositionsforpropertractionandbrake
function.
AdjustingtheCasterPosition
1.UsingtheHeight-of-CutChart,adjustthecaster
spacerstomatchwiththeaxleholeselected
(Figure12).
19