9
Installing Trimmer Head Shield
(Straight Shaft Model)
POTENTIAL HAZARD
• The cutoff blade is sharp.
WHAT CAN HAPPEN
• Contact with cutoff blade could cause serious
cuts or personal injury.
HOW TO AVOID THE HAZARD
• Keep hands, feet and clothing away from cutoff
blade.
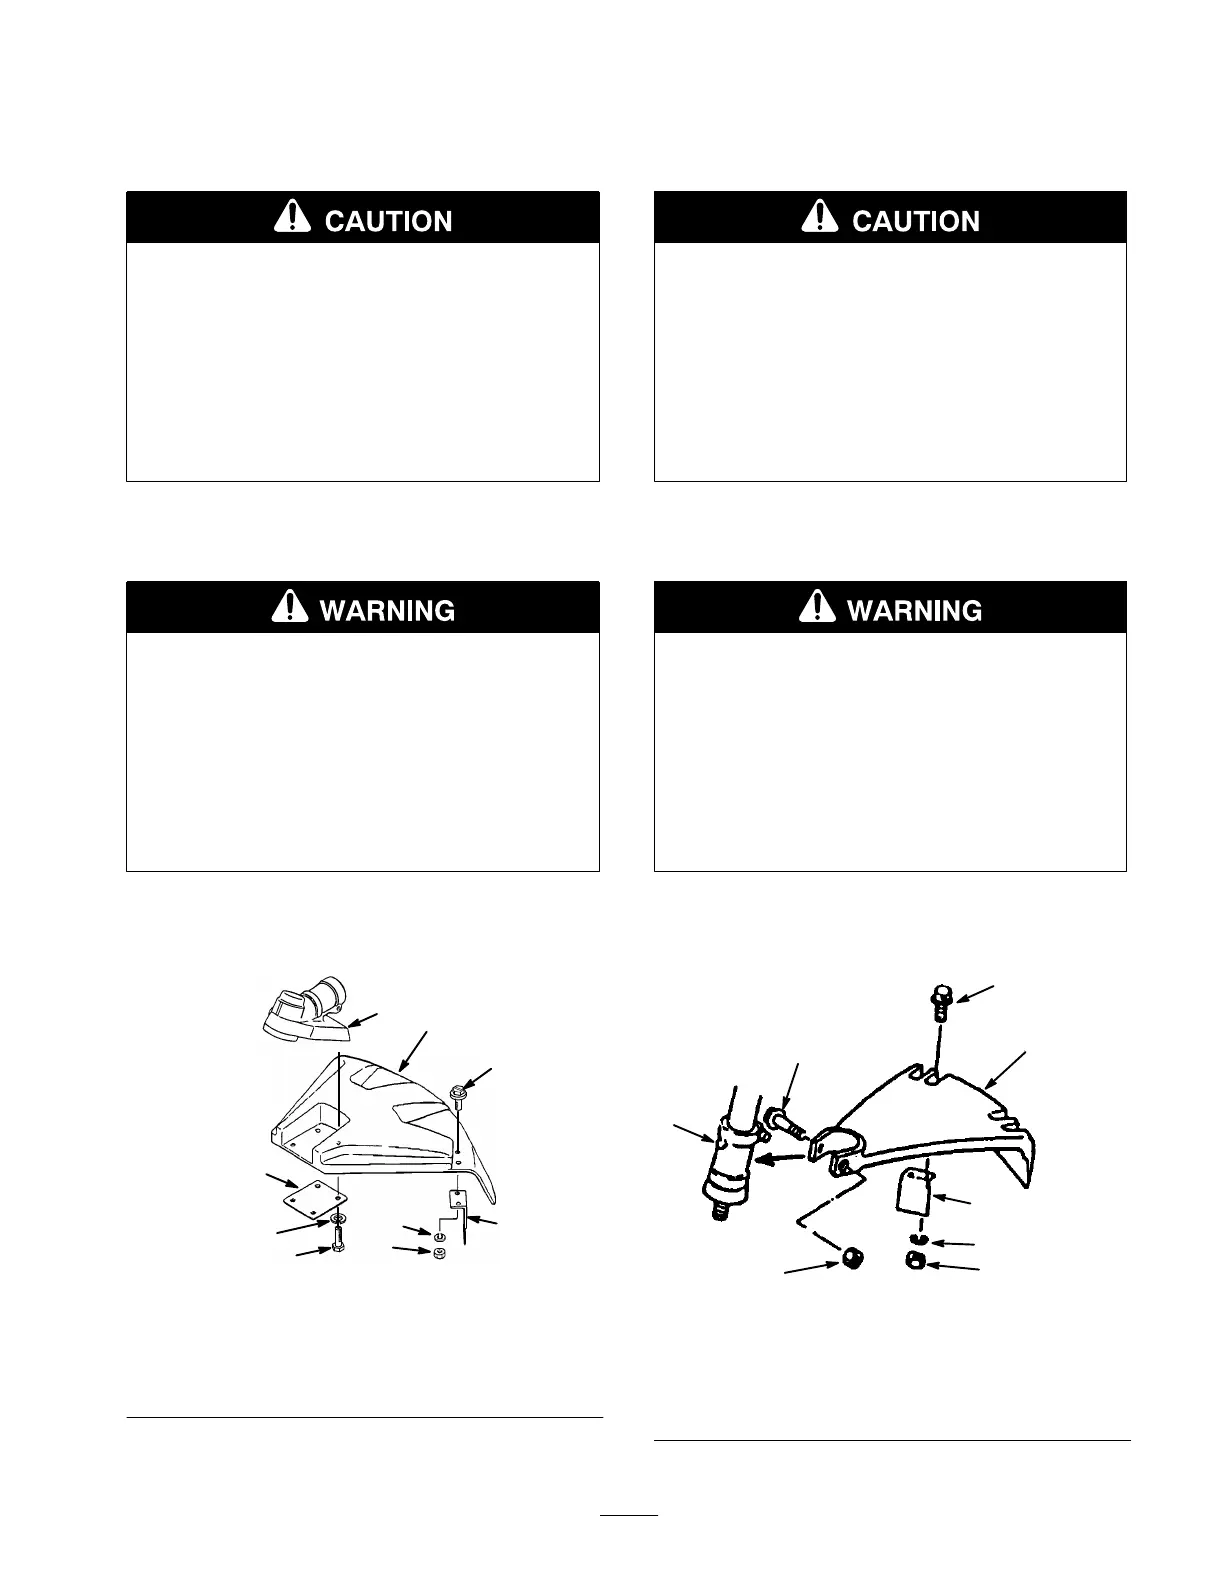
1. Fasten the string cutoff blade to the trimmer head
shield with two M5 x 15 screws, lock washers and hex
nuts as shown (Fig 7).
POTENTIAL HAZARD
• Foreign objects can be thrown by Trimmer.
WHAT CAN HAPPEN
• Contact with thrown objects can cause personal
injury.
HOW TO AVOID THE HAZARD
• Never operate the Trimmer without the
trimmer head shield in place.
2. Attach the trimmer head shield to the gearcase with
the four M5 x 12 screws and lock washers as shown
(Fig 7).
m-2975
Figure 7
1. Gearcase
2. Trimmer Head Shield
3. M5 x 15 Screw (2)
4. Plate
5. Lock Washer
6. M5 x 12 Screw (4)
7. Hex Nut
8. String Cutoff Blade
Installing Trimmer Head Shield
(Curved Shaft Model)
POTENTIAL HAZARD
• The cutoff blade is sharp.
WHAT CAN HAPPEN
• Contact with cutoff blade could cause serious
cuts or personal injury.
HOW TO AVOID THE HAZARD
• Keep hands, feet and clothing away from cutoff
blade.
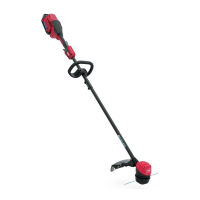
1. Fasten the string cutoff blade to the trimmer head
shield with two M5 x 15 screws, lock washers and hex
nuts as shown (Fig 8).
POTENTIAL HAZARD
• Foreign objects can be thrown by Trimmer.
WHAT CAN HAPPEN
• Contact with thrown objects can cause personal
injury.
HOW TO AVOID THE HAZARD
• Never operate the Trimmer without the
trimmer head shield in place.
2. Attach the trimmer head shield to the bearing case
with one M6 x 40 screw and locknut as shown (Fig 8).
Tighten only as needed.
Figure 8
1. String Cutoff Blade
2. Screw M6 x 40
3. Lock Washer
4. Hex Nut
5. Bearing case
6. Trimmer Head Shield
7. M6 x 40 Screw
8. Hex Nut