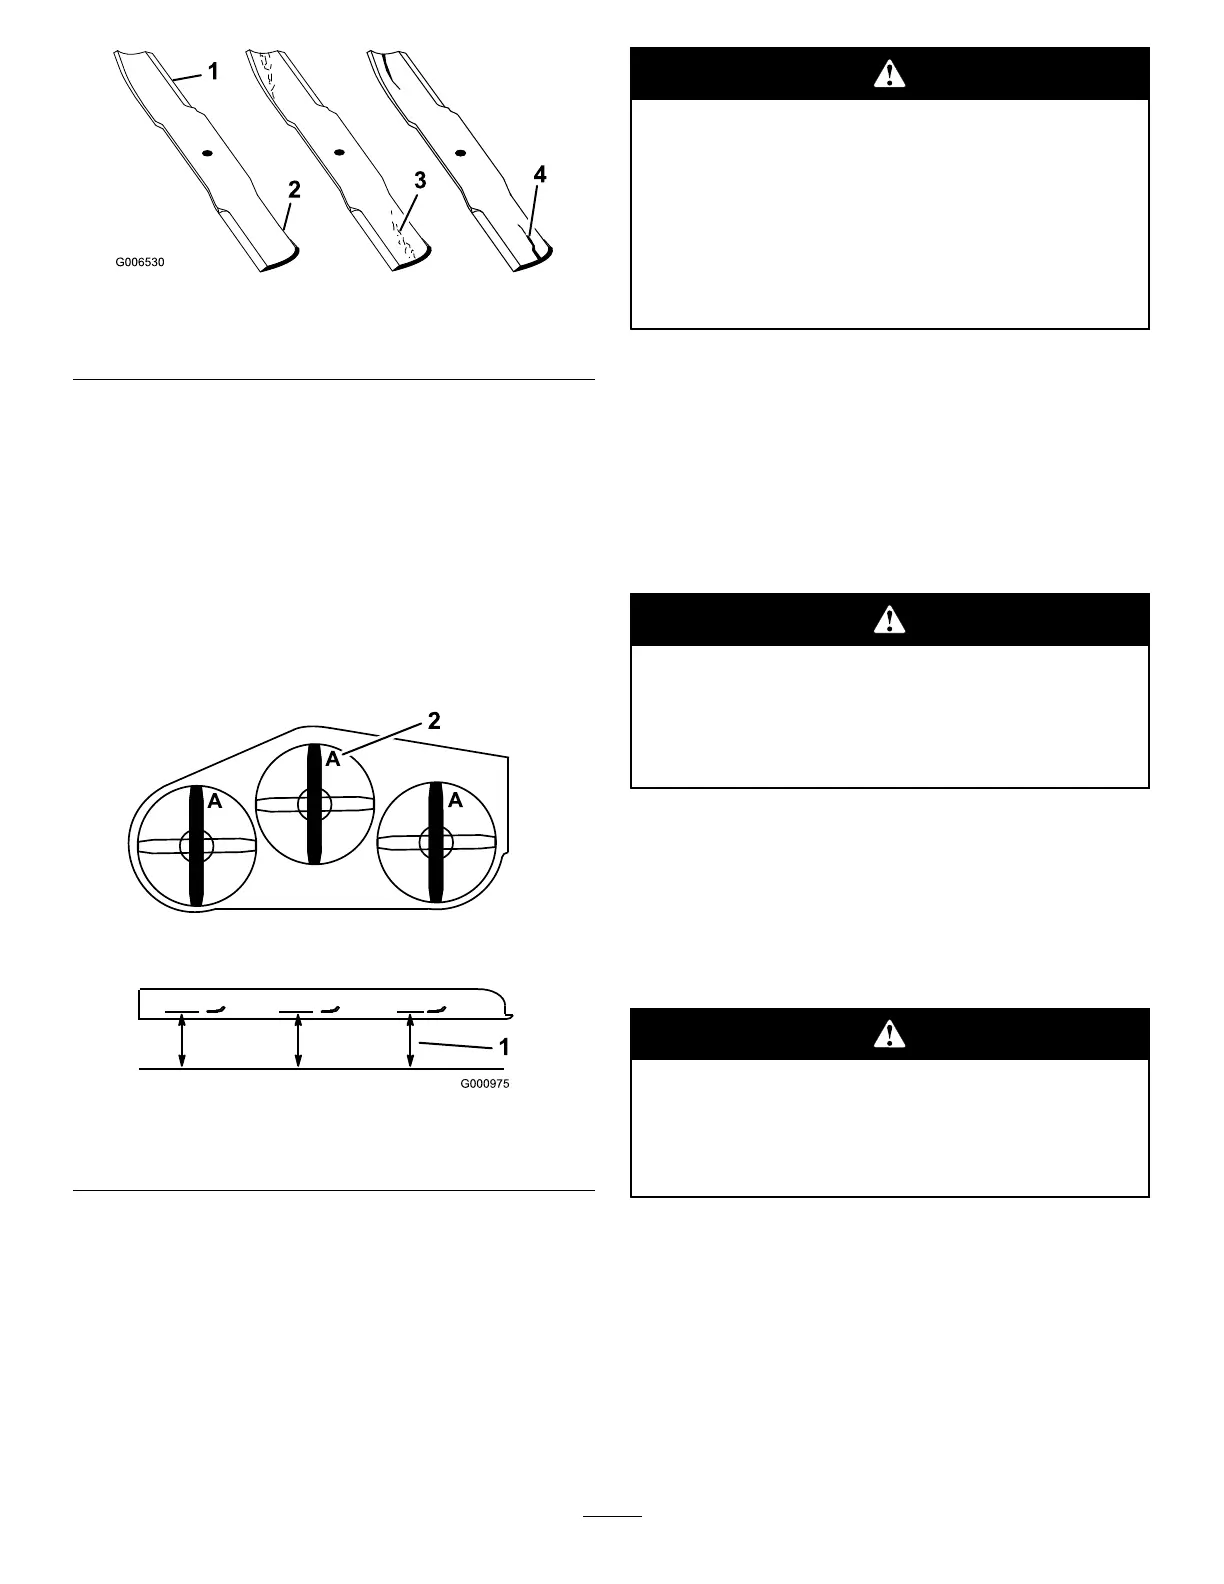
Figure62
1.CuttingEdge3.Wear/slotForming
2.CurvedArea4.Crack
2.Inspecttheblades,especiallythecurvedarea
(Figure62).
Ifyounoticeanydamage,wear,oraslotformingin
thisarea(Figure62),immediatelyinstallanewblade.
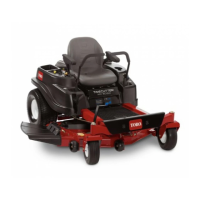
CheckingforBentBlades
1.Rotatethebladesuntiltheendsfaceforwardand
backward(Figure63).Measurefromalevelsurface
tothecuttingedge,positionA,oftheblades
(Figure63).Notethisdimension.
Figure63
1.Measureherefromblade
tohardsurface
2.PositionA
2.Rotatetheoppositeendsofthebladesforward.
3.Measurefromalevelsurfacetothecuttingedgeof
thebladesatthesamepositionasinstep1above.
Thedifferencebetweenthedimensionsobtainedin
steps1and2mustnotexceed1/8inch(3mm).If
thisdimensionexceeds1/8inch(3mm),theblade
isbentandmustbereplaced;refertoRemovingthe
BladesandInstallingtheBlades.
Abladethatisbentordamagedcouldbreak
apartandcouldseriouslyinjureorkillyouor
bystanders.
•Alwaysreplacebentordamagedbladewith
anewblade.
•Neverleorcreatesharpnotchesinthe
edgesorsurfacesofblade.
RemovingtheBlades
Bladesmustbereplacedifasolidobjectishit,ifthe
bladeisoutofbalanceorisbent.Toensureoptimum
performanceandcontinuedsafetyconformanceof
themachine,usegenuineTororeplacementblades.
Replacementbladesmadebyothermanufacturersmay
resultinnon-conformancewithsafetystandards.
Contactwithasharpbladecancauseserious
injury.
Wearglovesorwrapsharpedgesoftheblade
witharag.
1.Holdthebladeendusingaragorthickly-padded
glove.
2.Removethebladebolt,springdiskandbladefrom
thespindleshaft(Figure66).
SharpeningtheBlades
Whensharpeningblade,piecesofbladecould
bethrownandcauseseriousinjury.
Wearpropereyeprotectionwhensharpening
blade.
1.Usealetosharpenthecuttingedgeatbothends
oftheblade(Figure64).Maintaintheoriginalangle.
Thebladeretainsitsbalanceifthesameamountof
materialisremovedfrombothcuttingedges.
46