6.Supporttheweightofmowerdeckbyplacingwood
blocksundertheedgesofthedeck.
Note:Avoidplacingthesupportsunderanyanti-scalp
rollersifpresentonthedeck.
7.Movetotheleftsideofthemachine.Removetheside
carriageboltandlockingnutfromthexedposition
andinstallitintotherear,slottedpositionandleaveit
slightlyloose(
Figure50).
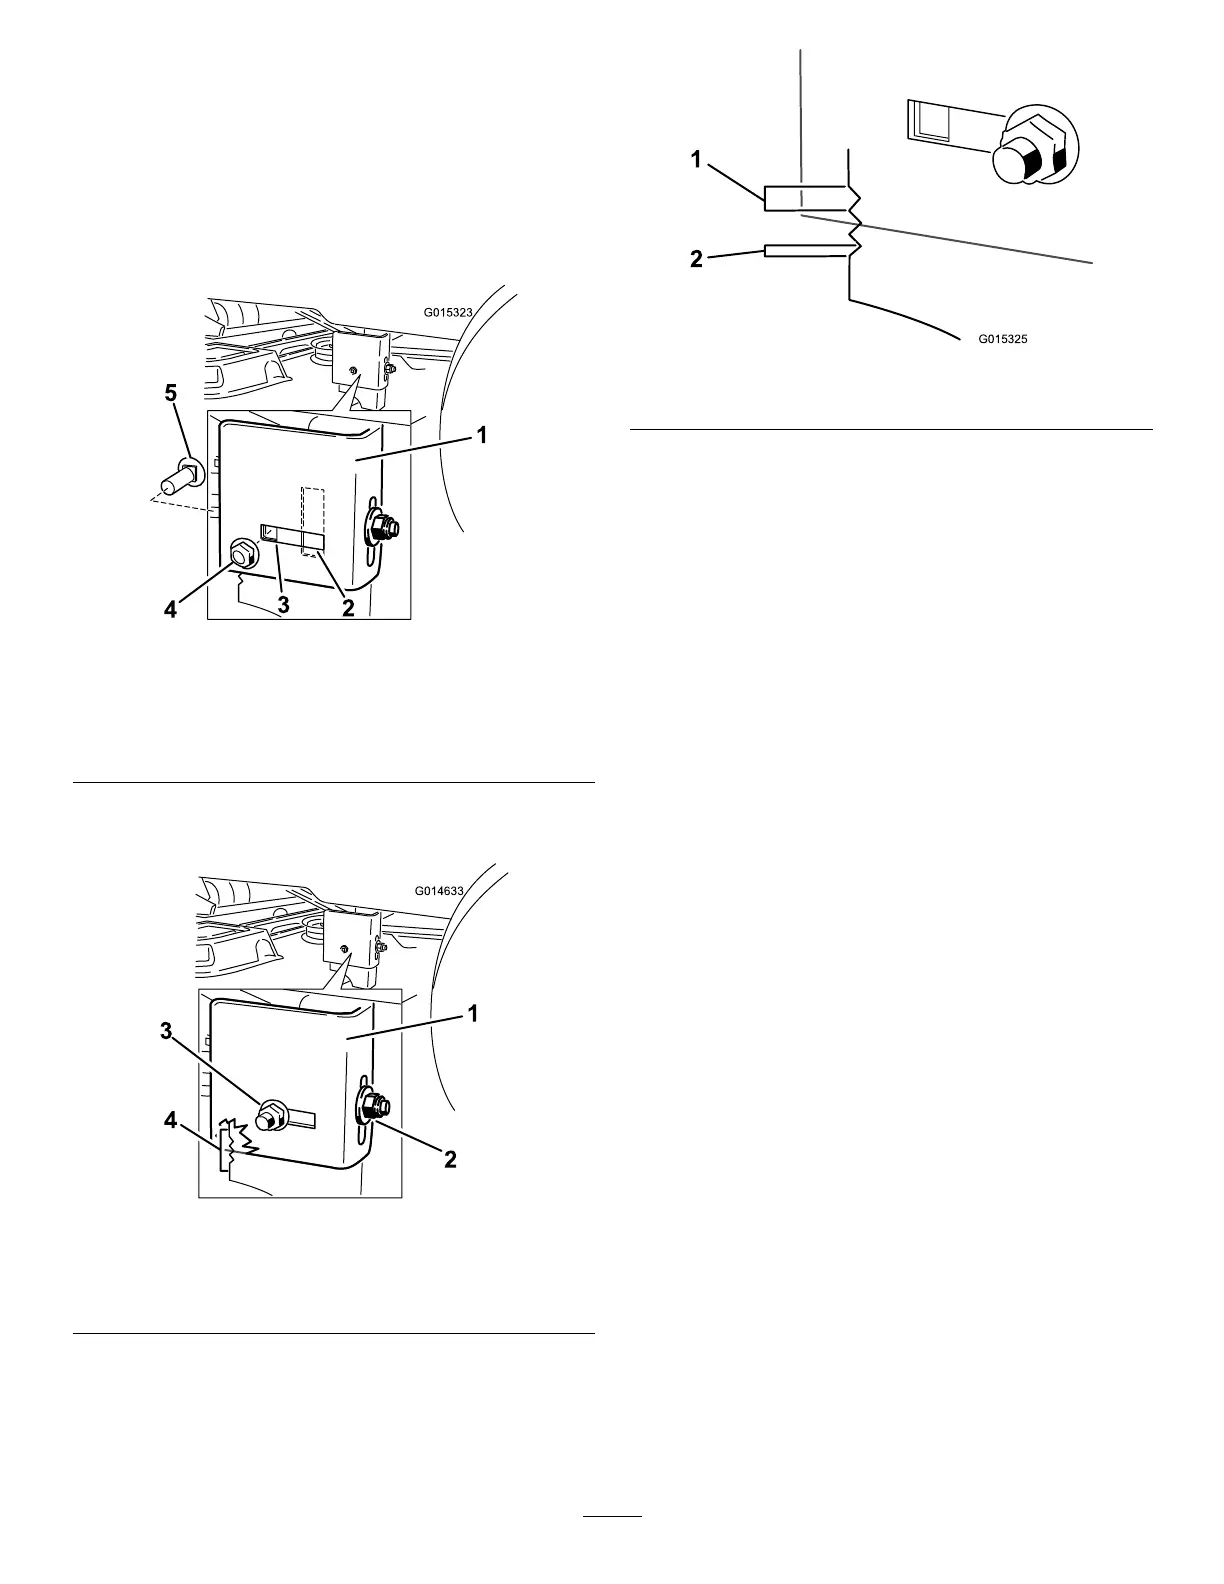
Figure50
1.Hangerbracket
4.Sidelockingnut.
2.Slottedadjustment
position
5.Sidecarriagebolt
3.Fixedposition
8.Loosentherearlockingnutonthehangerbracketjust
enoughtomovethebracket(Figure51).
Figure51
1.Hangerbracket
3.Sidelockingnut,slotted
position.
2.Rearlockingnut4.Adjustmentnotches
9.Usethenotchesontheweldedbrackettomeasure
theamountofadjustment.Eachnotchsurfaceis
equivalentto0.25inch,whileasinglesideis0.125
inch(
Figure52).Adjusttheheightofthemowerdeck
tothedesiredheight.
Figure52
1.0.25inch2.0.125inch
10.Stopthedeckattheadjustedpositionandtightenthe
rearlockingnutonthehangerbrackettoholdthenew
position(Figure51).Tightenthesidelockingnuton
thehangerbracket.
11.Continuelevelingthedeckbycheckingthefront-to-rear
bladeslope;refertoAdjustingtheFront-to-RearBlade
Slope.
AdjustingtheFront-to-RearBlade
Slope
Checkthefront-to-rearbladelevelanytimeyouinstallthe
mower.Ifthefrontofthemowerismorethan5/16inch
(7.9mm)lowerthantherearofthemower,adjusttheblade
levelusingthefollowinginstructions:
1.Parkthemachineonalevelsurfaceanddisengagethe
bladecontrolswitch.
2.Movethemotioncontrolleversoutwardtothepark
position,stoptheengine,removethekey,andwaitfor
allmovingpartstostopbeforeleavingtheoperating
position.
3.Settheheight-of-cutlevertomiddleposition.
Note:Checkandadjusttheside-to-sidebladelevelif
youhavenotcheckedthesetting;refertoSide-to-Side
Leveling.
4.Carefullyrotatethebladessotheyarefacingfrontto
rear(Figure53).
34