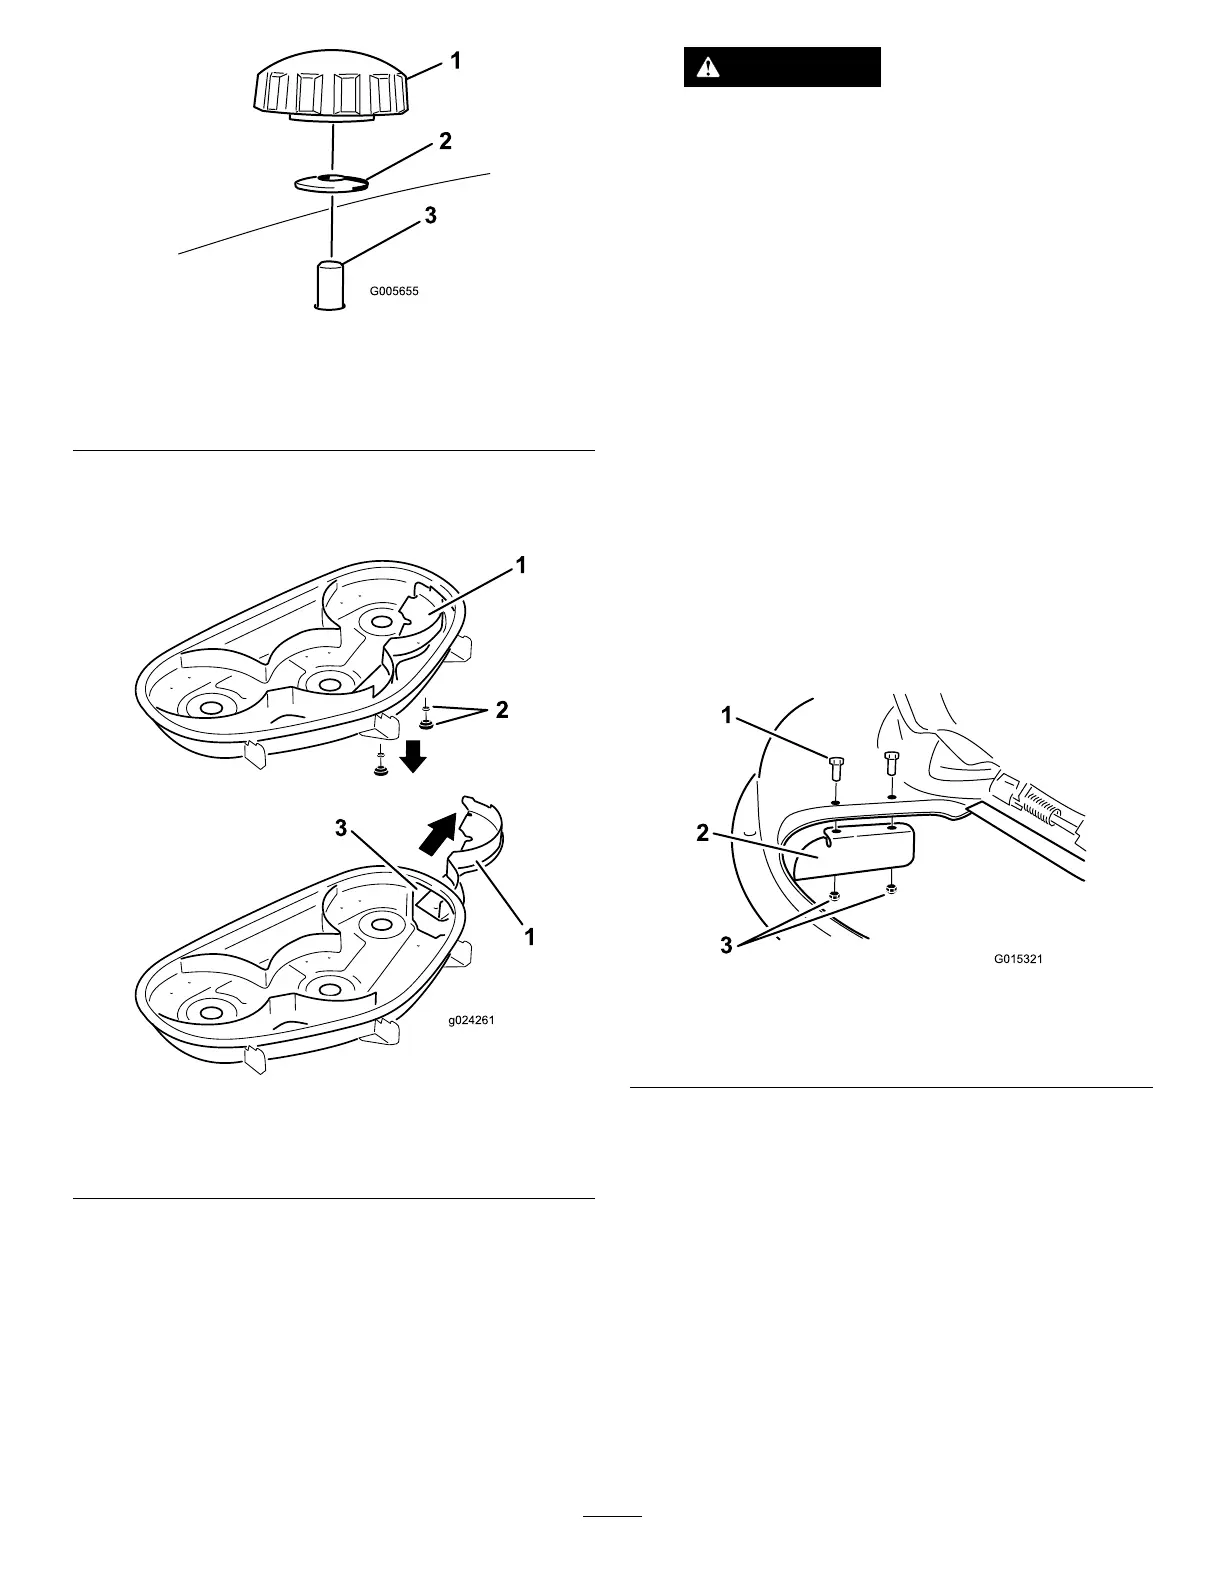
g005655
Figure16
1.Knob
3.Bafestudcomingthrough
themower
2.Curvedwasher
5.Removetherightbafeandlowerthegrass
deectoroverthedischargeopeningasshown
inFigure16andFigure17.
g024261
Figure17
1.Rightbafe
3.Dischargeopening
2.Curvedwasherandknob
6.Installfastenersintotheholesinthetopofthe
mowertopreventyingdebris.
WARNING
Openholesinthemachineexposeyou
andotherstothrowndebristhatcan
causesevereinjury.
•Neveroperatethemachinewithout
hardwaremountedinallholesinthe
machinehousing.
•Installthehardwareinthemounting
holeswhenyouremovethemulching
bafe.
7.Installtherightmowerblade;refertoInstalling
theBlades(page48).
8.Liftupthegrassdeector.Install2bolts(5/16x
3/4inch)tothe2holesalongthedeckcutout.
9.Installthecutoffbafetothemowerdeck(Figure
18).
Note:Usethe2locknuts(5/16inch)tosecure
thebafetothemowerdeck.
Note:Thecutoffbafewasshippedwiththe
machineasaloosepart.
g015321
Figure18
1.Bolt(5/16x3/4inch)3.Locknut(5/16inch)
2.Cutoffbafe
10.T orquethefastenersto7to9N∙m(14to18
ft-lb).
11.Lowerthegrassdeectoroverthedischarge
opening.
Important:Ensurethatthemowerhas
ahingedgrassdeectorthatdisperses
clippingstothesideanddowntowardthe
turfwhileinside-dischargemode.
InstallingtheRightBafeforMulching
1.Parkthemachineonalevelsurface,disengage
theblade-controlswitch,andengagetheparking
brake.
20