Installthefastenersintothesameholesinthedeckthey
wereoriginallyremovedfrom.Thisensurenoholesare
leftopenwhenthedeckisoperated.
Openholesinthemowerexposeyouandothers
tothrowndebris.Debristhrownoutofholesin
themowercancauseinjury.
•Neveroperatethemowerwithouthardware
mountedinallholesinthemower.
•Installhardwareinmountingholeswhen
thebafeisremoved.
RemovingtheMulchBafe
1.Parkthemachineonalevelsurfaceanddisengage
thebladecontrolswitch.
2.Movethemotioncontrolleversoutwardtopark
position,stoptheengine,removethekey,andwait
forallmovingpartstostopbeforeleavingthe
operatingposition.
3.RemovethemowerasdescribedintheRemoving
theMowerprocedureintheMaintenancesectionfor
moreinformation.
4.Turnthemowerupsidedown.
5.Removetheexistingmowerbladesinstalledonyour
deck.RefertotheRemovingtheBladesprocedure
intheMaintenancesectionformoreinformation.
6.Removethethreelocknuts(5/16inch)securedto
theweldedpostsoftheleftbafeonthetopof
themowerdeckatthecenter,leftofcenterand
leftpositions(Figure31).Removethecarriagebolt
andlocknutonthesidewallofthemowerdeck
securingtheleftbafetothedeck.
Figure31
1.Locknut(5/16inch)3.Leftbafe
2.Carriagebolt(5/16x3/4
inch)
4.Installfastenershere
7.Removetheleftbafefromthemowerdeckas
showninFigure31.
8.Locatethetwoboltsandlocknutsinloose
parts.Installthesefastenersintotheholesshown
inFigure31onthemowerdecktopreventying
debris.Installtheboltup,throughtheunderside
ofthedeckandusealocknuttosecurefromthe
topside.
Openholesinthemowerexposeyouandothers
tothrowndebriswhichcancausesevereinjury.
•Neveroperatethemowerwithouthardware
mountedinallholesinthemowerhousing.
•Installthehardwareinthemountingholes
whenyouremovethemulchingbafe.
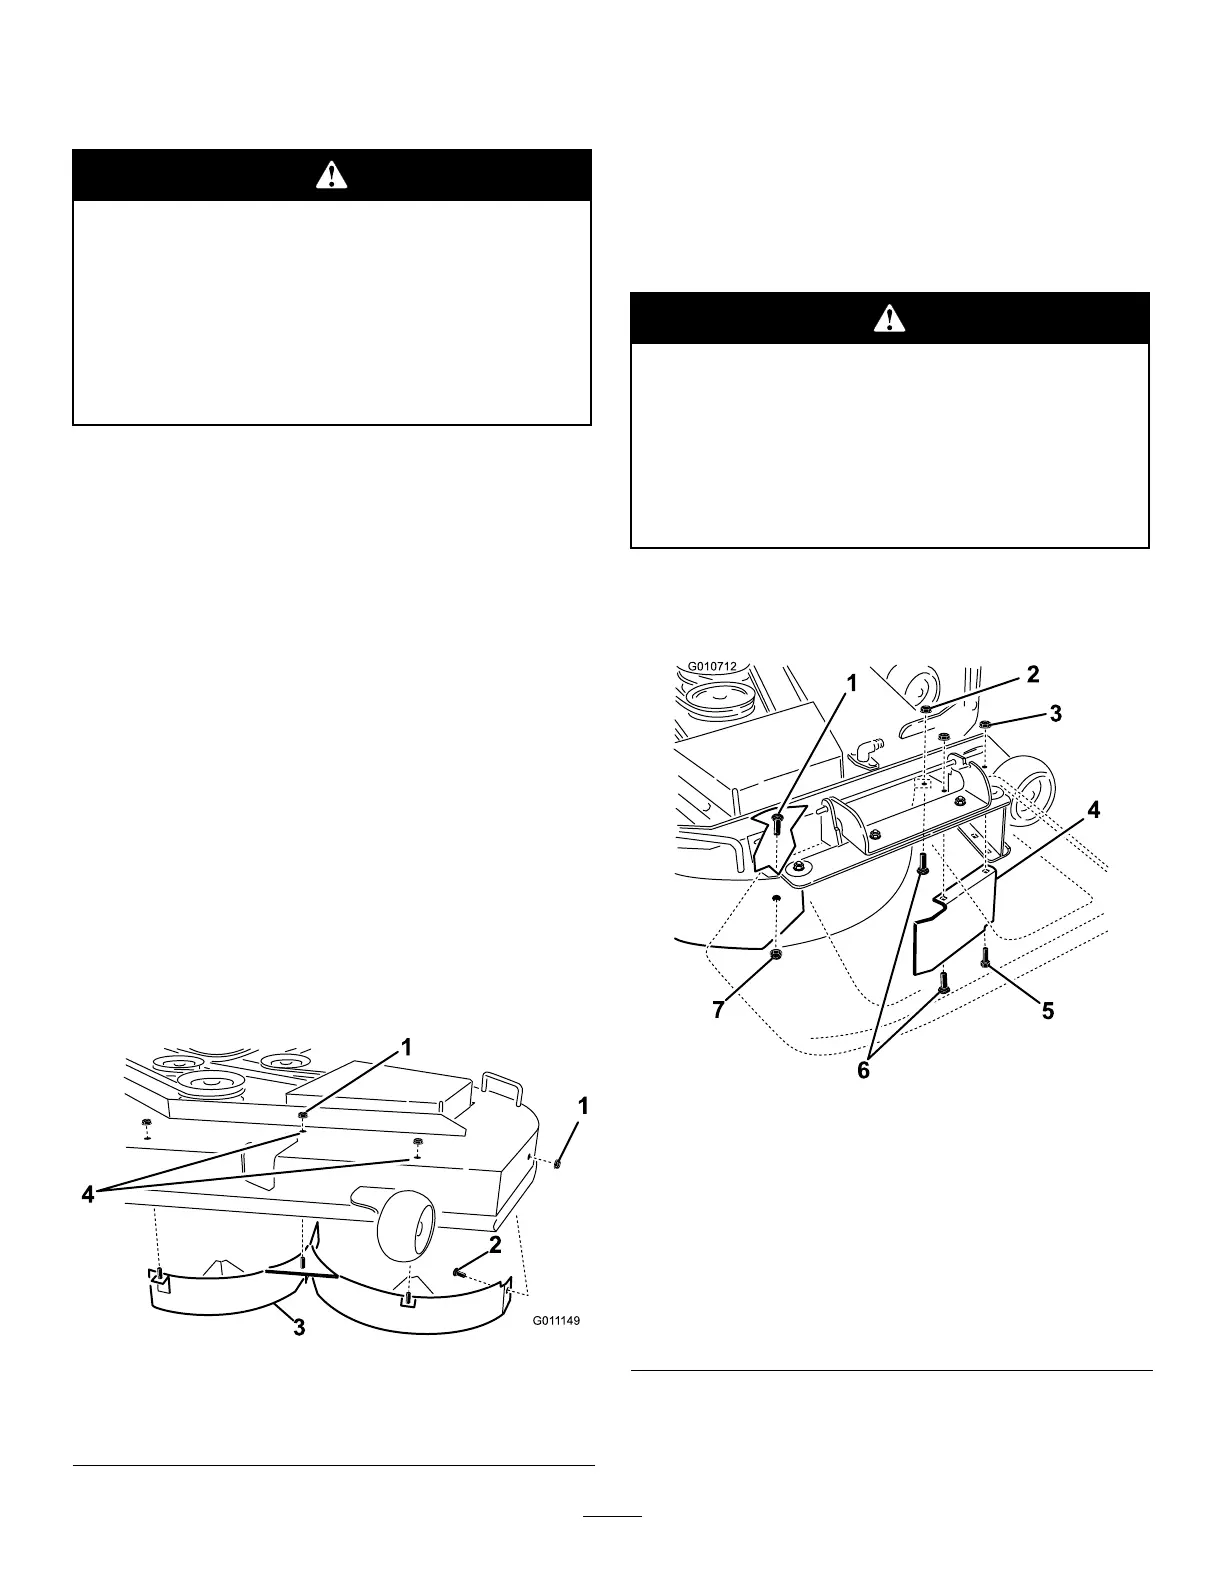
9.Removethecarriagebolt(5/16x3/4inch)andlock
nut(5/16inch)ontherearwallofthemowerdeck
securingthebafetothedeck(Figure32).
Figure32
1.Carriagebolt(5/16x3/4
inch)
5.Hexheadbolt,forward
holeindeck(reinstallafter
bafeisremoved)
2.Locknuts,frontof
dischargeplate(reinstall
afterbafeisremoved)
6.Carriagebolts,frontof
dischargeplate(reinstall
afterbafeisremoved)
3.Locknut,forwardholein
deck(reinstallafterbafe
isremoved)
7.Locknut(5/16inch)
4.Bafeguard,54inch
decks
10.Locatethebafeguardatthefrontedgeoftheside
dischargeopening.Removethefastenerssecuring
thebafeguardandtherightbafetothemower
25