2.Stoptheengine,removethekey,andwaitforall
movingpartstostopbeforeleavingtheoperating
position.
3.Lowerthemowertothe3inch(76mm)height-of-cut
position.
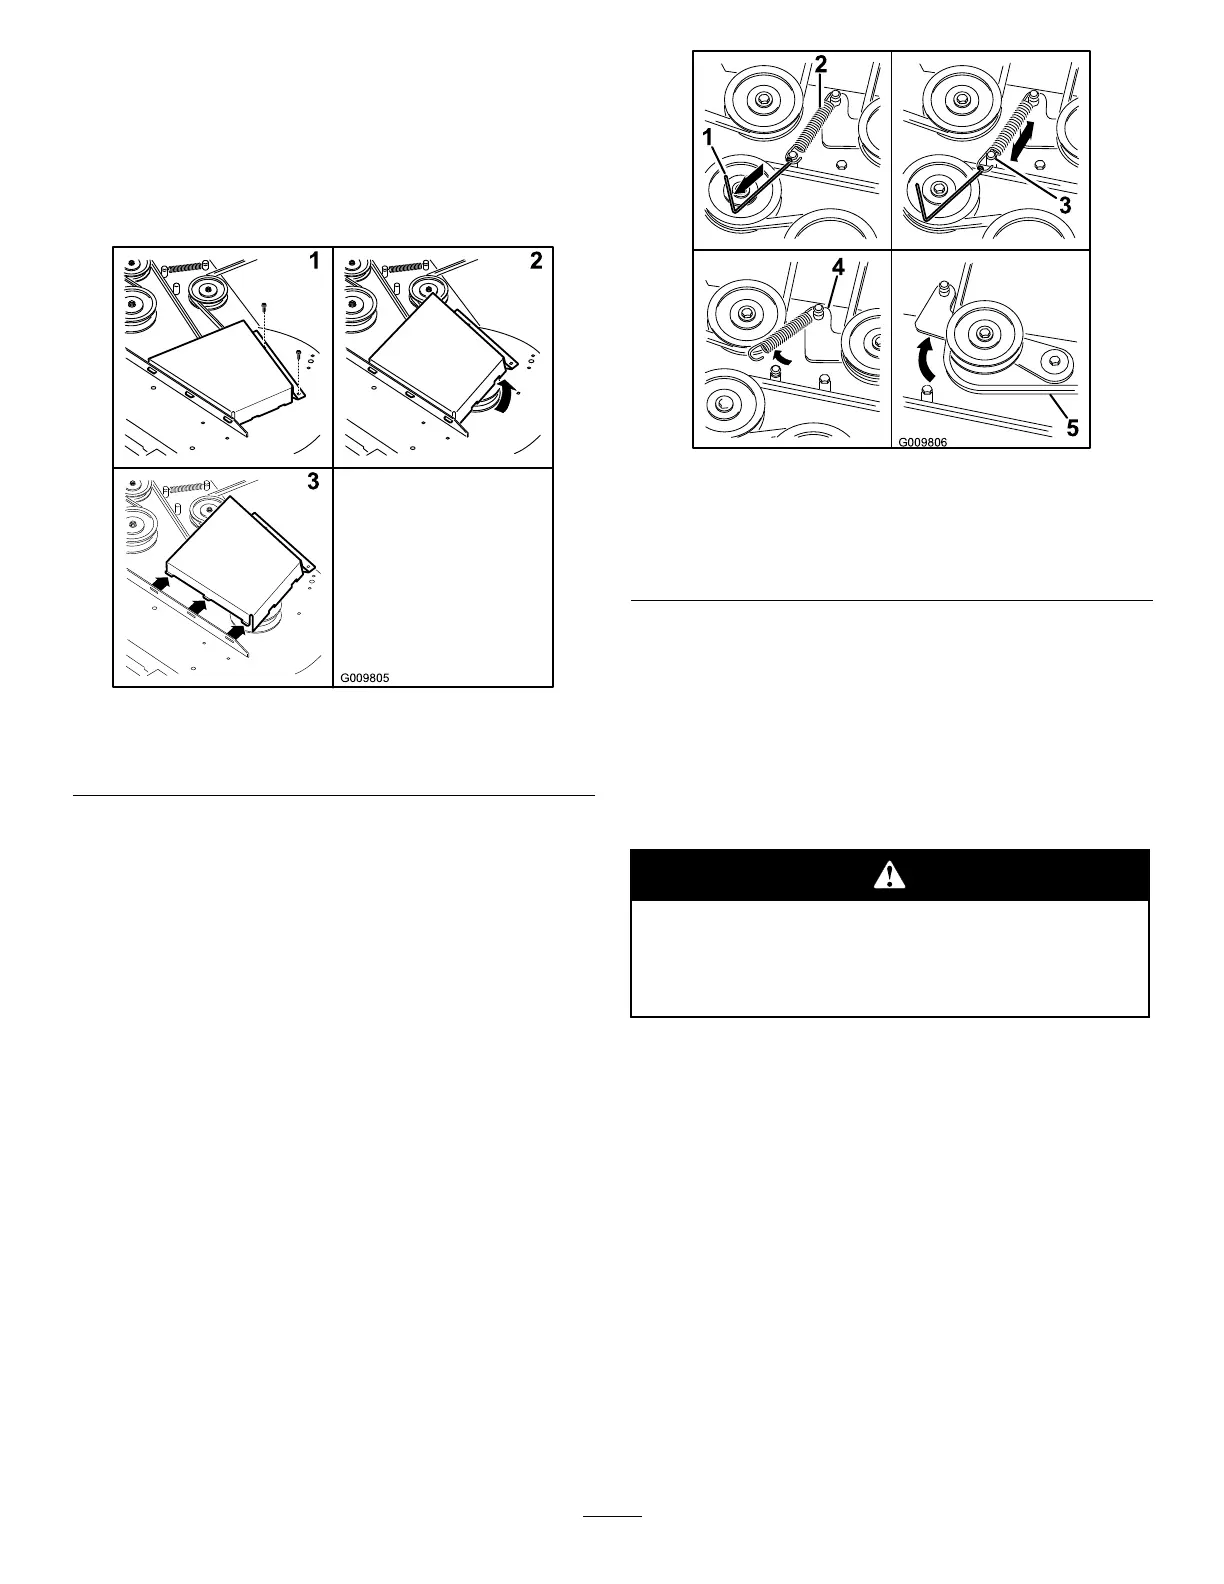
4.Removethebeltcovers(Figure68).
Figure68
1.Removethescrews3.Removebeltcover
2.Pivotthebeltcoverup
5.Removetheoorpantoaccesstheidlerpulley;
refertotheRemovingtheFloorPanprocedurein
Premaintenance.
6.Usingaspringremovaltool,(Toropartno.92-5771),
removetheidlerspringfromthedeckpostto
removetensionontheidlerpulley(Figure69).
Figure69
1.Springremovaltool(T oro
partno.92-5771)
4.Idlerarm
2.Idlerspring5.Mowerbelt
3.Deckpost
7.Lowerthemowertothelowestheight-of-cut.Place
theheight-of-cutpininthelockpositionforlowest
height-of-cut.
8.Removethebeltfromthemowerdeckpulleysand
removetheexistingbelt.
9.Installthenewbeltaroundthemowerpulleysand
theclutchpulleyundertheengine(Figure69).
Thespringisundertensionwheninstalledand
cancausepersonalinjury.
Becarefulwhenremovingthebelt.
10.Usingaspringremovaltool,(Toropartno.92-5771),
installtheidlerspringoverthedeckpostand
placingtensionontheidlerpulleyandmowerbelt
(Figure69).
11.Ensurethatthebeltisproperlyseatedinallpulleys.
12.Installthebeltcovers(Figure70).
46