CheckingforBentBlades
1.Disengagetheblade-controlswitch(PTO),movethe
motion-controlleverstotheNEUTRAL-LOCKposition,
andsettheparkingbrake.
2.Shutofftheengine,removethekey,andwaitforall
movingpartstostopbeforeleavingtheoperating
position.
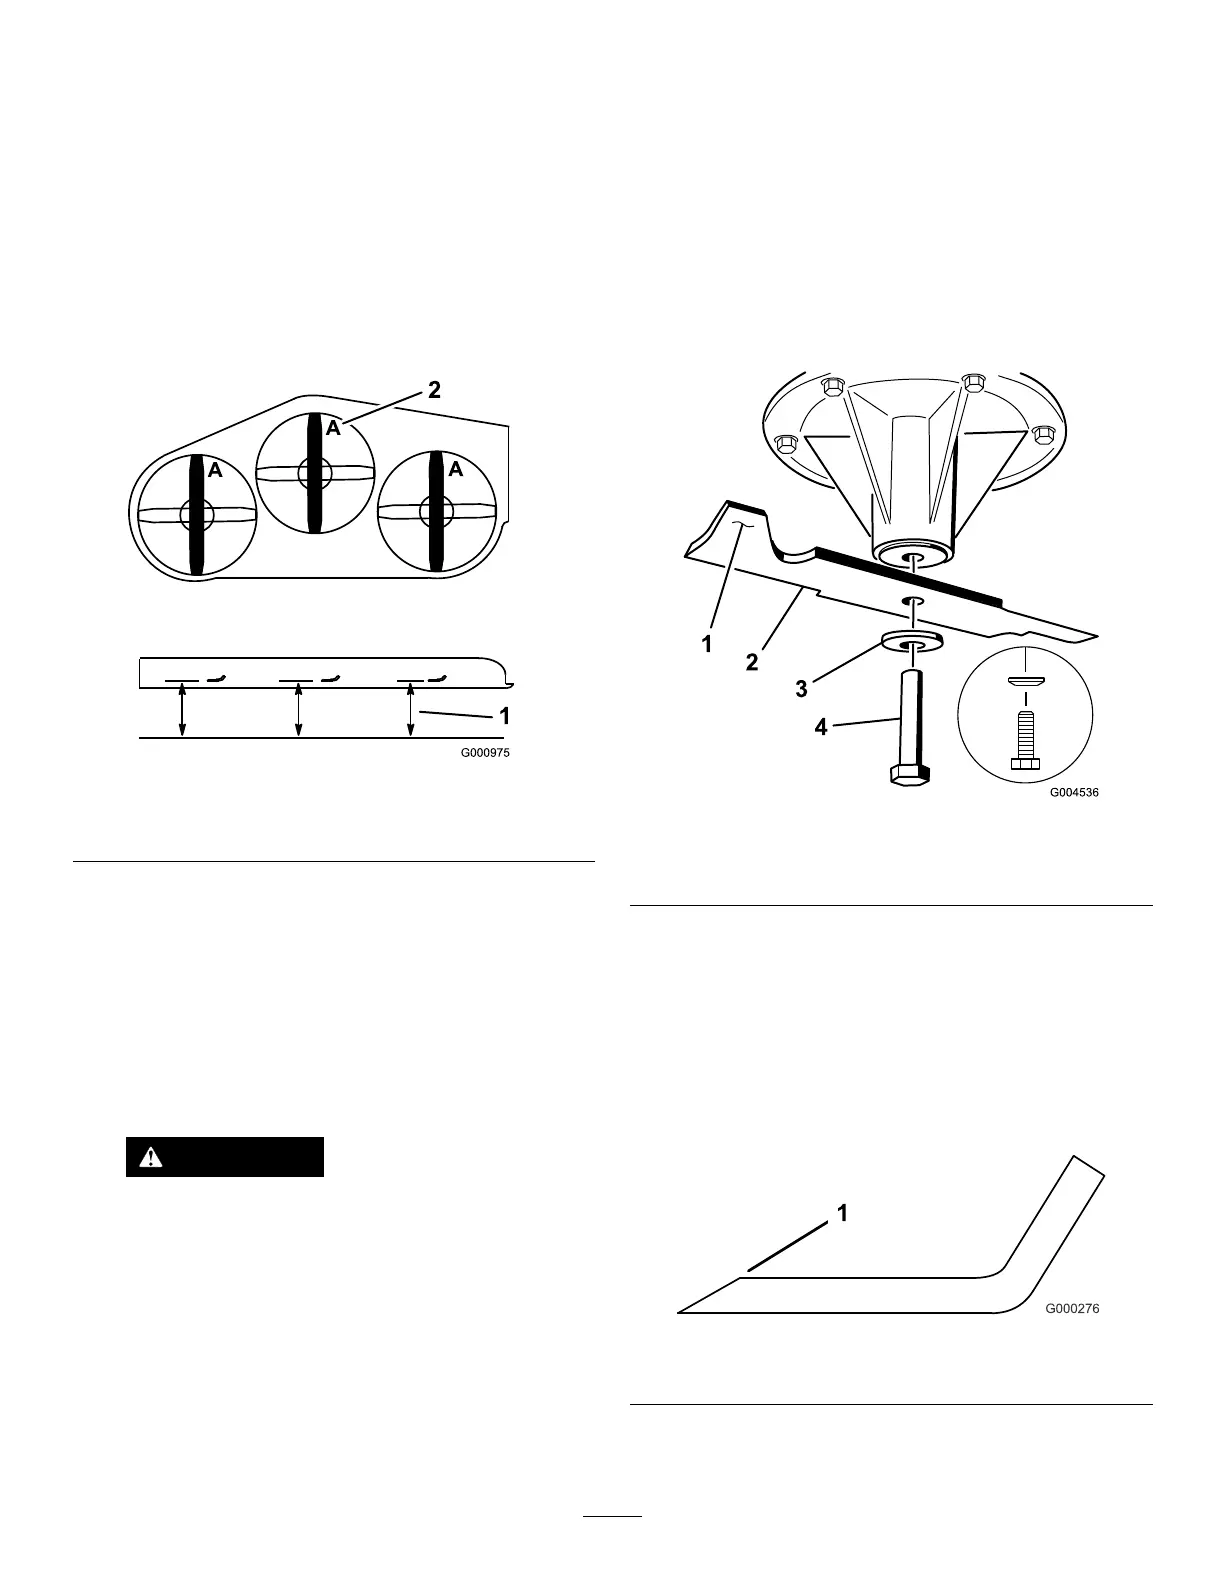
3.Rotatethebladesuntiltheendsfaceforwardand
backward(Figure100).
4.Measurefromalevelsurfacetothecuttingedge,
positionA,oftheblades(Figure100).
Figure100
1.Measureherefromblade
tohardsurface
2.PositionA
5.Rotatetheoppositeendsofthebladesforward.
6.Measurefromalevelsurfacetothecuttingedgeofthe
bladesatthesamepositionasinstep4.
Note:Thedifferencebetweenthedimensions
obtainedinsteps4and6mustnotexceed3mm
(1/8inch).
Note:Ifthisdimensionexceeds3mm(1/8inch),the
bladeisbentandmustbereplaced.
WARNING
Abladethatisbentordamagedcouldbreak
apartandcouldseriouslyinjureorkillyouor
bystanders.
•Alwaysreplacebentordamagedblade
withanewblade.
•Donotleorcreatesharpnotchesinthe
edgesorsurfacesoftheblade.
RemovingtheBlades
Replaceabladeifithitsanobject,ifthebladeisoutofbalance,
orifthebladeisbent.Toensureoptimumperformanceand
continuedsafetyconformanceofthemachine,usegenuine
Tororeplacementblades.Replacementbladesmadebyother
manufacturersmayresultinnonconformancewithsafety
standards.
1.Holdthebladeendusingaragorathicklypadded
glove.
2.Removethebladebolt,curvedwasher,andbladefrom
thespindleshaft(Figure101).
Figure101
1.Sailareaoftheblade3.Curvedwasher
2.Blade4.Bladebolt
SharpeningtheBlades
1.Usealetosharpenthecuttingedgeatbothendsof
theblade(Figure102).
Note:Maintaintheoriginalangle.
Note:Thebladeretainsbalanceifyouremovethe
sameamountofmaterialfrombothcuttingedges.
Figure102
1.Sharpenattheoriginalangle
2.Checkthebalanceofthebladebyputtingitonablade
balancer(Figure103).
62