ReplacingtheGrass
Deector
WARNING
Anuncovereddischargeopeningcouldallow
thelawnmowertothrowobjectsatyouor
bystanders,resultinginseriousinjury.Also,
contactwiththebladecouldoccur.
Donotoperatethelawnmowerunlessyou
installacoverplate,mulchplate,grass
deector,orbagger.
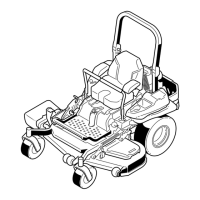
1.Removethelocknut,bolt,spring,andspacer
holdingthedeectortothepivotbrackets
(Figure108).
2.Removethedamagedorworngrassdeector
(Figure108).
g015594
Figure108
1.Bolt
5.Springinstalled
2.Spacer6.Grassdeector
3.Locknut
7.J-hookendofspring
4.Spring
3.Placethespacerandthespringontograss
deector.
4.Place1J-hookendofthespringbehindthe
deckedge.
Note:Makesurethat1J-hookendofthe
springisinstalledbehindthedeckedgebefore
installingtheboltasshowninFigure108.
5.Installtheboltandthenut.
6.Place1J-hookendofthespringaroundthe
grassdeector(Figure108).
Important:Thegrassdeectormustbeable
torotate.Liftthedeectoruptothefullopen
positionandensurethatitrotatesintothe
fulldownposition.
Cleaning
CleaningundertheMower
ServiceInterval:Beforeeachuseordaily
1.Disengagetheblade-controlswitch(PTO),move
themotion-controlleverstotheNEUTRAL-LOCK
position,andsettheparkingbrake.
2.Shutofftheengine,removethekey,andwait
forallmovingpartstostopbeforeleavingthe
operatingposition.
3.RaisethemowertotheTRANSPORTposition.
CleaningtheSuspension
System
Note:Donotcleantheshockassemblieswith
pressurizedwater(Figure109).
g030538
Figure109
DisposingofWaste
Engineoil,batteries,hydraulicoil,andenginecoolant
arepollutantstotheenvironment.Disposeofthese
accordingtoyourstateandlocalregulations.
73