Maintenance
19
Cutting Blade
To assure a superior quality of cut, keep the blade(s)
sharp. For convenient sharpening and replacement,
you may want to have an extra blade(s).
POTENTIAL HAZARD
• A blade that is worn or damaged could
break apart and pieces could be thrown at
bystanders or at you as you use the mower.
WHAT CAN HAPPEN
• Pieces of blade that may be thrown could
seriously injure or kill you or bystanders.
HOW TO AVOID THE HAZARD
• Periodically inspect the blade for wear and
damage. Immediately install a new blade if
it is worn or damaged.
Inspecting the Blade(s)
1. Remove the mower; refer to Removing the
Mower, page 11.
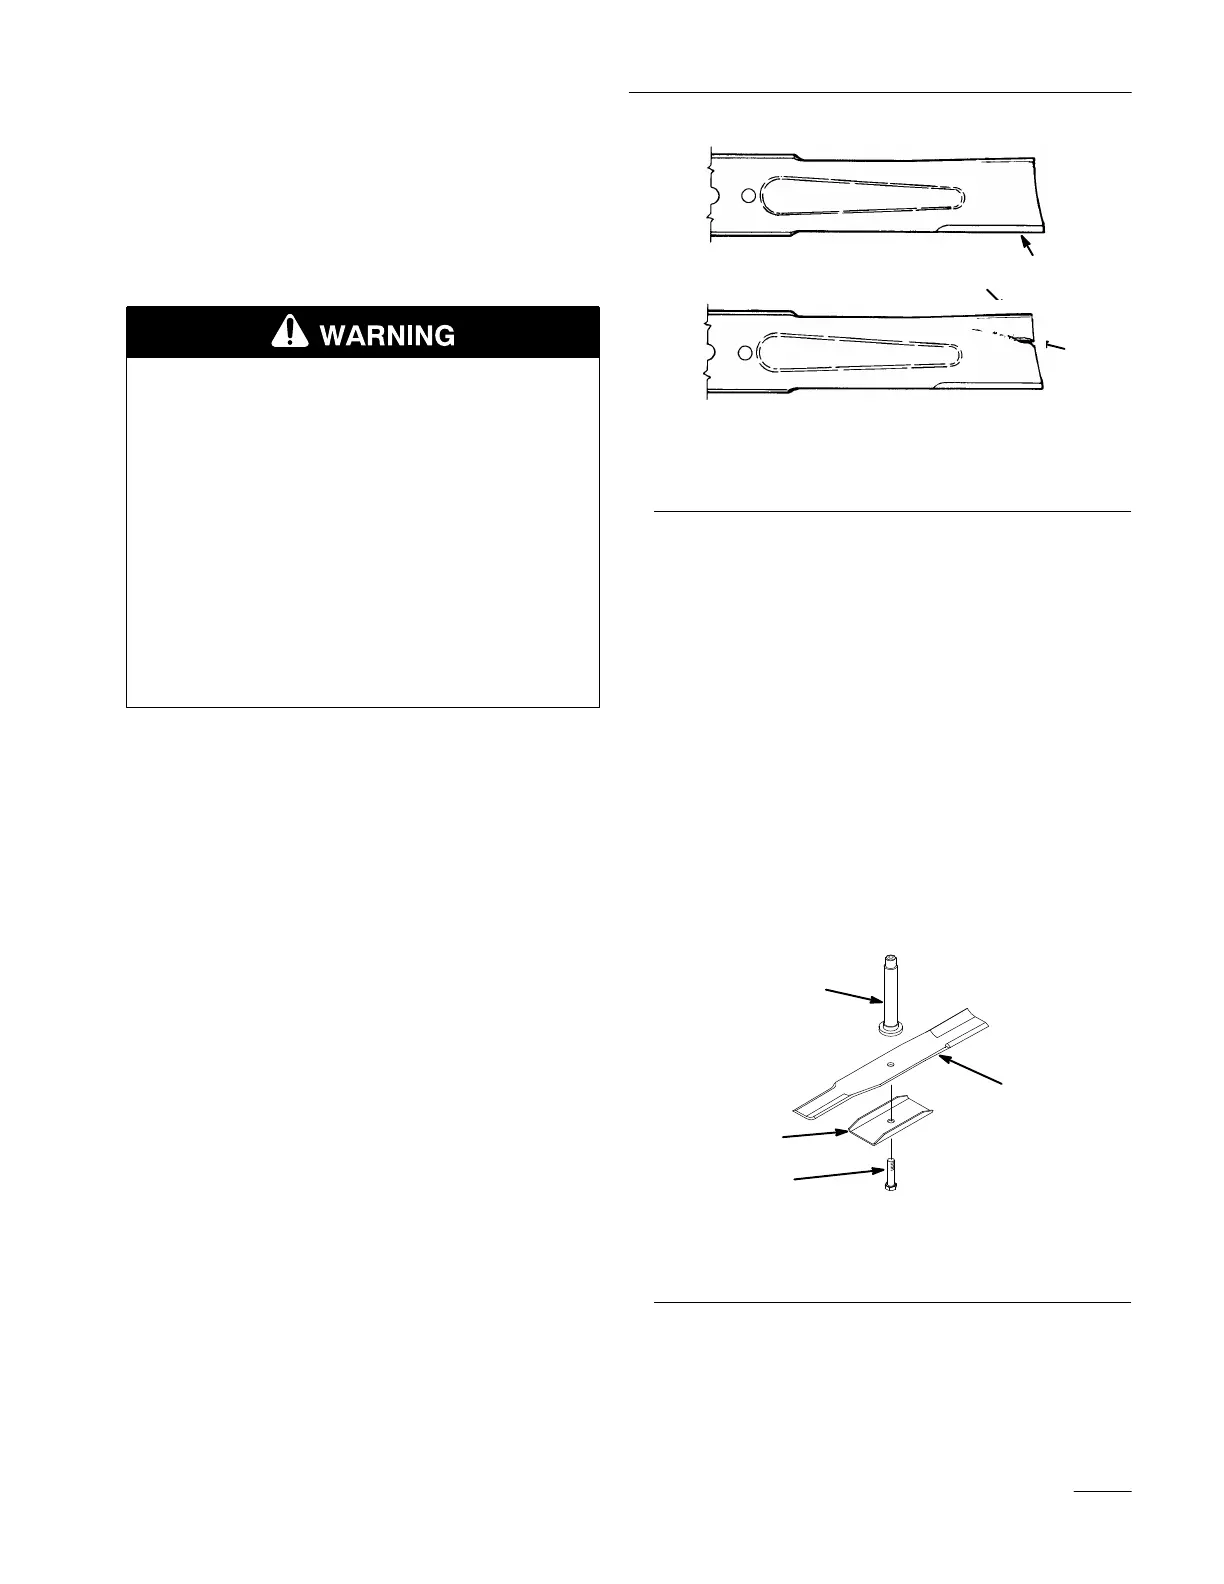
2. Inspect the cutting edges (Fig. 30). If the edges
are not sharp or have nicks, remove the blade(s)
and sharpen them; refer to Sharpening the
Blade(s), page 20.
3. Inspect the blade(s), especially the curved area
(Fig. 30). If you notice any damage, wear, or a
slot forming in this area (Fig. 30), immediately
install a new blade.
151
1
2
3
Figure 30
1. Cutting edge
2. Curved area
3. Wear/slot forming
Removing the Blade
1. Remove the mower; refer to Removing the
Mower, page 11.
2. Carefully tip the mower over.
3. Hold the blade end using a rag or thickly padded
glove. Remove the bolt, stiffener, and blade
(Fig. 31). A block of wood may be wedged
between the blade and the mower to lock the
blade when you are removing the bolt.
4. Inspect all parts. If a defect or damage is noticed,
install new parts.
m–3516
1
2
3
4
Figure 31
1. Nut
2. Stiffener
3. Blade
4. Spindle