WARNING
Thebatterychargercordcanbedamagedand
couldcauseashockorre.
Thoroughlyinspectthebatterychargercord
beforechargingtheunit.Ifthecordisdamaged,
donotchargethebattery.Replaceorrepaira
damagedcordimmediately.ContactanAuthorized
ServiceDealerforassistance.
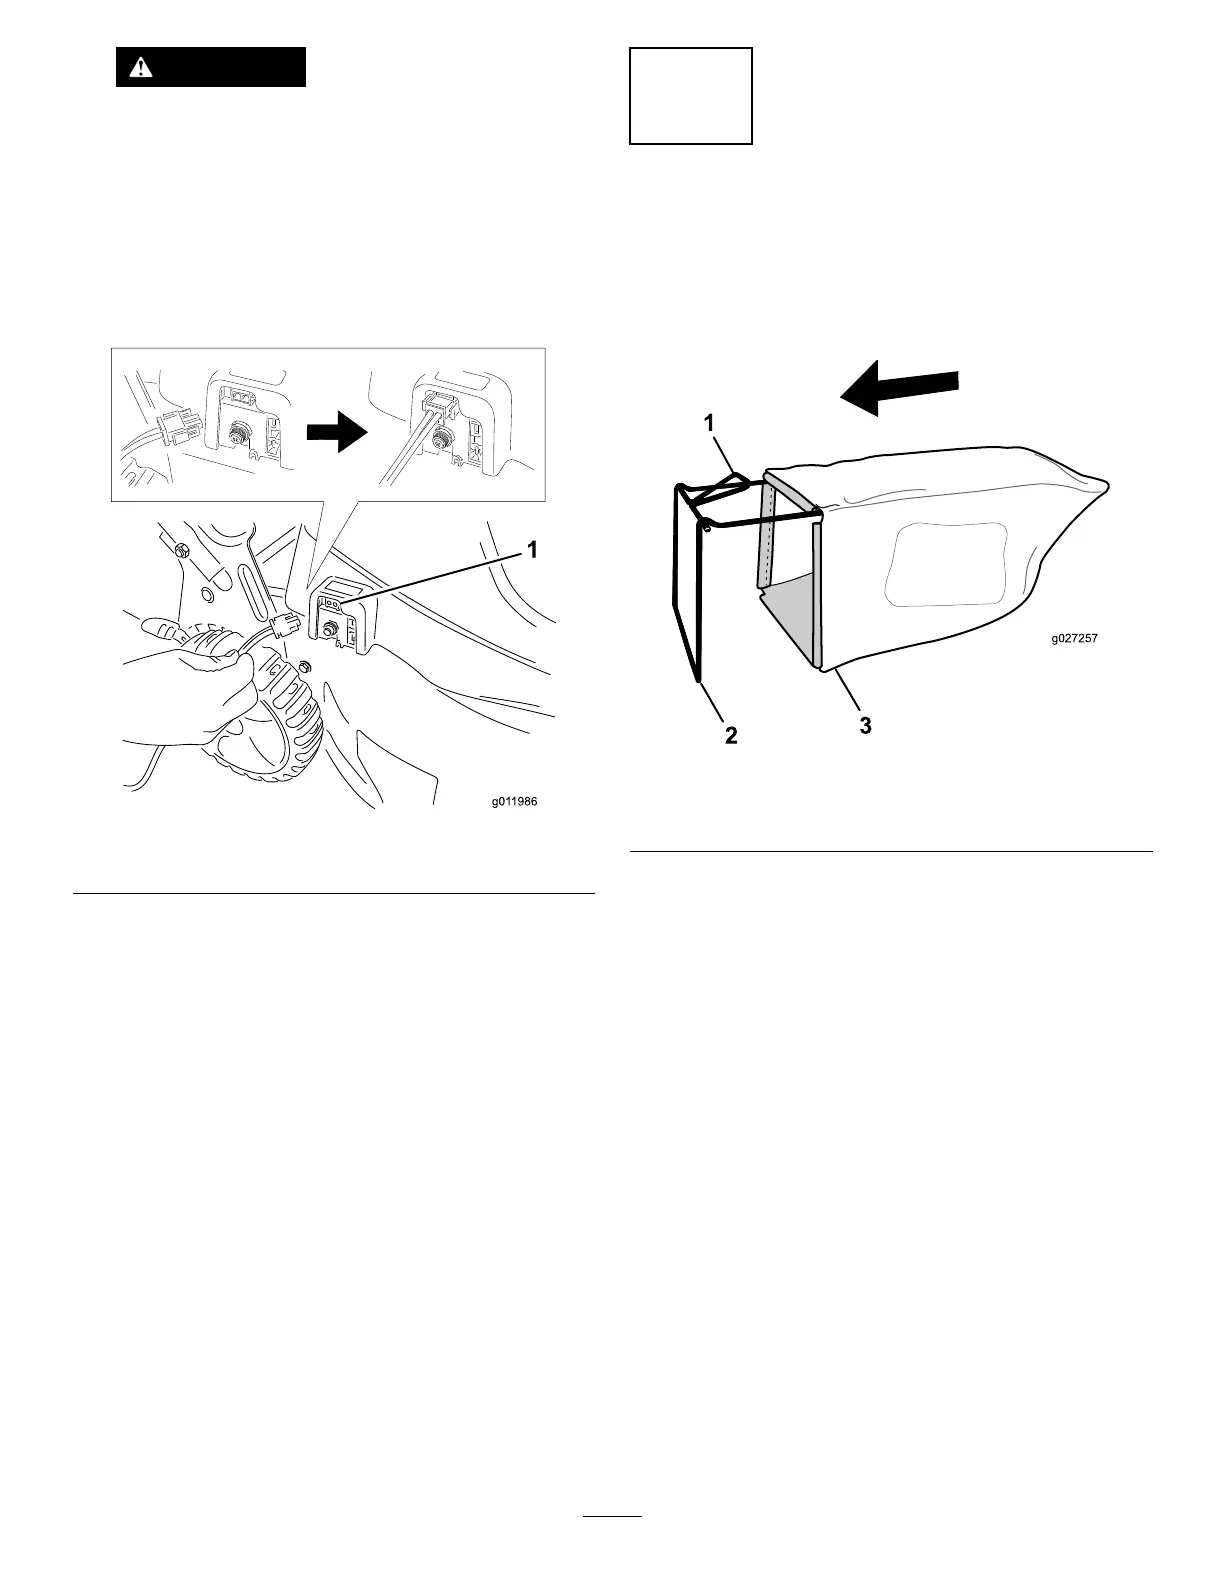
2.Insertthechargercordintothechargingplugreceptacle
(Figure4),andconnecttheotherendtoastandard120-volt
householdoutlet.
Figure4
1.Chargingplugreceptacle
Note:Yourbatterychargerhasa2-colorLEDdisplay
thatindicatesthefollowingstatesofcharging:
•Aredlightindicatesthatthechargerischargingthe
battery.
•Agreenlightindicatesthatthebatteryisfullycharged;
thechargeristrickle-chargingthebatterytomaintain
thebatterycharge.
3.Chargethebatteryforatleast16hours.
4.Unplugthechargercordfromthestandardoutletandthe
chargingplugreceptacleonthemachine.
Note:Donotunplugthechargercordbypullingonit.
Tounplugthecord,grasptheplug,notthecord.
Important:Thismachinehasabatterycharger
thatchecksthechargestateofthebatteryand
chargesthebatteryonlywhennecessary.Unplug
thechargerafter24hoursofcharging,thoughyou
mayleavethechargerpluggedintothemachine
longerwithoutharmingthesystem.Duringthe
non-mowingseason,youcanunplugandstorethe
machineforupto3monthsifthebatteryisfully
chargedandthemachineisstoredinacool,dry
place.
3
AssemblingtheGrassBag
NoPartsRequired
Procedure
1.SlipthegrassbagovertheframeasshowninFigure5.
Figure5
1.Handle
3.Grassbag
2.Frame
Note:Donotslipthebagoverthehandle(Figure5).
2.Hookthebottomchannelofthebagontothebottomofthe
frame(Figure6).
6
 Loading...