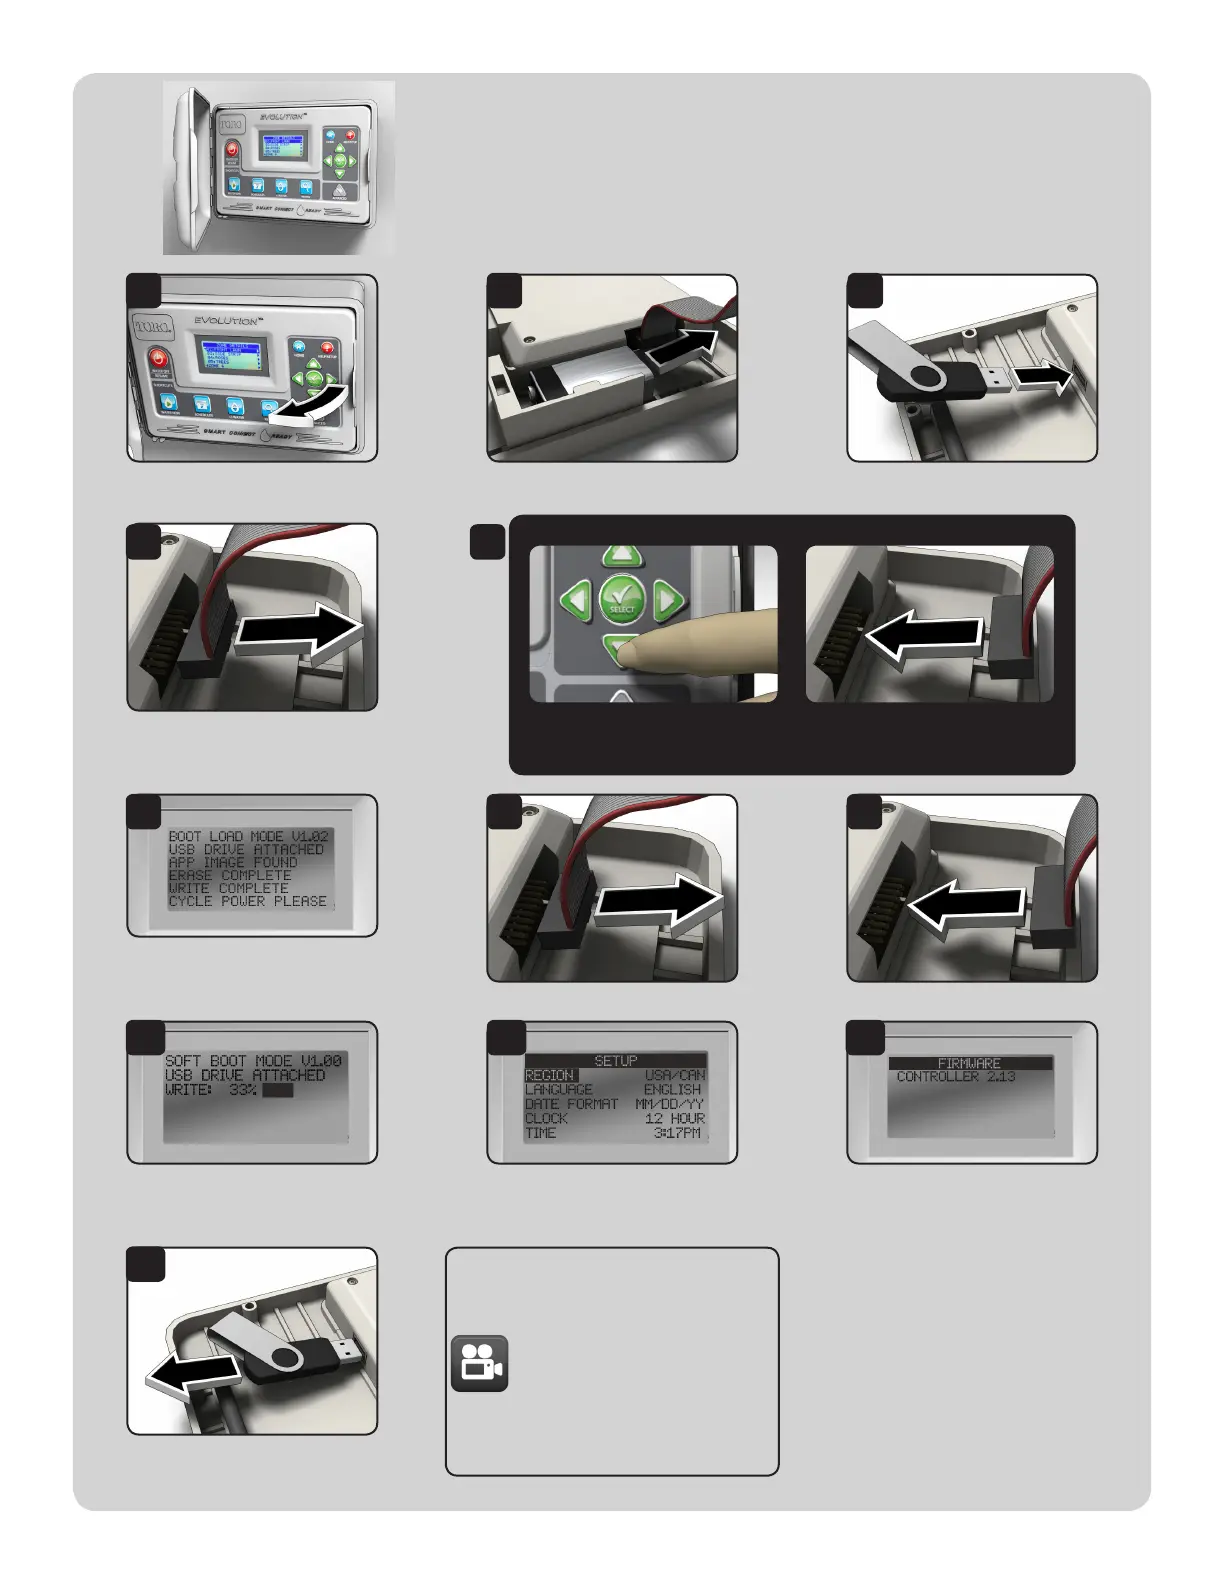
Upgrade from Version 2.0 and Earlier:
A video demonstrating the rmware
upgrade procedure is available at:
www.toro.com/evolution
(US & Canada)
www.toroevolution.com
(int’l).
Open the EVOLUTION controller. If backup battery is present,
remove it.
Insert USB drive into controller USB slot.
Remove power from the controller.
• Unplug AC (preferred) OR
• Remove ribbon cable
Controller will automatically recognize USB
drive and upgrade the controller.
Cycle power when prompted.
Remove power from the controller. ...return power to the controller.
Firmware le is updated.
A status bar will indicate progress.
Controller resets and is updated! Go to
ADVANCED-->FIRMWARE-->VERSION
and conrm rmware update to 2.13.
Remove USB drive if desired.
Congratulations!
Your EVOLUTION controller is now
ready to work with Smart Connect.
1 2 3
4
6
9 10 11
12
5
7 8
At the same time:
Hold nger on DOWN button
AND...
...return power to the controller.
• Plug AC power back in OR
• Reattach ribbon cable