3
InstallingtheJoystickPod
MountingBracket
Partsneededforthisprocedure:
1Joystickpodmountingbracket
2
Carriagebolt
1
Clip
Procedure
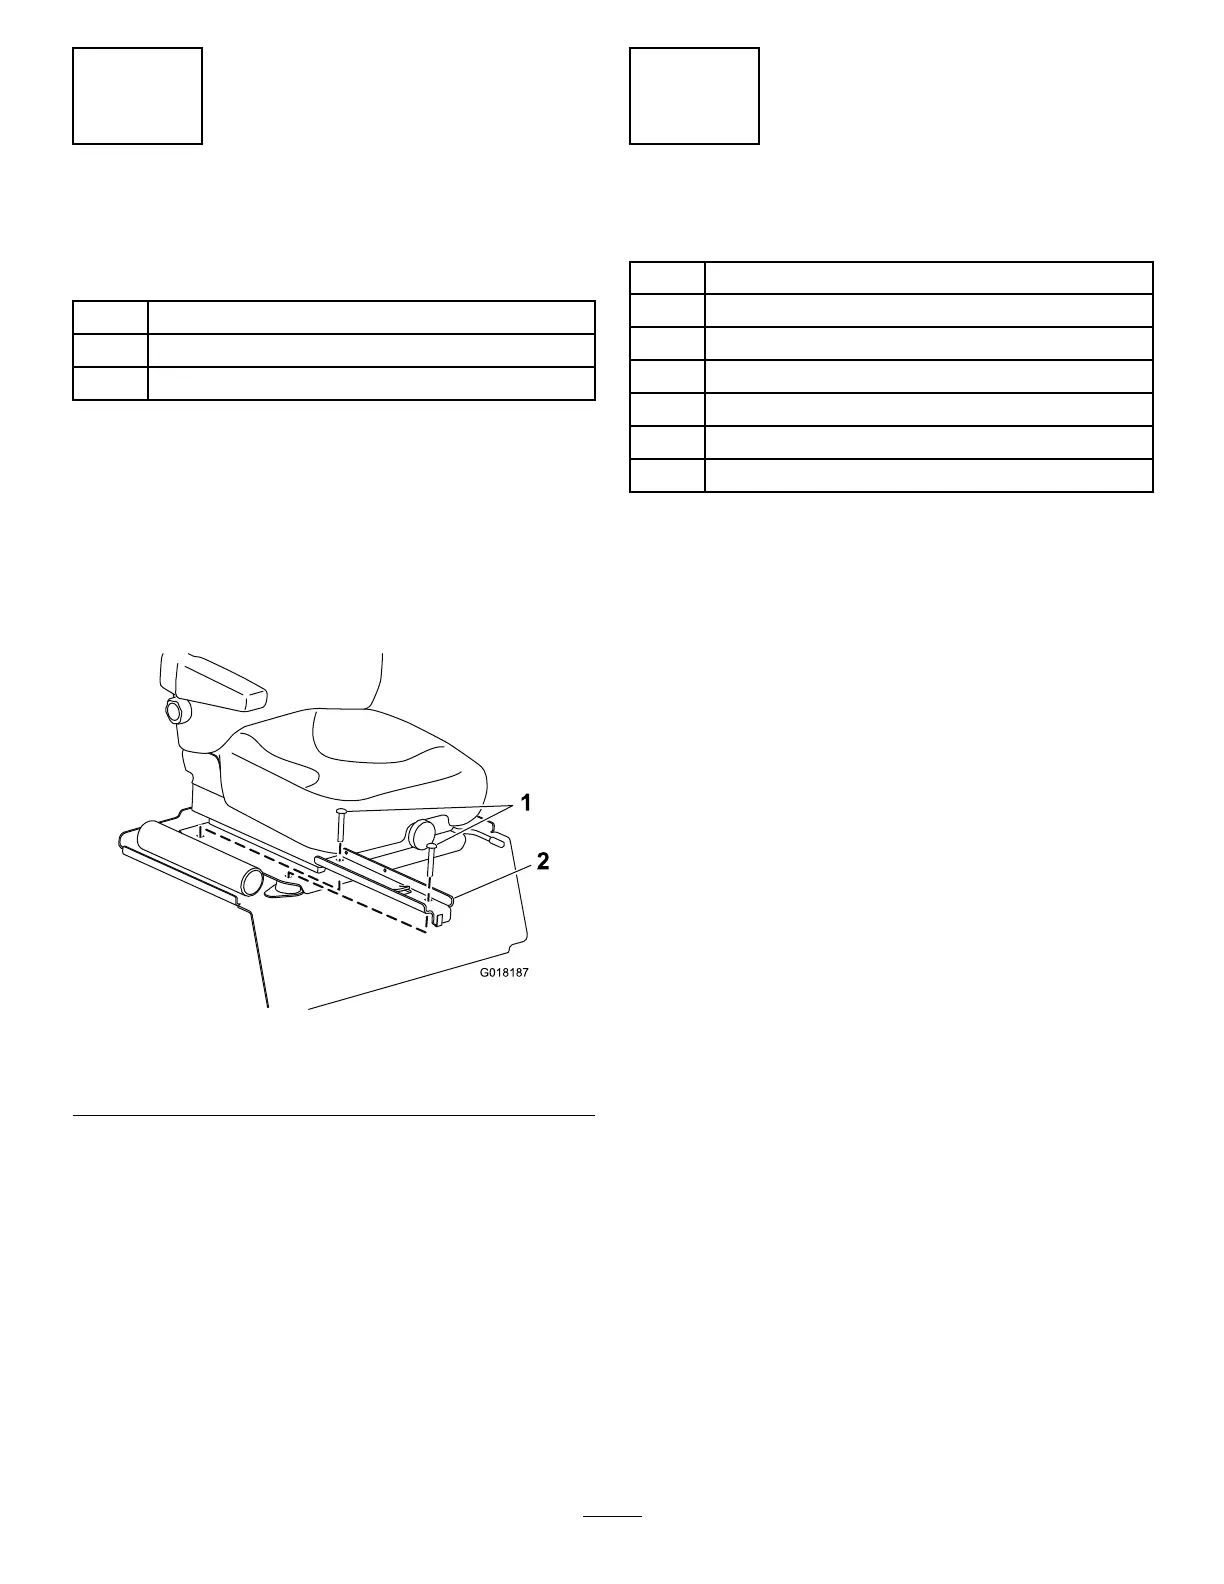
1.Attachthecliptothefrontholeinthejoystickpod
mountingbracket(Figure3).
2.Installthejoystickpodmountingbrackettotheright
sideoftheseatplate(Figure3)usingthelongercarriage
boltsandthenutsthatyouremovedinstep3of2
RoutingtheJoystickWireHarness(page3).
Figure3
1.Carriagebolts
2.Joystickpodmounting
bracket
3.Plugtheplasticsnapconnectorfromthewireharness
intotheholeinthejoystickpodmountingbracket.
4
InstallingtheJoystick
Partsneededforthisprocedure:
1Joystick
2
Clip
1Joystickpodcover
1Joystickpod
2
Hex-headscrew(1/4x5/8inch)
1Knob
1Decal
Procedure
1.Assemblethejoystick(Figure4).
Note:Ensurethattheheadsofthe6screwsinthe
joystickhandleareorientedtowardtherearofthe
machine.
4

 Loading...


