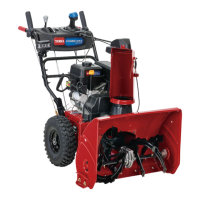
AdjustingtheDischarge-Chute
Latch
Ifthedischargechutedoesnotlockintothedesiredposition
ordoesnotunlocksothatyoucanmoveittoanother
position,adjustthedischarge-chutelatch.
1.Loosentheclampfasteneronthechute-supportplate
untilthecableisfree.
Figure48
1.Cableconduit3.Clampfastener
2.Cableclamp
2.Removeanyslackinthecablebypullingthecable
conduitrearward.
3.Tightentheclampfastenerwhileholdingthecablein
place.
ReplacingtheDriveBelts
Iftheauger/impellerdrivebeltorthetractiondrivebelt
becomesworn,oil-soaked,orotherwisedamaged,havean
AuthorizedServiceDealerreplacethebelt.
Storage
WARNING
•Fuelvaporscanexplode.
•Donotstorefuelformorethan30days.
•Donotstorethemachineinanenclosurenear
anopename.
•Allowtheenginetocoolbeforestoringit.
PreparingtheMachinefor
Storage
1.Onthelastrefuelingoftheyear,addfuelstabilizerto
freshfuelasdirectedbytheenginemanufacturer.
Note:Fuelshouldnotbestoredlongerthansuggested
bythefuel-stabilizermanufacturer.
2.Runtheenginefor10minutestodistributethe
conditionedfuelthroughthefuelsystem.
3.Runthemachineuntiltheenginerunsoutoffuel.
4.Primetheengineandstartitagain.
5.Allowtheenginetorununtilitshutsoff.Whenyou
cannolongerstarttheengine,itissufcientlydry.
6.Shutofftheengineandallowittocool.
7.Removetheignitionkey.
8.Cleanthemachinethoroughly.
9.Touchupchippedsurfaceswithpaintavailablefroman
AuthorizedServiceDealer.Sandaffectedareasbefore
painting,andusearustpreventativetopreventthe
metalpartsfromrusting.
10.Tightenallloosescrews,bolts,andlocknuts.Repairor
replaceanydamagedparts.
11.Coverthemachineandstoreitinaclean,dryplaceout
ofthereachofchildren.
RemovingtheMachinefrom
Storage
1.Removethesparkplugandspintheenginerapidly
usingthestartertoblowtheexcessoilfromthe
cylinder.
2.Installthesparkplugandtightenitrmly.
3.Connectthespark-plugwire.
4.Performtheannualmaintenanceproceduresasgiven
intheRecommendedMaintenanceSchedule;referto
Maintenance(page17).
22
 Loading...