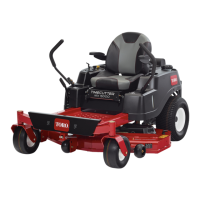
UsingtheSideDischarge
Themowerhasahingedgrassdeectorthat
dispersesclippingstothesideanddowntowardthe
turf.
DANGER
Withoutagrassdeector,dischargecover,or
acompletegrass-catcherassemblymounted
inplace,youandothersareexposedtoblade
contactandthrowndebris.Contactwith
rotatingmowerblade(s)andthrowndebris
willcauseinjuryordeath.
•Neverremovethegrassdeectorfromthe
mowerdeckbecausethegrassdeector
routesmaterialdowntowardtheturf.Ifthe
grassdeectoriseverdamaged,replaceit
immediately.
•Neverputyourhandsorfeetunderthe
mowerdeck.
•Nevertrytoclearthedischargearea
ormowerbladesunlessyoumovethe
blade-controlswitch(PTO)totheOFF
position,rotatethekeyswitchtotheOFF
position,andremovethekeyfromthekey
switch.
•Makesurethatthegrassdeectorisinthe
downposition.
AdjustingtheHeightofCut
Themachineisequippedwithafootpedaldeck-lift
system.Youcanusethefootpedaltoliftthedeck
brieytoavoidobstaclesandtoraisethedeck.
Youcanadjusttheheightofcutfrom38to114mm
(1-1/2to4-1/2inches)in6mm(1/4inch)increments
bymovingtheheight-of-cutpinintodifferenthole
locations.
1.Pushonthedeck-liftpedalwithyourfoottoraise
themowerdeck.
2.Toadjust,removethepinfromtheheight-of-cut
bracket(Figure23).
3.Selectaholeintheheight-of-cutsystem
correspondingtothedesiredheightofcutand
insertthepin(Figure23).
4.Lowerthedeckslowlyuntilthelevermakes
contactwiththepin.
g298941
Figure23
1.Deck-liftpedal
3.Pin
2.Height-of-cutpositions
AdjustingtheAnti-Scalp
Rollers
Wheneveryouchangetheheightofcut,adjustthe
heightoftheanti-scalprollers.
Note:Adjusttheanti-scalprollerssothattherollers
donottouchthegroundinnormal,atmowingareas.
1.Parkthemachineonalevelsurface,disengage
theblade-controlswitch,andmovethe
motion-controlleversoutwardtothePARK
position.
2.Shutofftheengine,removethekey,andwait
forallmovingpartstostopbeforeleavingthe
operatingposition.
21