Maintenance
28
1256
1
2
3
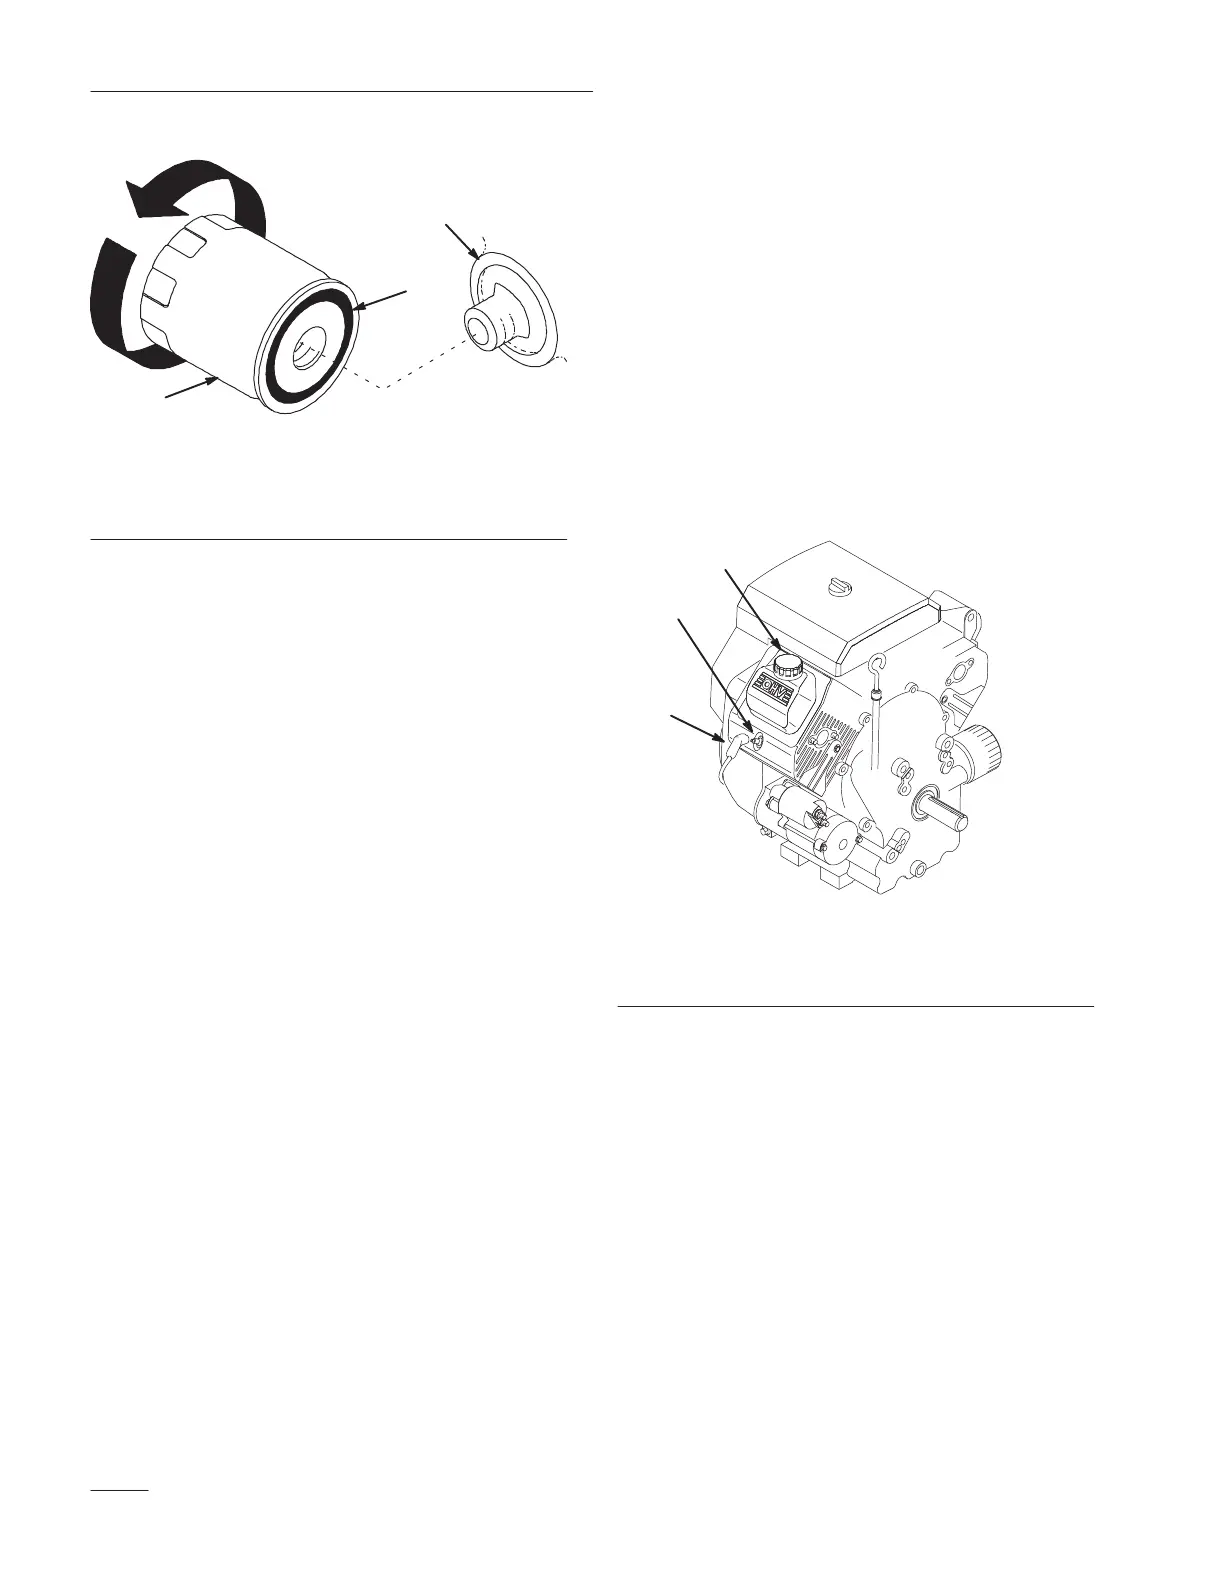
Figure 27
1. Oil filter
2. Gasket
3. Adapter
4. Install the replacement oil filter to the filter
adapter. Turn the oil filter clockwise until the
rubber gasket contacts the filter adapter, then
tighten the filter an additional 1/2 turn (Fig. 27).
5. Fill the crankcase with the correct type of new
oil; refer to Changing/Draining Oil, page 27.
Note: Dispose of the oil filter properly.
Recycle in accordance with local
codes.
Spark Plugs
Service Interval/Specification
Change the spark plugs after every 200 operating
hours. Make sure the air gap between the center and
side electrodes is correct before installing the spark
plugs. Use a spark plug wrench for removing and
installing the spark plugs and a gapping tool/feeler
gauge to check and adjust the air gap.
Type: Champion RC–12YC (or equivalent)
Air Gap: 0.030” (0.76 mm)
Removing the Spark Plug
1. Disengage the power take off (PTO), set the
parking brake, lower the attachment lift, and turn
the ignition key to “STOP” to stop the engine.
Remove the ignition key.
2. Open the hood.
3. Pull the wire(s) off the spark plug(s) (Fig. 28).
Now clean around the spark plug(s) to prevent
dirt from falling into the engine and potentially
causing damage.
4. Remove the spark plug(s) and metal washer.
2
1
m–3246
3
Figure 28
1. Spark plug wire
2. Spark plug
3. Oil filler
Checking the Spark Plugs
1. Look at the center of the spark plug(s) (Fig. 29).
If you see light brown or gray on the insulator,
the engine is operating properly. A black coating
on the insulator usually means the air cleaner is
dirty.
IMPORTANT: Never clean the spark plug(s).
Always replace the spark plug(s) when it has:
a black coating, worn electrodes, an oily film,
or cracks.
 Loading...