Installation
Step 1: Obtain License for the Console
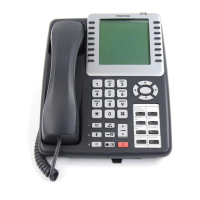
2 Strata CIX IP Attendant Console Installation 01/09
Step 1: Obtain License for the Console
Be sure to contact Toshiba Telecommunication Systems Division’s (TSD) Customer Service
department to obtain an order number. Use the FYI license key generator to obtain a license for
a single or multiple consoles.
Step 2: Program CIX for the Console
Certain programming assignments are required in the Strata CIX for the CIX Attendant Console;
others are preferred or recommended assignments for proper operation. You can use eManager or
CIX telephone button programming.
Step 2A: Assign Class of Service (COS) on CIX
Select System > Class of Service (Program 103), then use the following Feature Buttons
(FBs) to make the following assignments:
p FB00 – Specifies the COS, Toshiba recommends using “COS=10” for the Attendant
Console (recommended).
p FB01 – Enter 2 to disable Auto Busy Redial (required).
p FB06 – Enter 2 to disable this feature so that calling parties with Do Not Disturb (DND)
Override privileges cannot override the Console’s DND status (required).
p FB09 – Enter 1 to enable Executive Override privileges for the console (preferred).
p FB10 – Enter 2 to disable Executive Override for others calling the console (required).
p FB12 – Enter 1 to enable Group Pickup (preferred).
p FB13 – Enter 1 to enable Directed Station Pickup (preferred).
p FB14 – Enter 1 to enable Directed Group Call Pickup (preferred).
p FB15 – Enter 1 to enable Directed DN Call Pickup (preferred).
p FB16 – Enter 1 to enable External Call Pickup (preferred).
p FB17 – Enter 1 to enable Directed CO Call Pickup (preferred).
p FB20 – Enter 1 to enable the console to switch from ringing to handsfree answerback
(preferred).
p FB21 – Enter 1 to enable Privacy Override (preferred).
p FB23 – Enter 1 to enable Emergency Paging (preferred).
p FB24 – Enter 1 to enable the ability to Join calls (required).
p FB25 – Enter 1 to enable Through Dialing (required).
p FB26 – Enter 1 to enable Tandem (Trunk-to-trunk) Connections (preferred).
p FB27 – Enter 1 to enable the ability to change Day/Night mode (required).
p FB30 – Enter 1 to enable the ability to dial individual trunk access codes to access
specified lines (preferred).
p FB31 – Enter 1 to enable access to trunk groups by trunk access codes (required).
p FB34 – Enter 1 to enable use of a Short Flash signal over CO lines (required).
p FB35 – Enter 1 to enable use of a Long Flash signal over CO lines (required).
p FB36 – Enter 1 to enable the ability to receive Hook Flash over CO lines (required).
p FB38 – Enter 2 to disable the ability of other stations to call the console using Off-hook
Call Announce (required).
 Loading...