EasyManua.ls Logo

Toshiba D-VR4SU User Manual

Toshiba D-VR4SU
88 pages
To Next Page IconTo Next Page
Page #1 background imageLoading...
Page #1 background image
÷
TOSHIBA
Untroduetion
÷
v,_o o_.__ ............_ _
SPATRALiZER _
VURTUAL SURROUND
H[-Fi VCR & DVD VIDEO RECORDER
SU
OVV'NER'S /V'IANUAL
[v.s Hj-Fj
Various settings
Disc pUayback
Tape pUaybaak
Recording
Editing the disc
Dubbing
AddRionaU information
@2005 Toshiba Corporation
This device does not tape-record copy protected DVD Video
2G10101A Cover
÷

Table of Contents

Other manuals for Toshiba D-VR4SU

Question and Answer IconNeed help?

Do you have a question about the Toshiba D-VR4SU and is the answer not in the manual?

Toshiba D-VR4SU Specifications

General IconGeneral
TypeDVD VCR Combo
BrandToshiba
ModelD-VR4SU
Number of Discs1
Recordable MediaDVD-R, DVD-RW, DVD+R, DVD+RW
Video Output SystemNTSC
Progressive ScanYes
Output Resolution480p
Width16.9 inches
VCR TypeVCR
Playable FormatsMP3, JPEG
Remote Control TypeStandard
ConnectionsComposite Video, S-Video, Component Video, Audio Out
Height3.9 inches

Summary

SAFTY PRECAUTIONS

IMPORTANT SAFEGUARDS

Features

Playback function

Details on realistic sound, immediate scene access, title menus, JPEG, and progressive scan.

Recording function

Explains timer recording and one-touch timer recording features.

Edit function

Describes editing recorded material, creating playlists, and managing titles/scenes.

Dubbing function

Explains how to dub tapes to discs or discs to tapes.

Disc

Handling discs

Instructions for removing, storing, and cleaning discs.

Discs which can be played back

Lists compatible disc types and explains playback limitations.

Parts and functions

Front

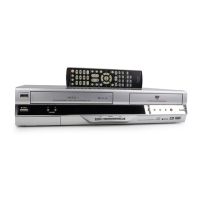
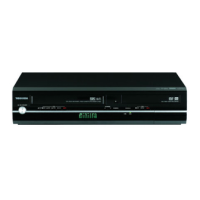
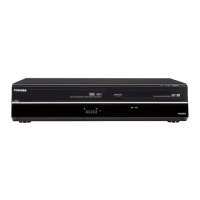
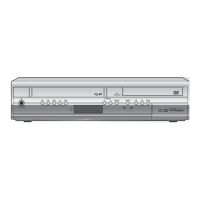
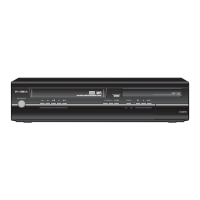
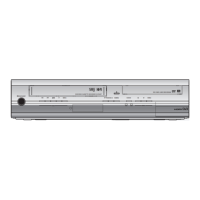
Details of the front panel controls, jacks, and display window.

Rear

Description of the rear panel connections and outputs.

Display window

Remote control

Inserting Batteries into the Remote Control

Power Source

Antenna connections

ΑΝΤΕΝΝΑ TO DVD/VCR CONNECTION

Diagrams for connecting antennas to the DVD/VCR.

DVD/VCR TO TV CONNECTION

Cable TV connections

Connections with the TV or audio component

Connect to a TV with Audio/Video output

Connecting the unit to a TV using audio/video jacks for playback.

Connect to a TV with S-Video output

Connecting via S-Video for higher quality picture output.

Connect to a TV with Component video output (for DVD/CD playback)

Connecting with component video for the best picture quality.

Connect to a stereo amplifier with audio output

Connect to an AV Amplifier with built-in digital surround

Connecting the optical digital cable

Various settings

Using the SETUP MENU

Explains the basic procedure for navigating and using the SETUP MENU.

Setting the language

Setting the parental control

Setting the clock

Setting the disc

Setting the screen

Setting the image quality

Setting the audio

Setting the recording

Setting the channel

Setting other items

Disc playback

Playback procedure

Step-by-step instructions for inserting a disc and starting playback.

Playback by selecting a title

Checking media information

Special playback

Instant skip / Locating a specific scene

Repeat playback

Title selection / DVD menu

Changing angles / Zooming / Karaoke playback

Changing soundtrack language / Subtitles / To turn off the PBC

Various operations on CD

MP3/WMA/JPEG playback

Progressive scan

Tape playback

Loading and unloading a cassette tape

Step-by-step guide for inserting and ejecting video tapes, including erase prevention.

Cassette tape playback

Special playback

ZERO RETURN function / Video index search system

Recording

Recording modes

Explains different recording modes (XP, SP, LP, SLP) affecting time and quality.

Disc remaining time

How to check the available space on a disc for recording.

Read this before recording on disc

Recording a TV program

One-touch Timer Recording (OTR)

Timer recording

Chase Playback

Stereo recording and playback

Editing the disc

Title menu

Information on automatically created title names and how to use the title menu for playback and editing.

Original title

Details on editing original titles like renaming, adding chapter marks, and erasing.

Playlist

How to create and manage playlists, combining or erasing scenes, and preventing accidental erasure.

Creating a playlist

Changing a title name

Erasing a scene (Edit title)

Combining chapters

Changing an original title name

Erasing an original title

Changing a disc name

Using the keyboard screen

Dubbing

Dubbing a tape onto a disc

Step-by-step guide for recording video from a tape onto a DVD disc.

Dubbing a disc onto a tape

Dubbing using other equipment

Additional information

Glossary

Definitions of technical terms and features used in the manual.

Problems and troubleshooting

Video head cleaning

Error/Warning message list

Specifications

Limited warranty

Related product manuals