© 2004 - 2010 TOSHIBA TEC CORPORATION All rights reserved e-STUDIO200L/202L/203L/230/230L/232/233/280/282/283
ADJUSTMENT
3 - 65
3
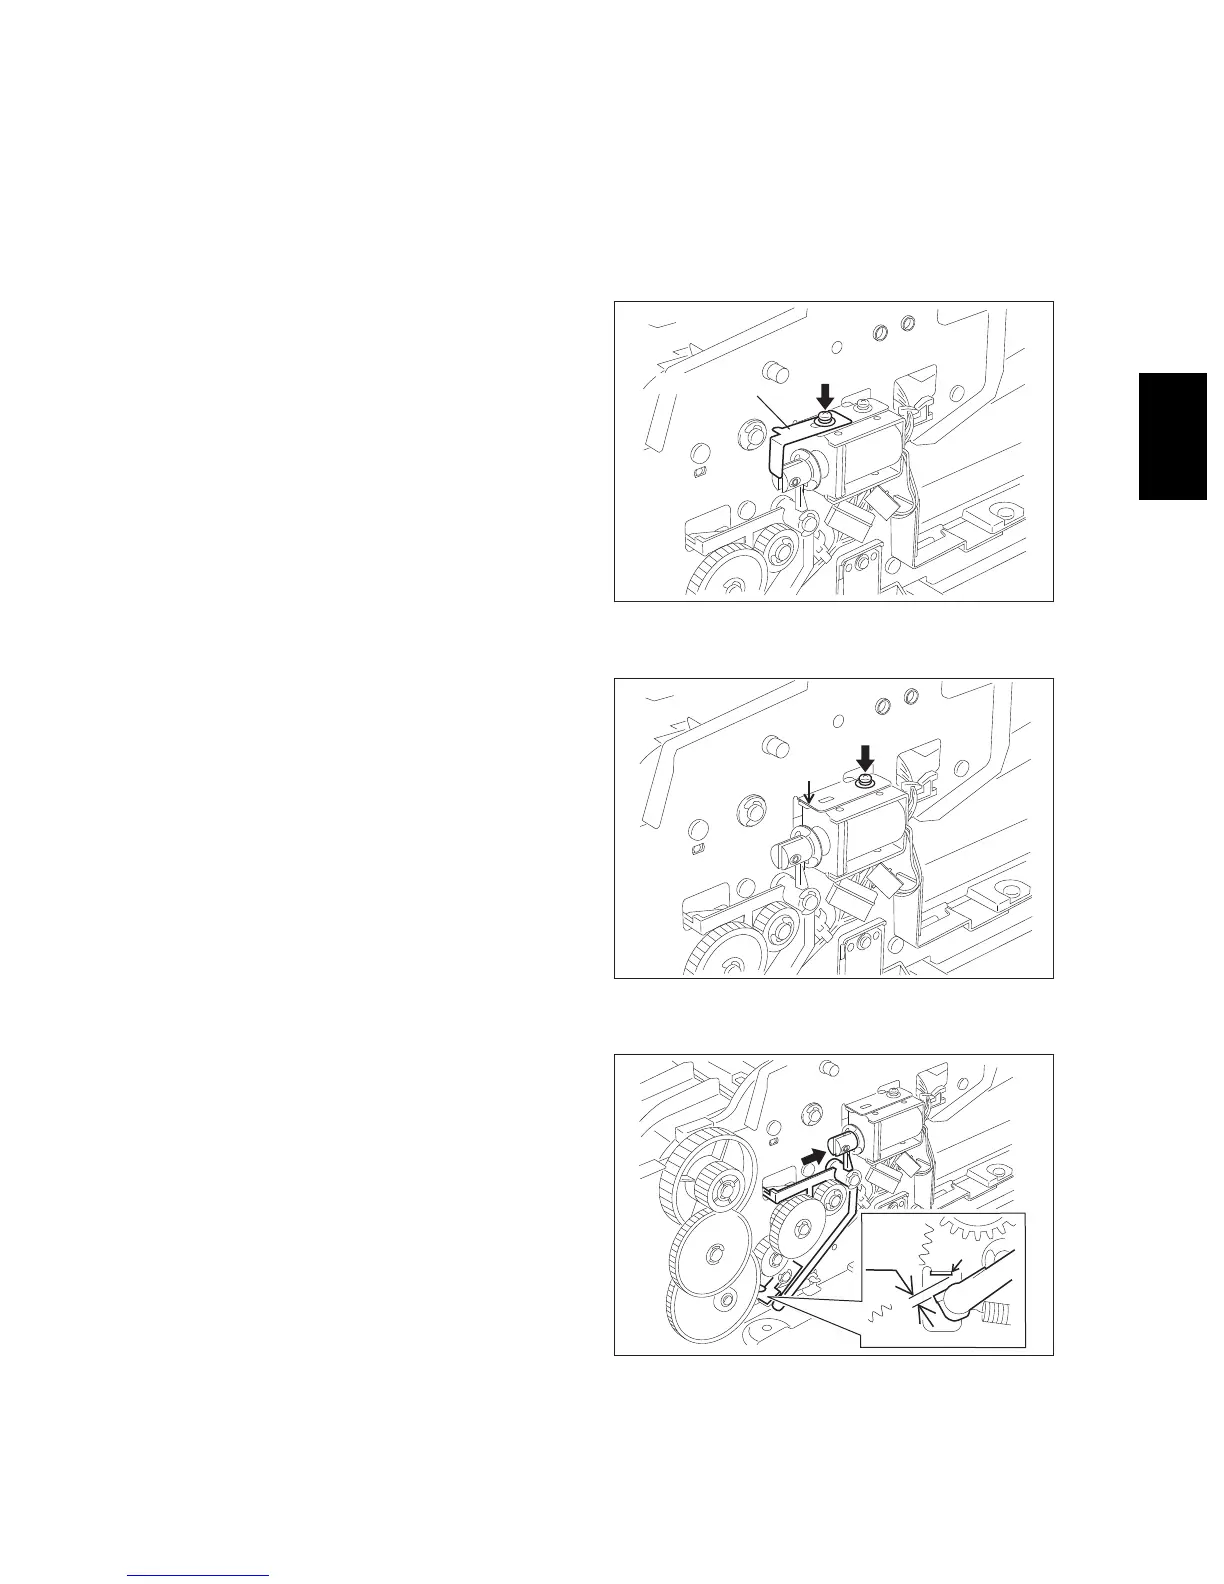
3.10.7 Adjustment of reverse solenoid
When operating the reverse solenoid, adjust it if the position of the flapper lever is out of the following
dimension.
Gap between A of the front frame and the flapper lever “C”: 0.5 mm to 2.0 mm
<Procedure>
(1) Remove the screw on the left and take off the
plate spring.
Fig. 3-71
(2) Align B of the front frame with the edge of the
reverse solenoid, and temporarily fix the
reverse solenoid with the screw on the right.
Fig. 3-72
(3) While the plunger of the reverse solenoid is
put in the position to be turned ON (by press-
ing it in the direction of an arrow), loosen the
screw on the right to adjust the reverse sole-
noid so that the gap (C) between A of the
front frame and the flapper lever is 0.5 mm to
2.0 mm.
Fig. 3-73

 Loading...


