© 2004 - 2010 TOSHIBA TEC CORPORATION All rights reserved e-STUDIO200L/202L/203L/230/230L/232/233/280/282/283
FIRMWARE UPDATING
6 - 109
6
6.6 Appendix
6.6.1 e-STUDIO200L/230/230L/280
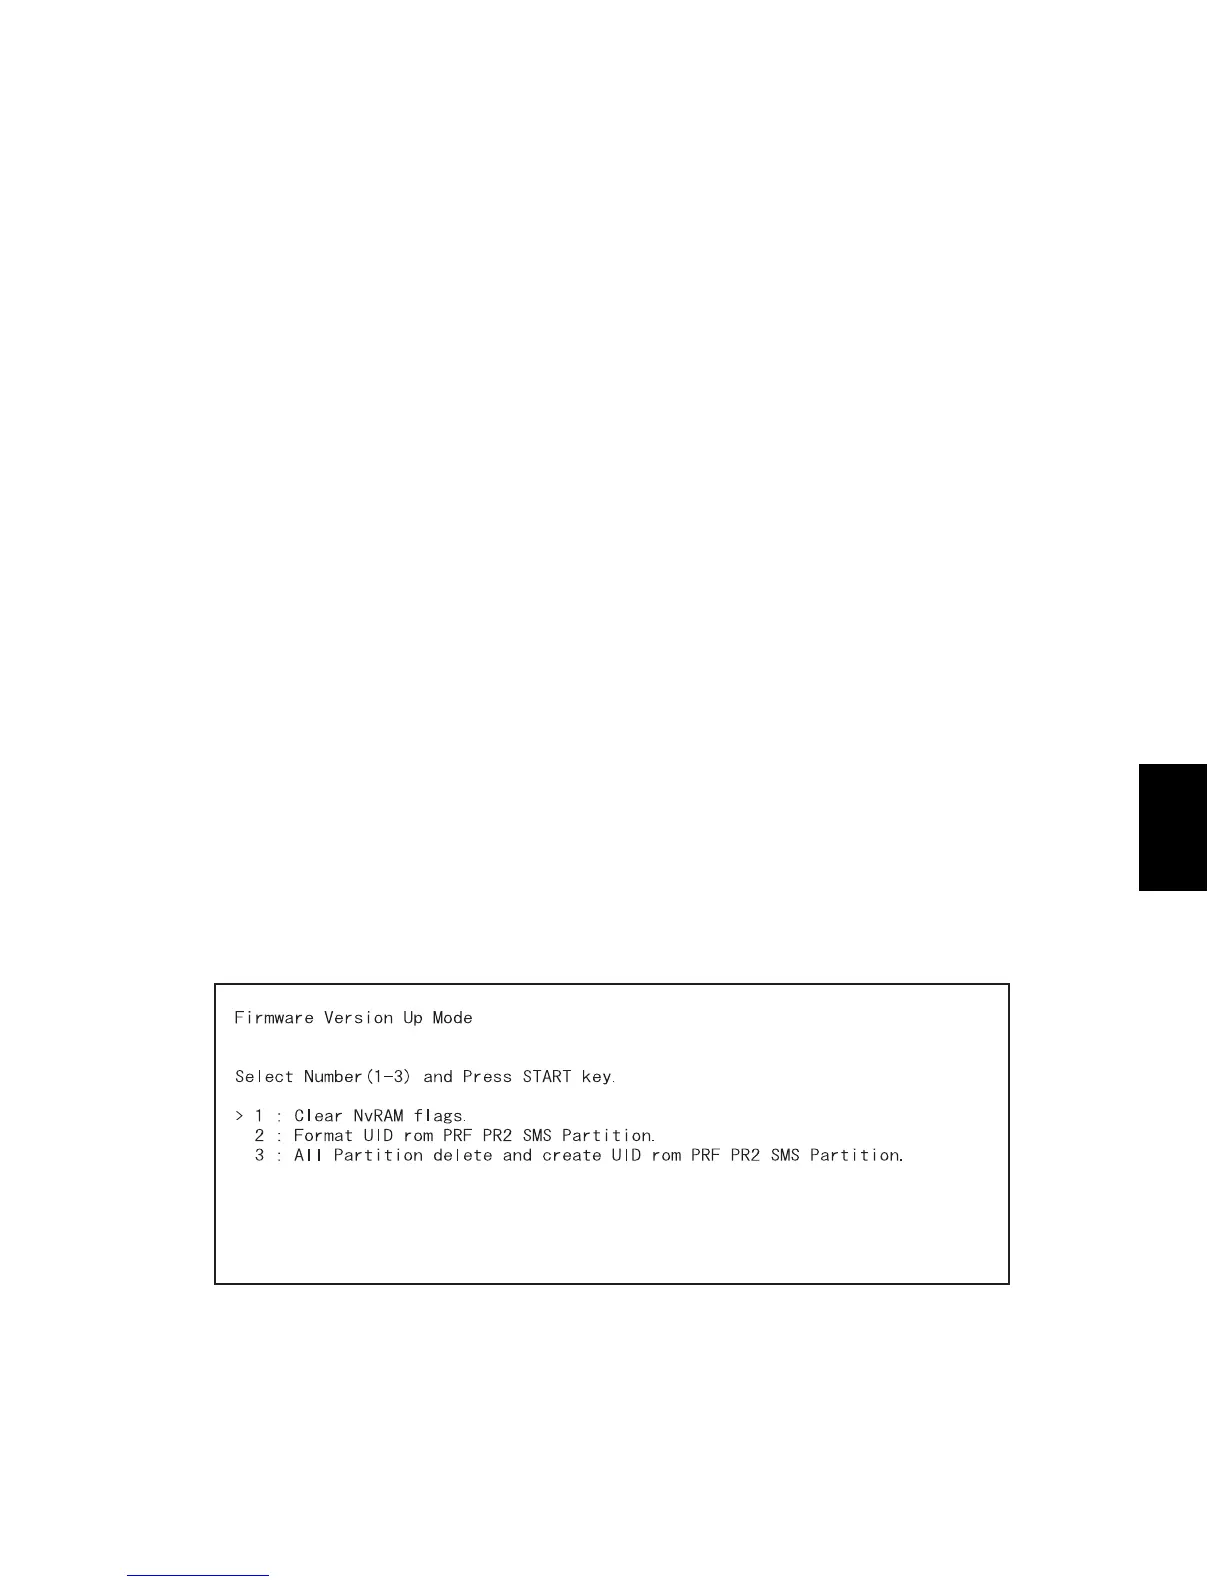
[A] Assist Mode
This equipment has the Assist Mode to enable the following functions.
1) NVRAM flag clearing (“Clear NvRAM flags.”)
Even if the firmware downloading has been completed normally, the Recovery Mode may acciden-
tally start up when the power is turned ON again. In this case, clear the NVRAM flags used in the
download process with this function.
(Normally, the flags are automatically cleared in the download process.)
Also in the case the Recovery Mode accidentally starts up after the replacement of NVRAM on the
SYS board, the flags are cleared with this function.
2) Data storage partition formatting (“Format UID rom PRF PR2 SMS Partition.”)
When a defection occurs on the UI data, etc. which are stored in the HDD, the partition with the
stored UI data, etc. is formatted with this function.
(Do not use this function since it is not normally necessary.)
3) HDD partition creation (“All Partition delete and create UID rom PRF PR2 SMS Partition.”)
When the HDD is replaced or UI data, etc. are downloaded using the FSMS or USB storage, it is
necessary to format a partition in the HDD before downloading. In this case, the partition is created
in the HDD with this function.
• When downloading with a download jig, it is not necessary to format a partition in advance.
• Perform the HDD partition formatting only when a new HDD and scrambler board are installed
since all data in the current HDD are erased by this operation.
[B] Operating Procedure of Assist Mode
(1) Turn ON the power while [3] button and [CLEAR] button are pressed simultaneously.
• The following screen is displayed.
Fig. 6-110
(2) Select the item with the digital keys and press the [START] button.
10/06

 Loading...


