e-STUDIO2006/2306/2506/2007/2307/2507/2303A/2303AM/2803AM/2309A/2809A
© 2013-2017 TOSHIBA TEC CORPORATION All rights reserved
DISASSEMBLY AND REPLACEMENT
4 - 94
4.9 Fuser/Exit Unit <23LA/23LM/28LM/23HA/28HA>
Notes:
1. Be sure to turn the power OFF and unplug the power cable during service.
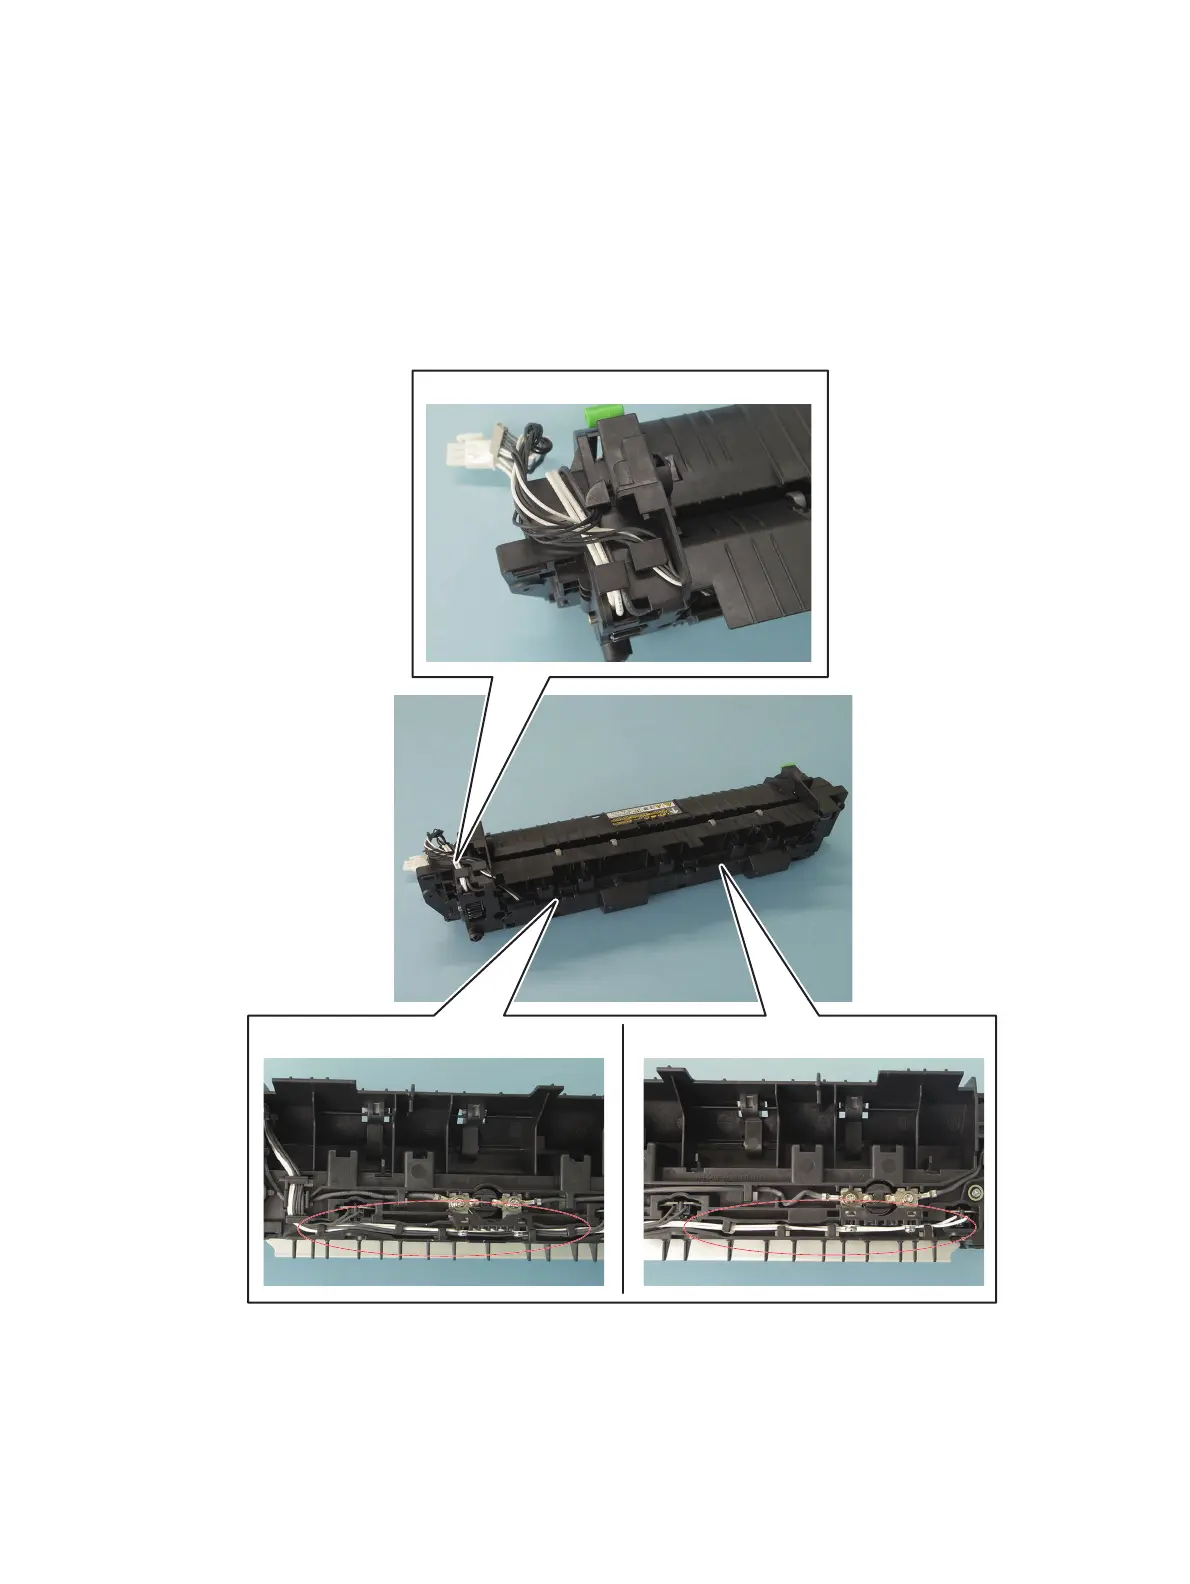
2. When disassembling the fuser unit or replacing any parts in it, be sure that the wire harness is
correctly set, and also be careful not to catch it between other parts.
a. Route the harnesses of the thermostat so that they are hooked on the frame as shown
below.
b. Route the harnesses of the thermistor so that they are hooked on the housing as shown
below.
Fig. 4-251
a
b

 Loading...


