EasyManuals Logo

Toshiba e-STUDIO6550C Series Management Guide

Toshiba e-STUDIO6550C Series
282 pages
To Next Page IconTo Next Page
To Previous Page IconTo Previous Page
Page #121 background imageLoading...
Page #121 background image
2.SETTING ITEMS (ADMIN)
Setting General Functions 119
2 SETTING ITEMS (ADMIN)
2
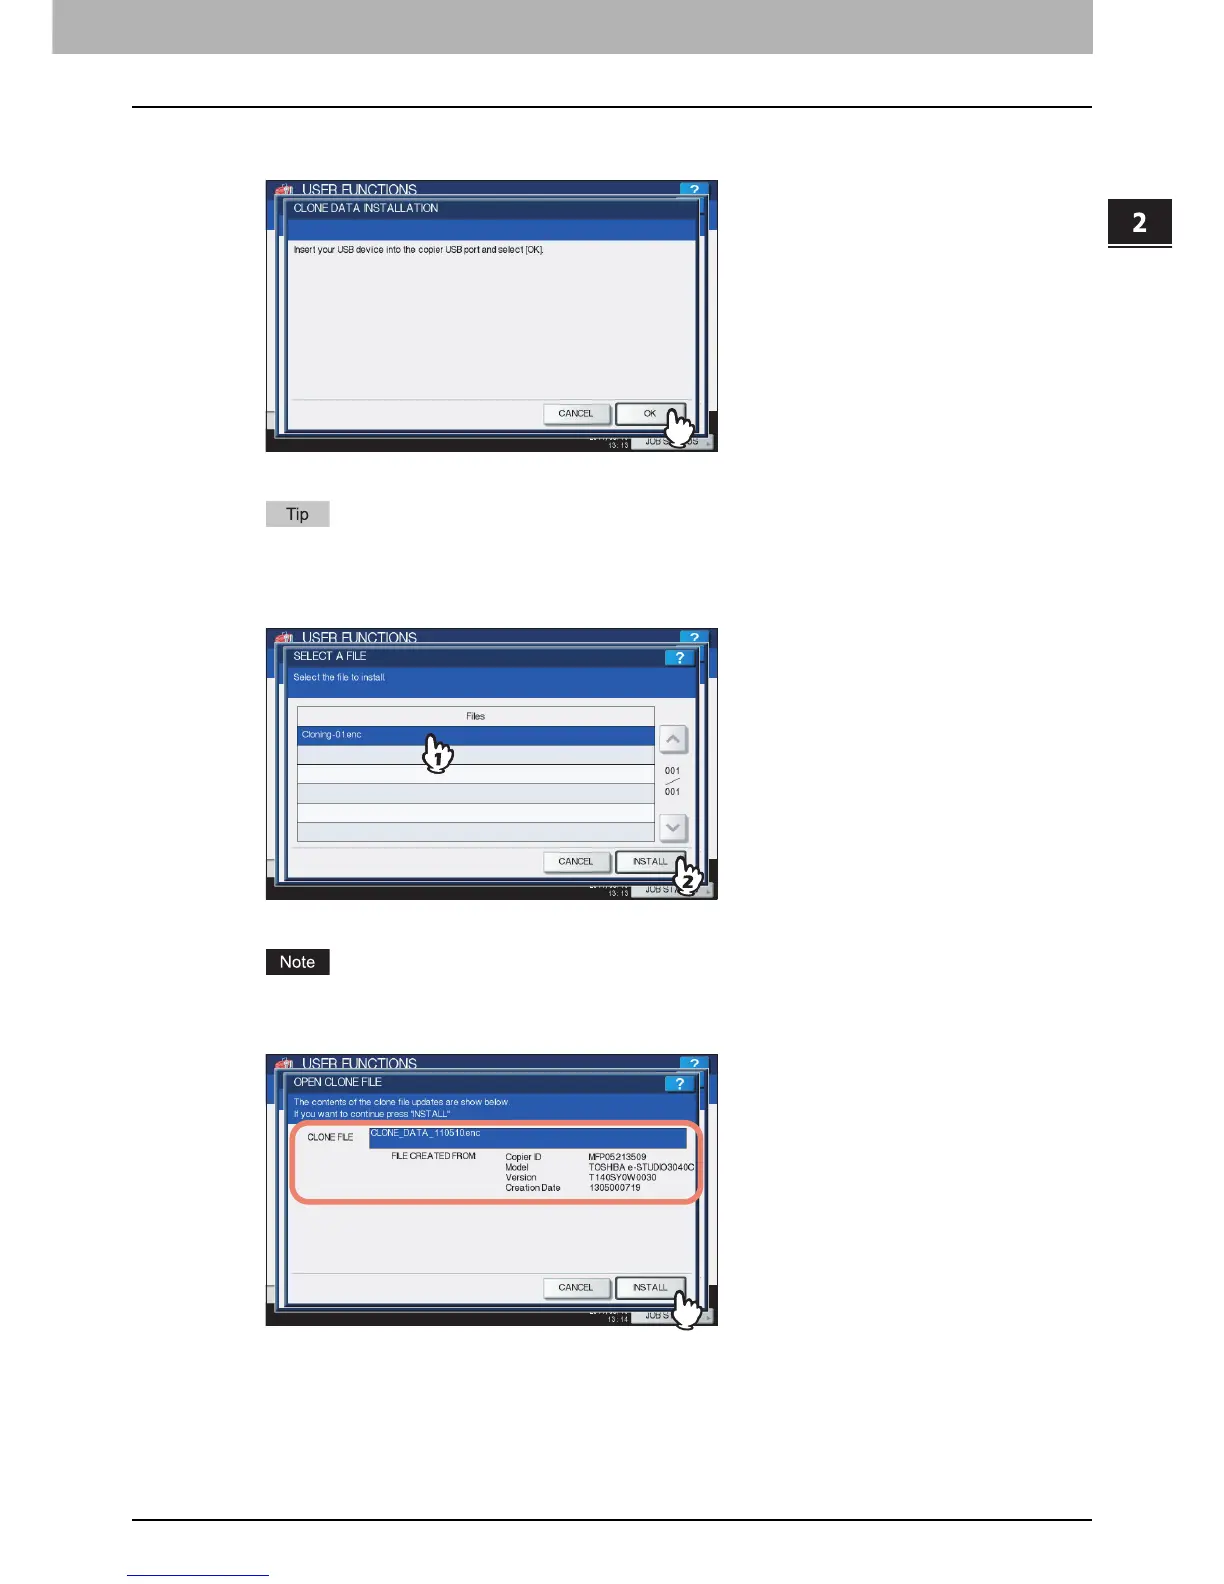
Connect your USB storage device in which the cloning files are stored to the USB port
on the equipment, and press [OK].
The SELECT A FILE screen is displayed.
For the location of the USB port on the equipment, refer to the Quick Start Guide “Chapter 1:
PREPARATIONS”.
3
Select the file that you want to install, and press [INSTALL].
The OPEN CLONE FILE screen is displayed.
You can choose only one file in one operation.
4
Confirm the file name and file contents, and press [INSTALL].
The PASSWORD REQUEST screen is displayed.

Table of Contents

Other manuals for Toshiba e-STUDIO6550C Series

Questions and Answers:

Question and Answer IconNeed help?

Do you have a question about the Toshiba e-STUDIO6550C Series and is the answer not in the manual?

Toshiba e-STUDIO6550C Series Specifications

General IconGeneral
BrandToshiba
Modele-STUDIO6550C Series
CategoryAll in One Printer
LanguageEnglish

Related product manuals