2 OPERATIONS WITH THIS EQUIPMENT
24 Storing Documents
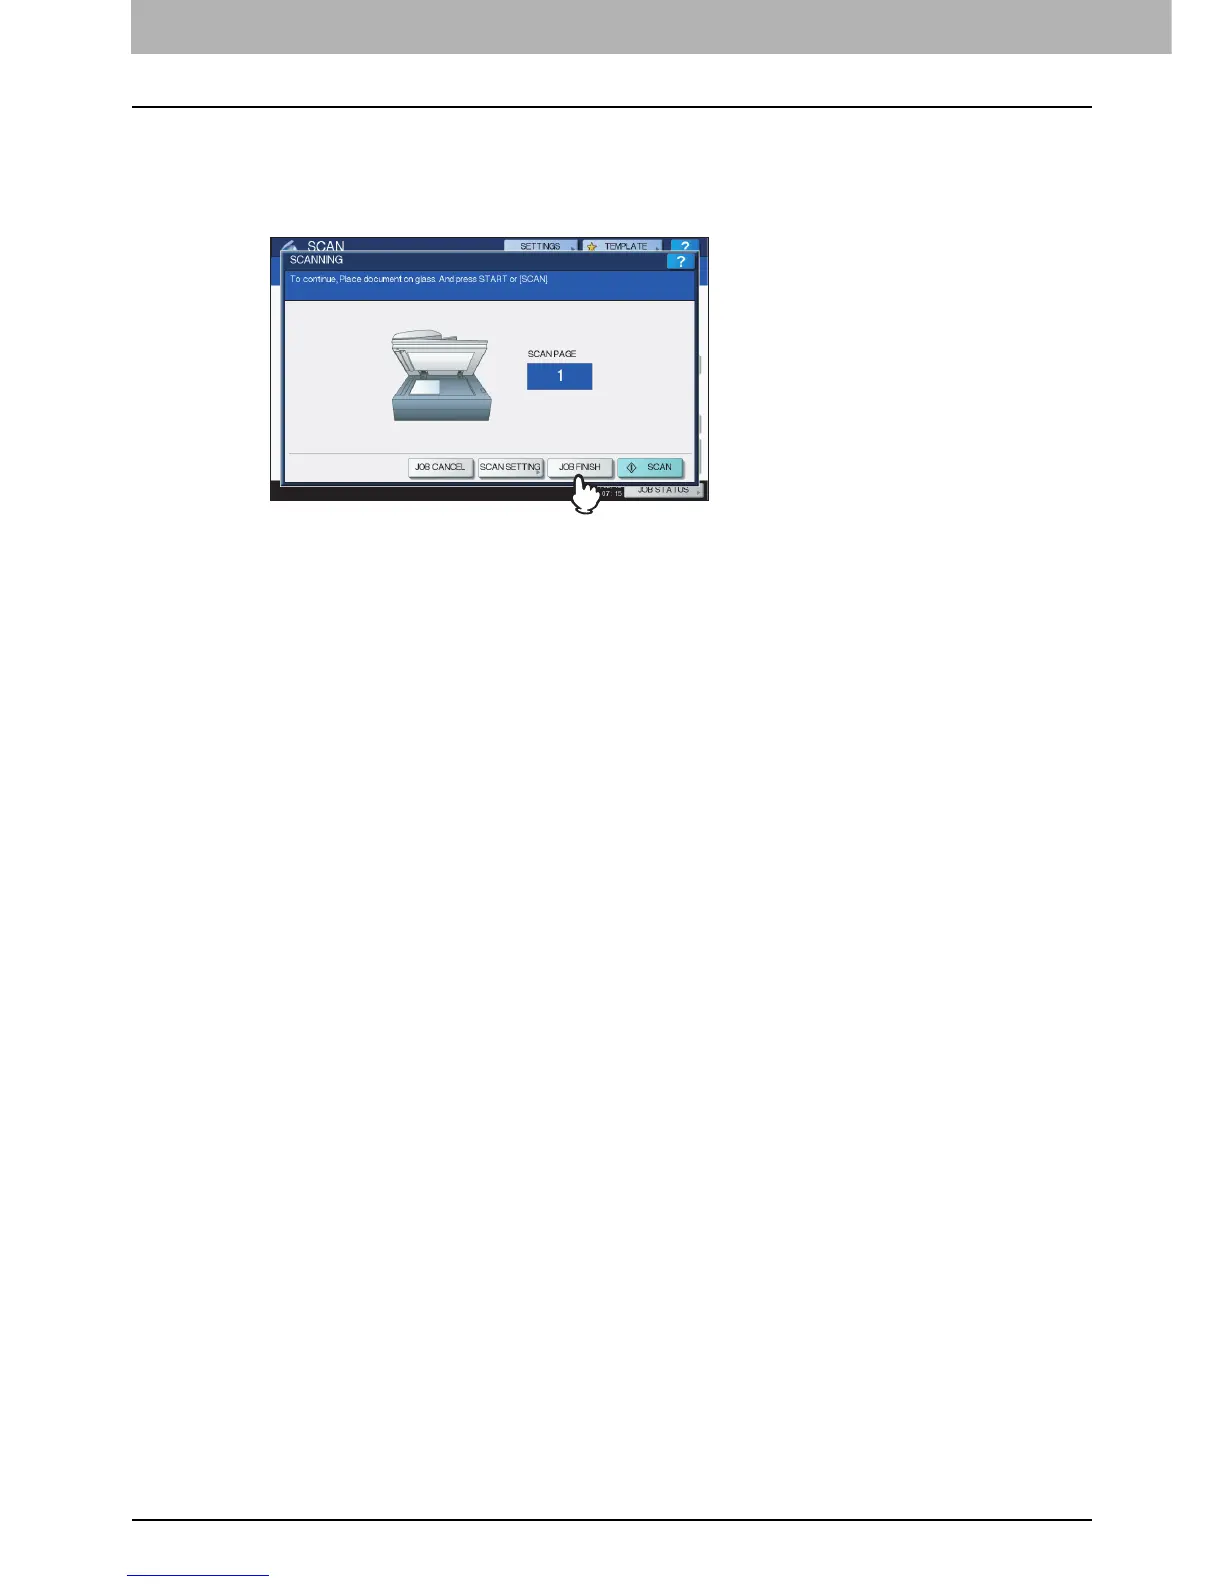
y Scanning the next original
When the original is set on the glass or [CONTINUE] is pressed during scanning on the RADF, the confirmation
screen for the next original will be displayed.
In either case, when you set the next original and press [SCAN], it will be scanned. Follow this procedure as many
as times as necessary. When all of the scanning is finished, press [JOB FINISH].
y You can change the scan setting by pressing [SCAN SETTING].
y You can cancel the reservation of the scanned data by pressing [JOB CANCEL].
y Deleting scan jobs
Follow the procedure below to stop the scanning of the documents (delete scan jobs).
1) Press [JOB STATUS].
2) On the job status menu, display the scan job list.
3) Select the job you want to delete, and then press [DELETE].
4) The delete confirmation screen appears. Press [DELETE].
For details of deleting scan jobs, refer to the Scanning Guide.

 Loading...


