12
Under Ceiling Type, 1-way Air Discharge Cassette Type (2SH Series)
• While the air conditioner stops, the horizontal flap (Up/Down air direction adjustment plate)
automatically directs upward.
• While the air conditioner is in ready status for heating, the horizontal flap (Up/Down air direc-
tion adjustment plate) directs upward. The swinging operation starts after heating ready status
has been cleared, but “SWING
” is displayed on the remote controller even if the status is
ready to heating.
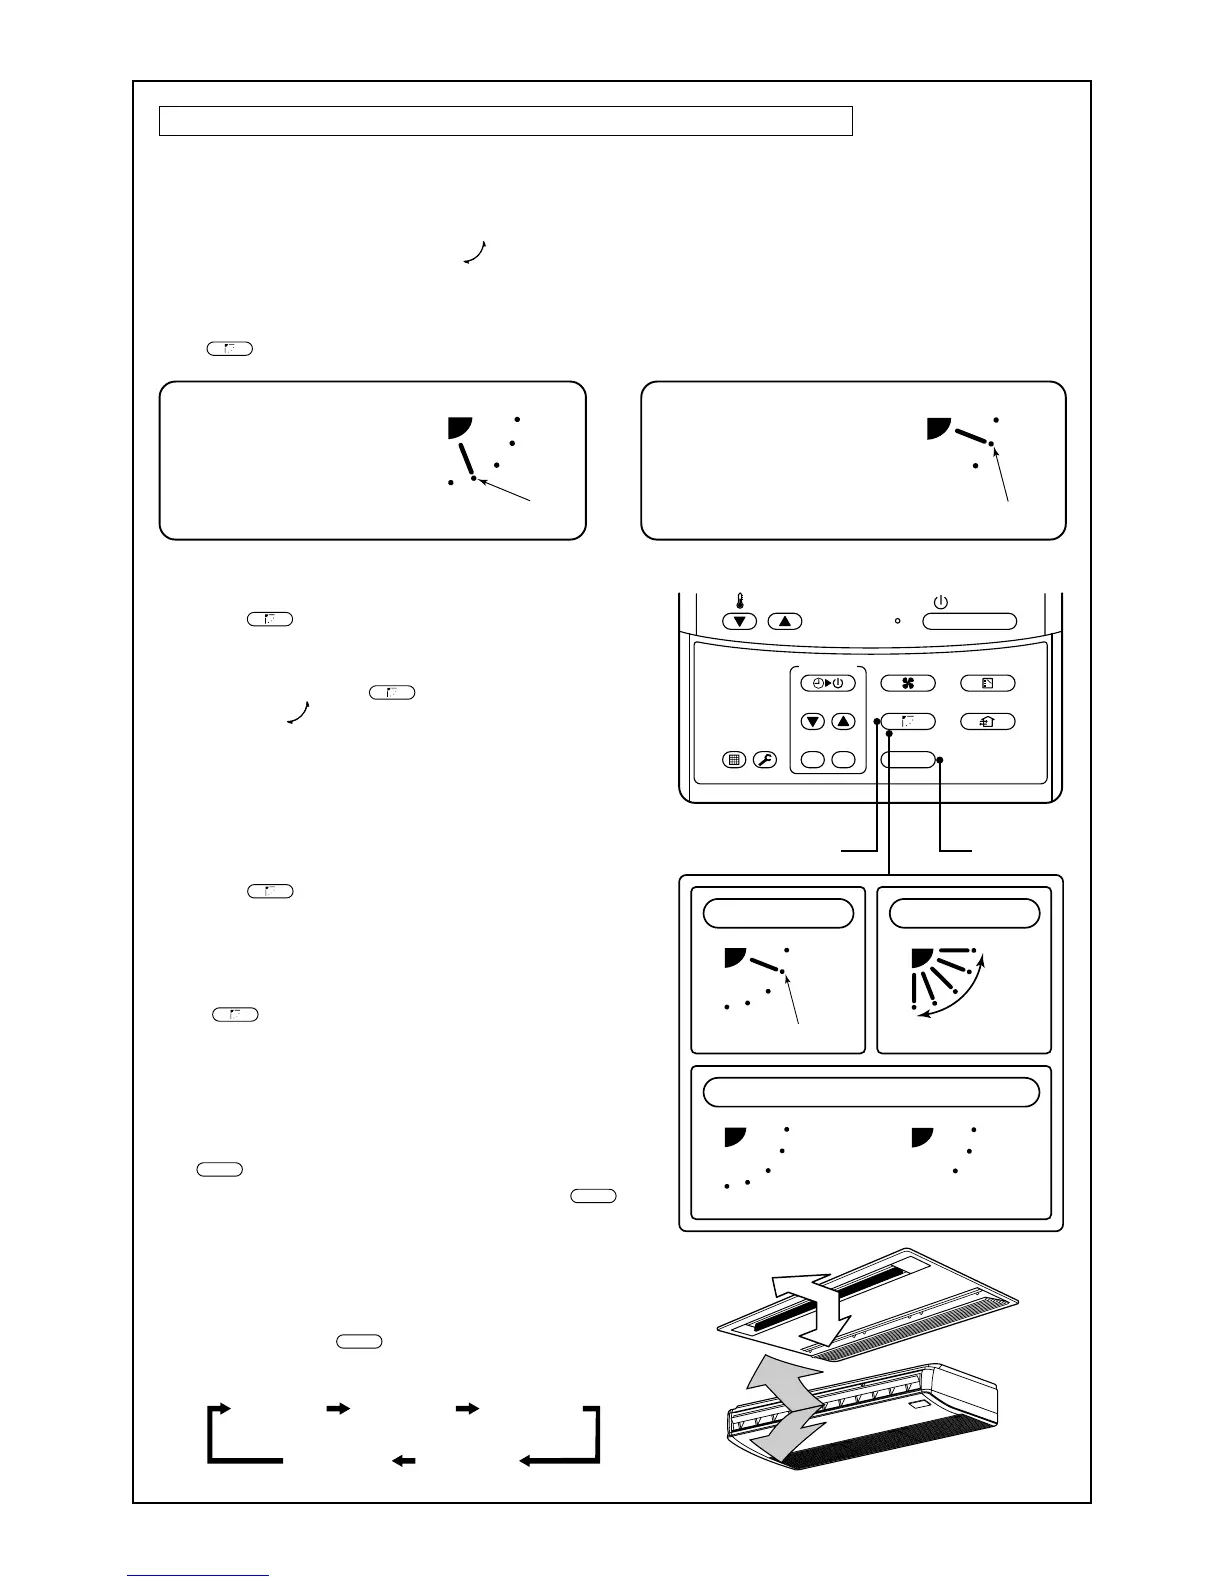
How to set up the air direction
Push
SWING/FIX
button during operation.
Initial setup
Initial setup
ON / OFF
FAN
TEMP.
SWING/FIXTIME
MODE
VENT
UNITSET CL
FILTER
RESET
TEST
TIMER SET
In FAN operation
1, 2, 3 4
In all modes
Display when stopping the swing
Initial setup
Series of
operation
Fan/Heat
operation
Cool/Dry
operation
In Heating operation
Set the horizontal flap (Up/Down
air direction adjustment plate)
downward. If directing it upward,
the hot air may not come to the
foot come to the foot.
In Cooling / Dry operation
Set the horizontal flap (Up/Down
air direction adjustment plate)
upward. If directing it downward,
the dew may fall on near the air
air outlet port or it drips.
How to start swinging
2
Push
SWING/FIX
button.
Set direction of the horizontal flap (Up/Down air
direction adjustment plate) to the lowest posi-
tion and then push
SWING/FIX
button again.
• [SWING ] is displayed and the air direction
automatically changes upward/downward.
In case when one remote controller controls the
multiple indoor units, each indoor unit can be
selected and its air direction can be set up.
How to stop swinging
3
Push
SWING/FIX
button again during swinging of the
horizontal flap.
• The horizontal flap can be stopped at the desired
position. After then the air direction can be again
set up from the uppermost position by pushing
SWING/FIX
button.
* While the horizontal flap is set downward in
cooling/drying operation, it does not stop.
If stopping the horizontal flap which directs
downward during swinging, it stops after moving
to the 3rd position from the top position.
4
UNIT
• To set up the air direction individually, push
UNIT
button to display each indoor unit No. in a group
control. Then set up the air direction to a dis-
played indoor unit.
• If there is no display, all the indoor units can be
operated collectively.
• Every pushing
UNIT
button, the display ex-
changes as shown in the figure.
1
Every pushing the button, the air direction changes.
Unit No. 1-1No display Unit No. 1-2
Unit No. 1-4 Unit No. 1-3
 Loading...