12
EN
• For laying pipes under ground, use hard vinyl chloride pipe. (Inner diam. 20 or 25 mm)
• Set drain side of pipe at downward slope. (1/100 or more)
• Be sure to apply thermal insulation (foaming polyethylene, 10 mm-thickness or
more) for pipes passing through the room.
• Adhere the connecting sections with vinyl chloride agent surely so that no water
leakage is caused.
• Support the piping with hanging bracket so that force is not applied to
connection sections of pipe and pipe is not waved with connected pipes.
• As shown in the figure, set the collective piping such as the ceiling duct so that
waste water does not back up from the main pipe.
NOTE
• Do not make slack or trap at halfway of pipes.
• Set pipes so that the end of drain pipe is not dipped in water, and also keep
space with 50 mm or more to the ground.
• After piping work, check water drains smoothly.
• Hole should be made at a slight downward slant to the outdoor side.
• When connecting extension drain hose, insulate the connecting part of
extension drain hose with shield pipe.
• Insert the drain hose completely into the connecting port of the drain pan.
• Apply thermal insulation surely to the drain hose with elbow thermal insulation cover.
For drain-up kit installation.
Refer to the installation manual supplied with the drain-up kit.
6 DRAIN PIPING WORK
Piping material
Piping and cautions
Connection of the drain hose
Drain-up kit (Option)
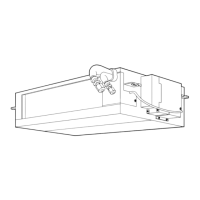
Indoor
unit
Thermal
insulator
1.5m to 2m
Support bracket
1/100 or more
downward
grading
Over thread
Trap
50 mm
or more
Do not put the drain
hose end into water or
drainage ditch.
Shield pipe (local parts)
Drain hose
Inside the
room
Extension
drain hose
Insert the hose completely
up to the end.
Elbow thermal
insulation cover
Be sure to apply
thermal insulation.
Drain hose
Longer as possible (Approx. 100 mm)
30 or more Downward grading
1/100 or more
Extended
ventilating pipe
 Loading...