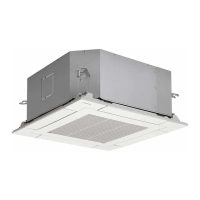
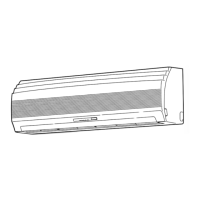
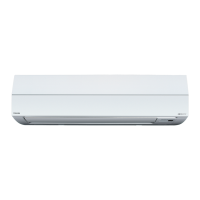
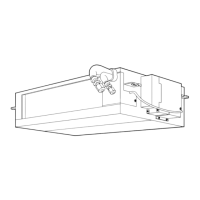
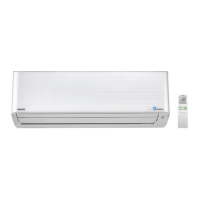
Instructions for the Customers
•
•
•
•
Explain to the customers the proper operation procedure and let them
operate the air conditioner along with the supplied instruction manual.
When multiple indoor units are connected to the outdoor unit, the cooling
mode and the heating mode are not available at the same time.
When multiple indoor units are running at the same time, the operation mode
of the unit which starts running first is applied to the other units
When you start running the indoor unit or change the operation mode, the
unit starts running after 3 minutes. This is due to the protection function of
the unit, not a malfunction.
When the external temperature becomes low, the pre-heating of the
compressor starts to protect it. Keep the circuit breaker on for use.
The electricity consumption during pre-heating is about 100 W.
If the circuit breaker is turned off, the indoor unit may not start running fo
about 11 minutes.
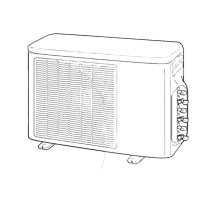
• Electronic expansion valves are used for the outdoor unit.
When you turn on the power, the outdoor unit starts clattering every 1 or
2 months. This clattering is not a malfunction, but occurs when the unit is
returning to the default setting for optimised control.
• While an indoor unit is running in the heating mode, the outdoor unit supplies
refrigerant to the other indoor units which are not running.
Therefore, noise may come from the other indoor units or the exterior of
them may become warm.
Pump-down Operation (Recovering refrigerant)
CAUTION
Since the forcible running for collecting
refrigerant stops automatically after 10
minutes, finish collecting refrigerant withi
10 minutes.
Electric current is applied on the
control board. Beware of electric
shock.
• The following must be certainly done
during pump down.
•
•
Do not incorporate air into the
refrigeration cycle.
Close the 2 service valves. Stop the
compressor and remove the refrigerant
pipe.
If the refrigerant pipe is removed when
the compressor is operating and service
valves are opened, the refrigerant cycle
will inhale unwanted matter such as air
and the pressure in the cycle becomes
abnormally elevated. It may cause a
burst or injury.
1.
2.
Detach the front panel. Do not remove the air discharge grille.
Turn on the circuit breaker to supply electricity.
In the initial LED display status, D805 is lighted as below.
:
ON,
:
OFF,
: Rapid Flashing (5 times/sec.),
: Slow Flashing (1 time/sec.)
D800 D801 D802 D803 D804 D805
Start running all the indoor units connected to the outdoor unit in the
cooling mode.
The checking procedure cannot be completed if the cooling mode is not
operated in every indoor units.
SW801
D800
D801
D802
D803
LED
D804
D805
3. Hold down SW801 for at least 5 seconds, and check that D800 is
lighted and D804 light is flashing(1time/sec.)
4. Press SW801 for 1 time. Then D804 light is flashing (5 times/sec.)
5. Press SW802 for 1 time. Then D805 light is flashing (5 times/sec.)
6. Hold down SW802 for at least 5 seconds. Then outdoor unit start
cooling mode.
(The display is kept during the refrigerants collection operation.)
7. Close the valve stem of the service valve at the liquid end.
8. Make sure that the compound pressure gauge reading is –101 kPa
(–76 cmHg)
9. Close the valve stem of the service valve at the gas end.
10.
11.
The refrigerants collection operation is finished in maximum 10 minutes
After the collection is finished, promptly stop the operation of all th
indoor unit.
(There are cases that the compressor restarts.)
When you want to start over the operation of the SW801 and SW802,
press the SW801 and SW802 at the same time for 5 sec. (It back to the
initial condition of 3.)
However, do not execute the operation during the refrigerants collection.
If by any chance the collection is stopped by the operation, start over the
refrigerants collection operation.
D800 D801 D802 D803 D804 D805
D800 D801 D802 D803 D804 D805
D800 D801 D802 D803 D804 D805
D800 D801 D802 D803 D804 D805
Display
Indoor
check
code
Description
D800
(YL)
D801
(YL)
D802
(YL)
D803
(YL)
D804
(YL)
D805
(GN)
- Normal operation (no error)
1C Compressor case thermostat error
21 High pressure switch error
1C Compressor system error
1d
Compressor lock
1F Compressor breakdown
14 Driving element short circuit
16 Position detection circuit error
17 Current detection circuit error
1C Communication error between MCU
1A Fan system error
1E Discharge temperature error
19 Discharge temperature sensor (TD) error
1b
Outdoor air temperature sensor (TO) error
18 Suction temperature sensor (TS) error
18
Heat exchanger temperature sensor (TE) error
1C
Gas pipe (unit A) temperature sensor (TGa) error
1C
Gas pipe (unit B) temperature sensor (TGb) error
1C
Gas pipe (unit C) temperature sensor (TGc) error
1C
Gas pipe (unit D) temperature sensor (TGd) error
1C
Gas pipe (unit E) temperature sensor (TGe) error
- PMV error (SH≥20)
- PMV error (SH≤–8)
20 PMV leakage error (unit A)
20 PMV leakage error (unit B)
20 PMV leakage error (unit C)
20 PMV leakage error (unit D)
20 PMV leakage error (unit E)
- Miswiring (mispiping) check error
1C Communication error between MCU
1C Communication error between MCU
1
2
2
2
2
2
1 : Back-up operation is performed without error display of the indoor unit.
2 : Operated normally when the air conditioners in other rooms are driven.
• The D800 LED represents unit A.
• The D801 LED represents unit B.
• The D802 LED represents unit C.
• The D803 LED represents unit D.
• The D804 LED represents unit E.
:ON ( :3 sec ON/0.5 sec OFF)
:OFF
12-2-10. Troubleshooting
You can perform fault diagnosis of the outdoor unit with the LEDs on the P.C.
board of the outdoor unit in addition to using the check codes displayed on
the remote controller of the indoor unit.
Use the LEDs and check codes for various checks. Details of the check
codes displayed on the remote controller of the indoor unit are described in
the Installation Manual of the indoor unit.
LED displays and check codes
 Loading...