12-2-9. Test run
Wiring/Piping Check
CAUTION
Electric current is applied on the
control board. Beware of electric
shock.
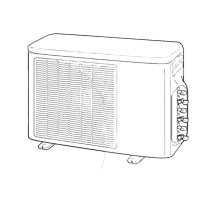
1. Detach the front panel of the outdoor unit.
Do not remove the air discharge grille.
2. Turn on the circuit breaker to supply electricity.
In the initial LED display status, D805 is lighted as below.
4. Press the SW801 4 times until the LED is displayed as below.
5. Press SW802 for 1 times. Then D805 light is flashing (5 times/sec.)
6. Hold down SW802 for at least 5 seconds. Then the wiring/piping
check starts automatically. (The LED display is lighted for a moment.)
7. The below is displayed when the error is detected.
(* Repetition of 3 sec ON / 0.5 sec OFF)
Press the SW801 3 times until the LED is displayed as below, to check
the room judged as error.
Incorrect wiring/piping can be checked by pressing SW802. The LED is dis-
played as below. Turn off the circuit breake , then check wiring/piping again.
• If no problems are detected, the checking operation returns to the
normal operation automatically. The LED is displayed as below.
Start running all the indoor units connected to the outdoor unit in the
cooling mode.
(The indoor unit in the room that doesn’t operate the cooling mode cannot
be checked.)
3. After 5 minutes, hold down SW801 for at least 5 seconds, and check
that D800 is lighted and D804 light is flashing (1 time/sec.)
:
ON,
:
OFF,
: Rapid Flashing (5 times/sec.),
: Slow Flashing (1 time/sec.)
D800 D801 D802 D803 D804 D805
D800 D801 D802 D803 D804 D805
D800 D801 D802 D803 D804 D805
D800 D801 D802 D803 D804 D805
D800 D801 D802 D803 D804 D805
D800 D801 D802 D803 D804 D805
* * * * *
D800 D801 D802 D803 D804 D805
D800 D801 D802 D803 D804 D805
LED
Description
D800 D801 D802 D803 D804 D805
Normal operation (no error)
Trouble in unit A
Trouble in unit B
Trouble in unit C
Trouble in unit D
Trouble in unit E
Trouble in units A and B
Trouble in units A and C
Trouble in units A and D
Trouble in units A and E
Trouble in units B and C
Trouble in units B and D
Trouble in units B and E
Trouble in units C and D
Trouble in units C and E
Trouble in units D and E
Trouble in units A, B, and C
Trouble in units A, B, and D
Trouble in units A, B, and E
Trouble in units A, C, and D
Trouble in units A, C, and E
Trouble in units A, D, and E
Trouble in units B, C, and D
Trouble in units B, C, and E
Trouble in units B, D, and E
Trouble in units C, D, and E
Trouble in units A, B, C, and D
Trouble in units A, B, C, and E
Trouble in units A, B, D, and E
Trouble in units A, C, D, and E
Trouble in units B, C, D, and E
“Trouble in all units
Service valve stays closed”
:
ON,
:
OFF,
: Rapid Flashing (5 times/sec.),
: Slow Flashing (1 time/sec.)
Check results
• The D800 LED represents unit. A.
• The D801 LED represents unit. B.
• The D802 LED represents unit. C.
• The D803 LED represents unit. D.
•
8.
The D804 LED represents unit. E.
When you want to start over the operation of the SW801 and SW802,
press the SW801 and the SW802 at the same time for 5 sec. (The
procedure will set back to step 3.) However, do not execute the
operation during the check. If by any chance the check is stopped by the
operation, start over the check after turning off the power once
9. Notes
• It sometimes takes about 30 minutes maximum for the check.
•
•
During the check, the compressor and the fan of the outdoor/indoor unit
repeat ON/OFF.
You cannot check wiring/piping when the external temperature is 5°C
or less. Also, there is a possibility to misjudge if the indoor temperature
becomes too low by cooling operation. In that case, execute the cooling
operation for per room and check if the connection is normal.
Test run
1. If you perform the test run in summer, start running in the cooling mode first to
decrease the temperature of the room, then run in the heating mode.
(Heating mode: Set the temperature to 30°C.)
• If you perform the test run in winter, start running in the heating mode firs
to increase the temperature of the room, then run in the cooling mode.
(Cooling mode: Set the temperature to 17°C.)
2. For the test run, be sure to satisfy the following conditions below:
- Perform the test run for each indoor unit respectively.
- Perform the test run for about 10 minutes in both the cooling mode and
the heating mode.
• You can perform the test run in the cooling/heating mode by utilizing the
thermo sensor of the indoor unit.
Cooling mode: Warm the thermo sensor using an appliance such as a
hair dryer.
Heating mode: Put a cold towel on the thermo sensor.
Gas Leak Inspection
Refer to the “ Gas Leak Inspection”

 Loading...

