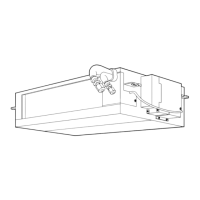
Fixing screws
for element
(7 positions)
Earth screw
IPDU P.C. board
fixing screw
Supporters
(3 positions)
IPDU P.C. board
Radiating grease
Sub heat sink Rediatin
sheet
No.
6
Part name
IPDU P.C.
board
(Continued)
Procedure
7)
Remove the earth wire of IPDU P.C. board.
(Truss head B tight screw Ø4 × 6, 1 pc.).
8)
Tak
e off fixing screws for IPDU P.C.
board.
(Flange nut to fix element Ø3 × 16, 7 pcs.: Pan
head S tight scre
w to fix P
.C
.
board
Ø3 × 20, 1 pc.)
9)
Remove IPDU P.C. board. (3 supporters)
NOTE)
Be careful that IPDU P.C. board is difficult to be
taken out by radiating grease for the heat sink.
10)
Mount a new IPDU P.C. board.
NOTE)
• Take note that the compressor lead V:
CN201 (white) and the reactor lead CN05,
CN06 are correctly attached.
(For the compressor lead, the transparent
sleeve is attached to the circular terminal,
and for the reactor lead, the transparent
sleeve is not attached to the circular terminal.)
• Be sure not to forget to attach the Sub heat
sink and also the rediating sheet.
(If you apply a little amount of radiating
grease beforehand to the rear side of the
insulation sheet, the attaching work to the
heat sink will become easy.)
Remarks
 Loading...