Do you have a question about the Toshiba Satellite P775 Series and is the answer not in the manual?
| Processor | Intel Core i3/i5/i7 |
|---|---|
| Storage | 500GB/640GB/750GB HDD |
| Display | 17.3-inch diagonal widescreen TruBrite TFT LCD display |
| Graphics | Intel HD Graphics 3000 |
| Operating System | Windows 7 Home Premium |
| Optical Drive | DVD SuperMulti drive |
| Webcam | Integrated webcam |
| Audio | Harmon Kardon speakers |
| Battery | 6-cell Lithium-ion |
| Wireless | Wi-Fi 802.11 b/g/n |
| Ports | VGA, HDMI |
| Resolution | 1600 x 900 |
| LAN | 10/100 Ethernet |
| RAM | 4GB/6GB/8GB DDR3 |
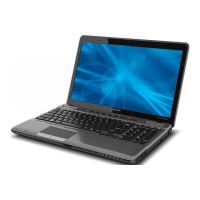
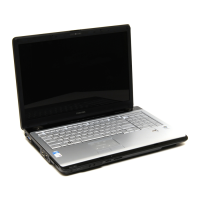
Details the comprehensive features of the Toshiba P770/P775 notebook, including processor, memory, and display options.
Introduces the purpose of Chapter 2 and lists the Field Replaceable Units (FRUs) covered for troubleshooting.
Provides a flowchart to guide the diagnostic process for identifying and resolving system malfunctions.
Details the steps and procedures for diagnosing and resolving issues related to the computer's power supply.
Outlines the process for identifying and fixing problems with the computer's display, including external checks and diagnostics.
Provides steps to diagnose and resolve issues with the laptop's keyboard, including diagnostic checks and connector tests.
Guides users through troubleshooting external USB devices and their connectivity issues.
Provides procedures for diagnosing and resolving problems with the laptop's touchpad.
Outlines steps to troubleshoot issues with the built-in speakers and headphone jack.
Guides users through troubleshooting the optical drive, including CD/DVD checks and software compatibility.
Provides steps to diagnose and fix problems with the Wireless LAN (WLAN) system.
Details troubleshooting procedures for the laptop's camera, including software and hardware checks.
Outlines steps to diagnose and resolve issues related to the Bluetooth wireless communication function.
Details the process for diagnosing and resolving problems with the Hard Disk Drive (HDD) and Solid State Drive (SSD).
Outlines procedures for troubleshooting the microphone (MIC) functionality.
Details troubleshooting steps for USB3.0 ports and devices, including connection and transmission checks.
Details procedures for diagnosing and resolving problems with the Local Area Network (LAN) port.
Outlines procedures for diagnosing and resolving issues with the laptop's battery.
Explains how to use the Test & Diagnostic program to test hardware modules and lists available functional tests.
Provides step-by-step instructions on how to run the diagnostic programs using Free-DOS or a diagnostics CD/USB.
Describes the audio sound test procedure, which confirms speaker function by playing sounds and music.
Details the fan test to check its ON/OFF functionality and speed, requiring user feedback on wind and sound.
Explains the main battery charge test, measuring battery type, manufacturer, capacity, and charge function.
Details how to check the computer's memory frequency and size in each slot, offering read, write, and info tests.
Explains the keyboard test to check all key functions, requiring selection of keyboard matrix code.
Describes the mouse (touchpad) test, allowing adjustment of mouse speed, acceleration, and button assignments.
Describes the LAN test for checking the full-duplex environment, including speed tests.
Describes the first HDD test to verify its functionality, including read/write tests and a password check.
Details the second HDD test to verify its functionality, similar to the first HDD test.
Details how to set the computer's function status in EEPROM, including MIC, HDMI, and BIOS language settings.
Provides an overview of laptop disassembly and FRU replacement, including safety precautions and an FRU removal chart.
Details the procedures for removing and installing the notebook's main battery pack.
Provides step-by-step instructions for removing and installing the Hard Disk Drive (HDD).
Explains the procedure for removing and installing a second Hard Disk Drive (HDD), if the model supports it.
Details the process for removing and installing the optional memory modules (RAM).
Provides instructions for removing and installing the Optical Disc Drive (ODD), including disassembly and assembly.
Provides step-by-step instructions for removing and installing the notebook's keyboard.
Details the procedures for removing and installing the Wireless LAN (WLAN) card.
Provides instructions for removing and installing the logic upper assembly, which includes the keyboard and touchpad.
Details the procedures for removing and installing the notebook's speakers.
Provides instructions for removing and installing the touchpad on/off and light bar components.
Details the procedures for removing and installing the thermal fan.
Provides instructions for removing and installing the USB board.
Details the procedures for removing and installing the notebook's motherboard.
Provides instructions for removing and installing the CPU and its thermal module, including thermal paste application.
Details the procedures for removing and installing the entire display assembly.
Provides instructions for removing and installing the LCD bezel surrounding the screen.
Details the procedures for removing and installing the LCD module itself.