12
Note: The unit can only operate for a short time at the maximum sloping
angle of 5° for preventing water leakage.
● If the roof of the vehicle is sloped (not level) such that the rooftop air conditioner
cannot be mounted within the maximum allowable degree specifications, an
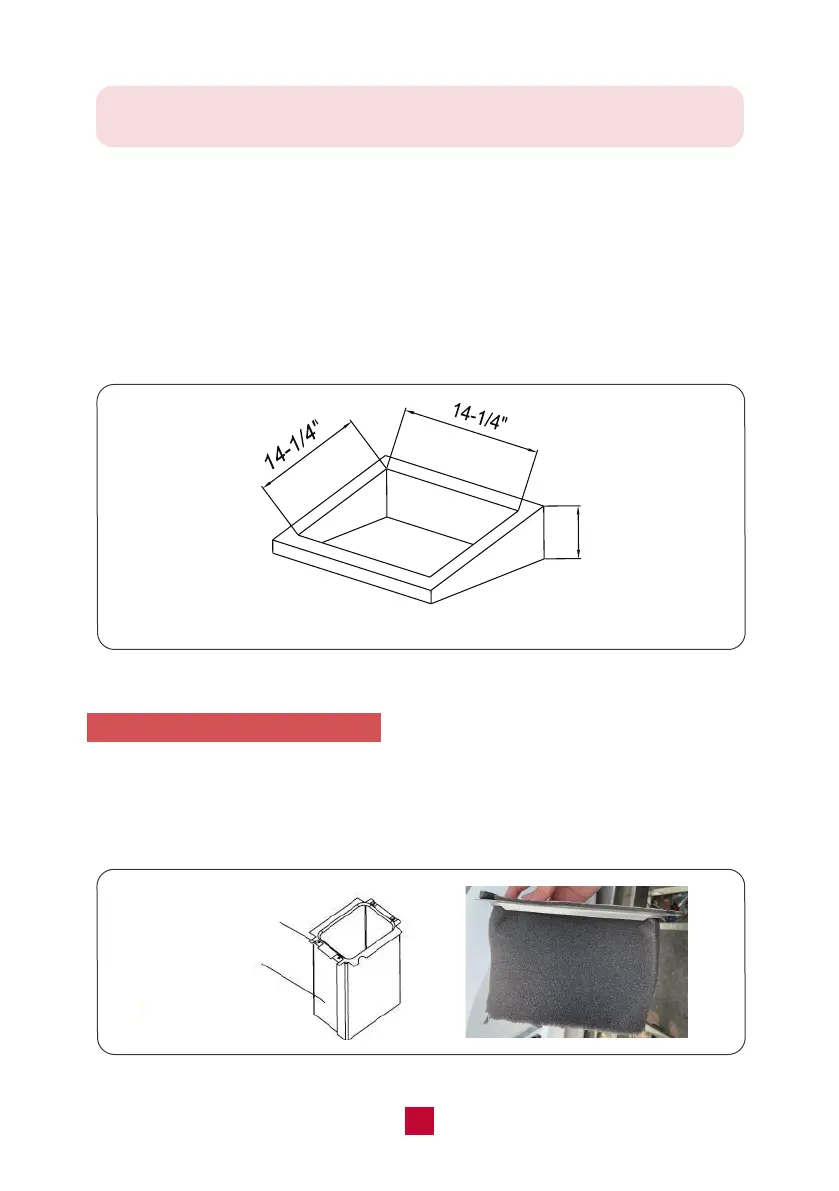
exterior leveling shim will need to be added to make the unit level. A referencing
leveling shim is shown in Figure 6.
● Once the rooftop air conditioner has been leveled, some additional shimming may
be required above the interior ceiling assembly. The rooftop air conditioner and the
ceiling assembly must be parallel with each other before they are secured together.
4. Install the Ceiling Assembly
● Carefully take the ceiling assembly out of the carton and remove the ceiling grille.
● Remove the sticker on the fabric duct and assemble it to the flat side of the upper
duct plate. Then turn over the duct to make the black side out.
Figure 6
Height Varies to Make Unit Level
Upper Duct Plate
Fabric Duct
(black side out)
Figure 7
Fabric Duct
(black side out)
 Loading...