16
1.
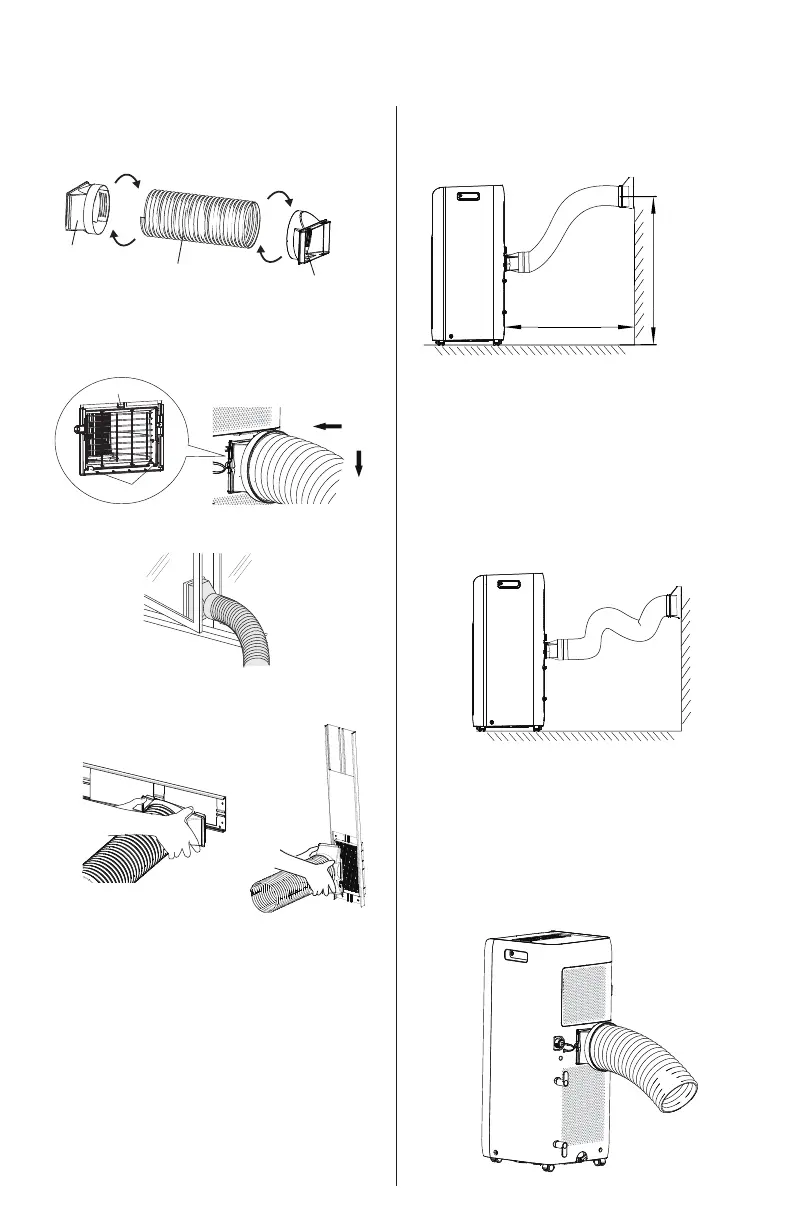
Rotate joint and rear clip clockwise into the
two ends of heat discharge pipe.
Clockwise
Clockwise
Rear clip
Joint
Heat discharge pipe
2. Insert joint of heat discharge pipe into the
groove until you hear a sound.
3.Lead the heat discharge pipe outdoors.
4.Slide and open the exhaust cover on the win-
dow panel, and attach the rear clip. (Optional)
Installation of heat discharge pipe
Install heat discharge pipe
Under 51"
(129.54 cm)
About 24"
(60.96 cm)
Wright
User can adjust the installation method of the
discharge pipe basing on the requirement,
while the similar installation methods as below
which will lead to unsmoothly air-out are not
allowed.
Wrong
• The length of the heat discharge pipe is less
than 40" (101.6 cm). It is recommended to use
it with shortest length.
• When installing, heat discharge pipe should
be as flat as possible. Don’t prolong the pipe or
connect it with other heat discharge pipe.
NOTES: In order to improve cooling effici-
ency, the heat discharge pipe should be as
short as possible and flat without curve to
ensure smooth heat discharge.
The discharge pipe is suggested to be installed
according to below figure by the manufacturer.
Clasp
Groove

 Loading...