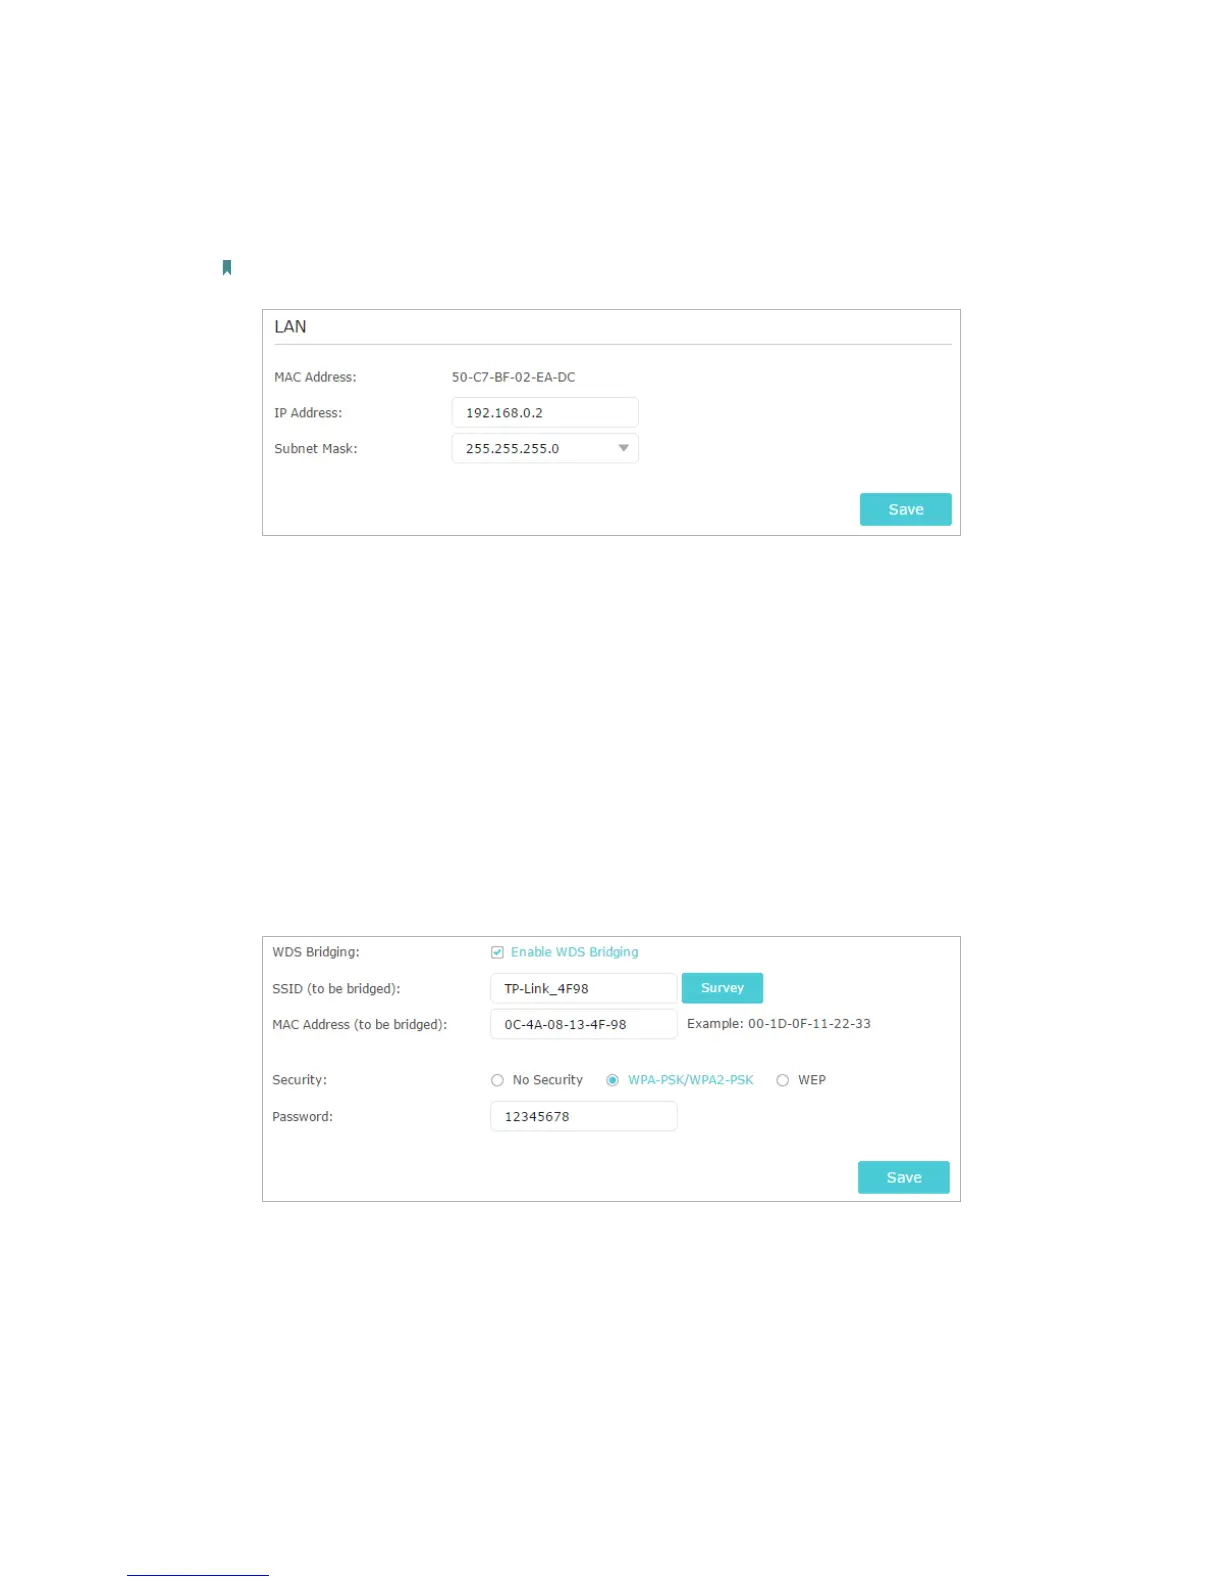
91
of the root router is 192.168.0.1, the IP address of the extended router can be
192.168.0.2~192.168.0.254. We take 192.168.0.2 as example.)
2 ) Click Save.
Note: Log in to the web management page again if the IP address of the router is altered.
3. Survey the SSID to be bridged:
1 ) Go to Advanced > Guest Network and focus on the Wireless section. Click
2.4GHz and untick the Enable Guest Network checkbox.
2 ) Go to Advanced > System Tools > System Parameters and focus on the 2.4GHz
Wireless section, click Enable WDS Bridging.
3 ) Click Survey, locate the root router’s SSID and click Choose (Here we take
TP-Link_4F98 as example).
4 ) If the root router has wireless password, you should enter the wireless password
of the root router.
5 ) Click Save.
4. Disable DHCP:
1 ) Go to Network > DHCP Server.
2 ) Deselect Enable DHCP Server and click Save.
Now you can go to Advanced > Status > Wireless to check the WDS status. When the
WDS status is Run, it means WDS bridging is successfully built.
Q5. What should I do if I cannot access the internet even though the