27
Chapter 5
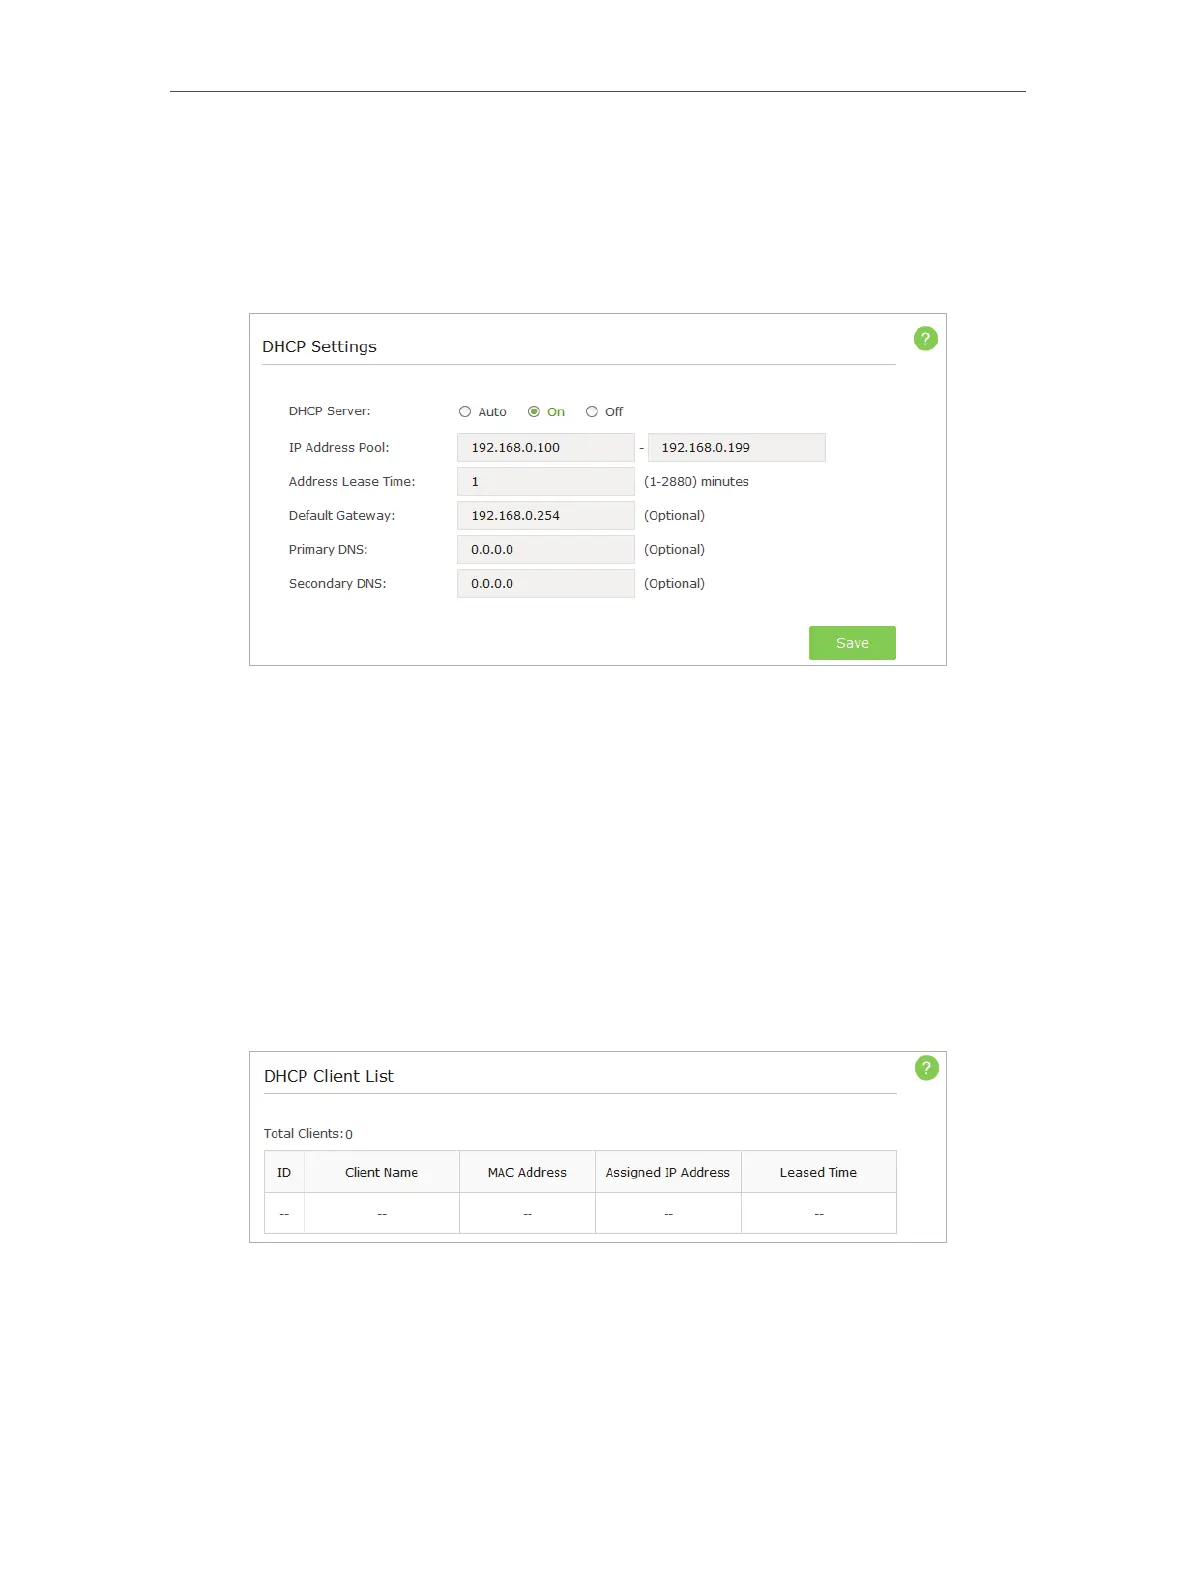
¾ DHCP Settings
1. Visit http://tplinkap.net, and log in with the username and password you set for the
AP device.
2. Go to Advanced > Network > DHCP Server.
3. Switch On the DHCP server.
4. Enter the starting and ending IP address in the IP Address Pool.
5. Enter other parameters if the ISP offers, the Default Gateway is automatically filled
which is the same as the LAN IP address of the AP device.
6. Click Save.
¾ Check the DHCP Clients
1. Visit http://tplinkap.net, and log in with the username and password you set for the
AP device.
2. Go to Advanced > Network > DHCP Client List to check the DHCP Client List.
¾ To reserve an IP address for a specified client device:
1. Visit http://tplinkap.net, and log in with the username and password you set for the
AP device.
2. Go to Advanced > Network > IP Address Reservation.
3. Click Add.