51
Chapter 11
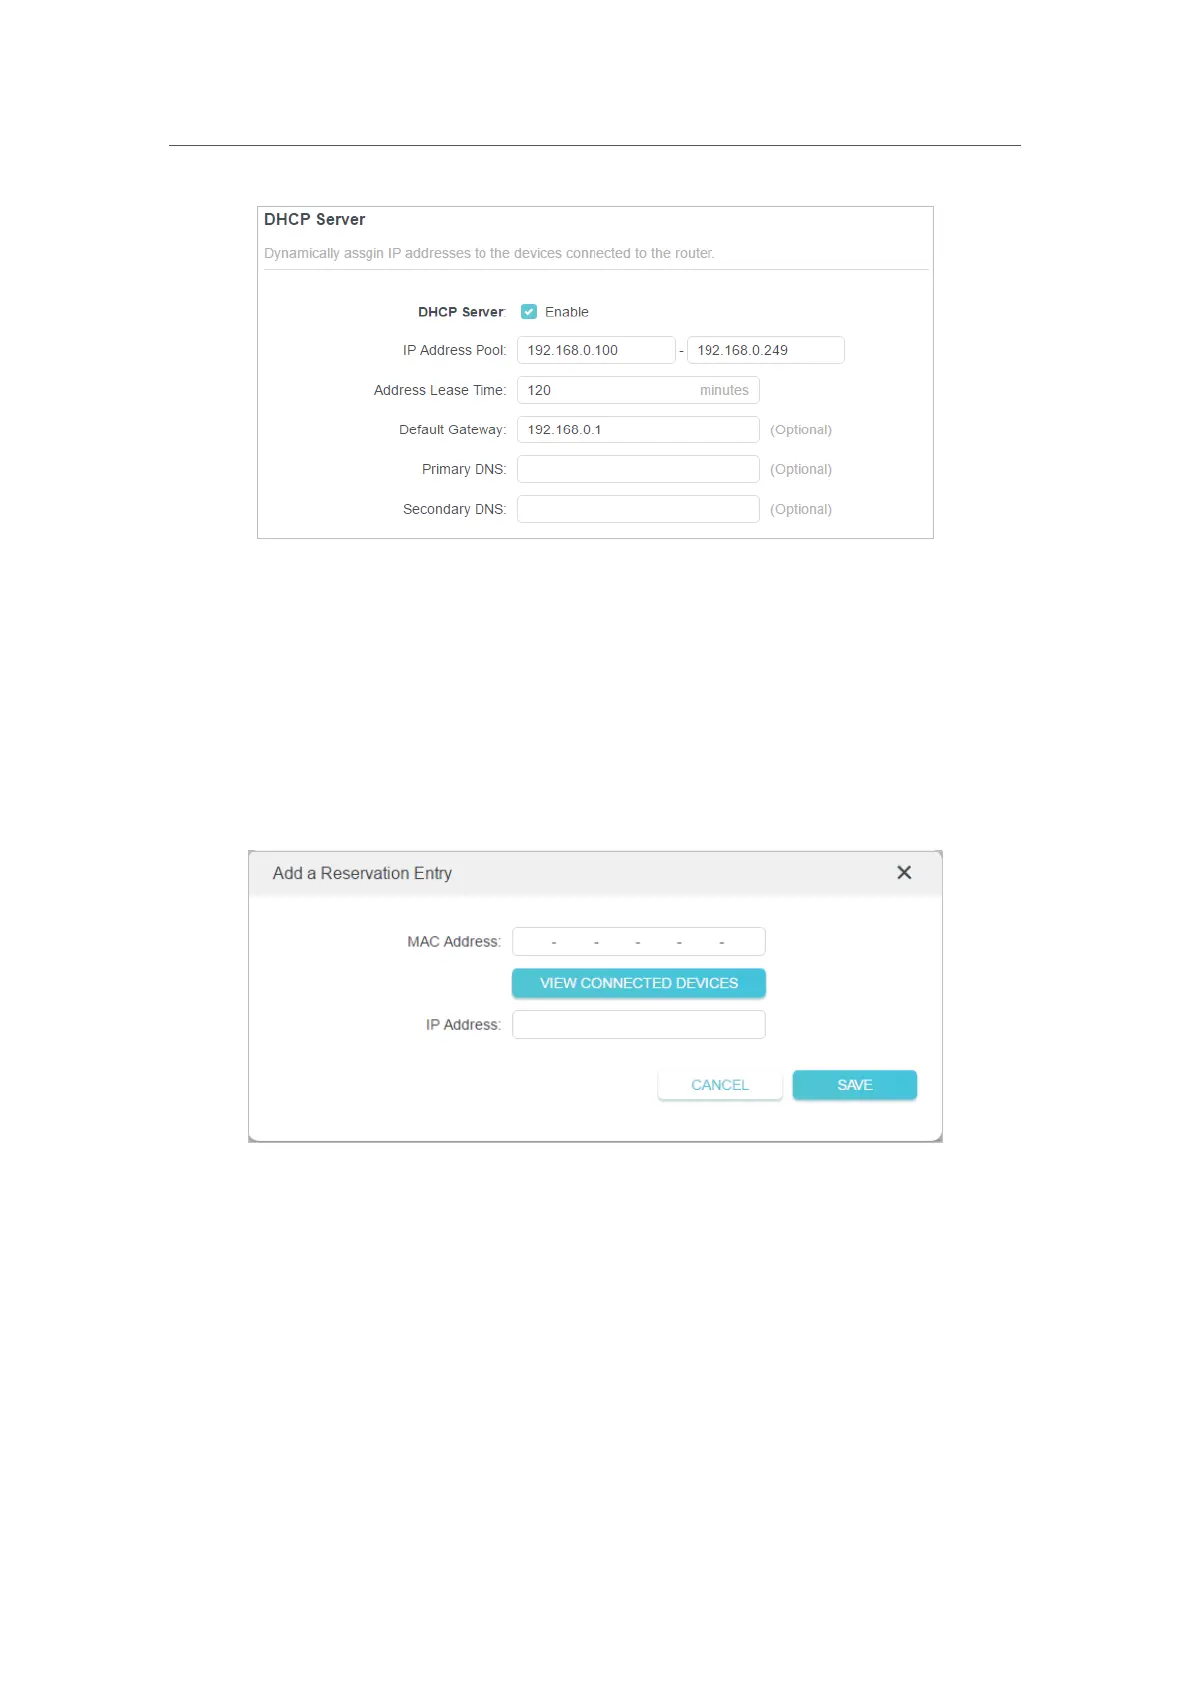
Customize Your Network Settings
1. Tick the Enable checkbox.
2. Enter the starting and ending IP addresses in the
IP Address Pool.
3. Enter other parameters if the ISP offers. The
Default Gateway is automatically filled in
and is the same as the LAN IP address of the router.
4. Click
SAVE.
• To reserve an IP address for a specified client device:
1. Click
Add in the Address Reservation section.
2. Click VIEW CONNECTED DEVICES and select the you device you want to reserve an
IP for. Then the
MAC Address will be automatically filled in. Or enter the MAC address
of the client device manually.
3. Enter the
IP address to reserve for the client device.
4. Click
SAVE.
11. 4. Set Up a Dynamic DNS Service Account
Most ISPs assign a dynamic IP address to the router and you can use this IP address
to access your router remotely. However, the IP address can change from time to time
and you don’t know when it changes. In this case, you might apply the DDNS (Dynamic