EasyManuals Logo

TP-Link PHAROS SERIES Installation Guide

TP-Link PHAROS SERIES
24 pages
To Next Page IconTo Next Page
To Previous Page IconTo Previous Page
Page #10 background imageLoading...
Page #10 background image
07
• Mounting CPE
At the selected site, approximately align the CPE to the direction that you
have oriented.
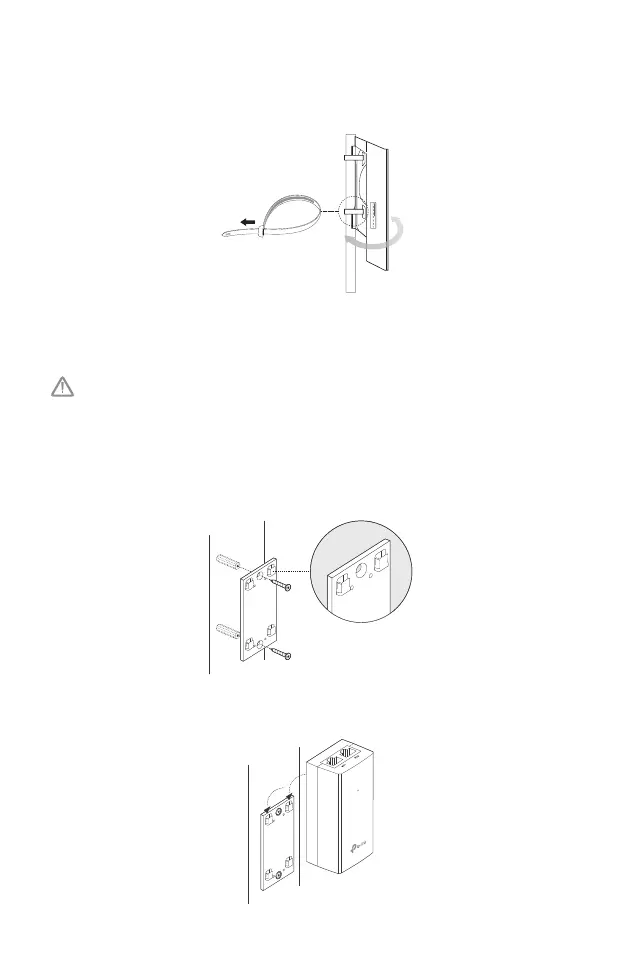
• Mounting Power Adapter (Optional)
Follow the steps below to mount the power adapter:
To ensure the passive PoE adapter is attached most securely, it is
recommended to install the adapter with the Ethernet port facing upward.
1. Drill two holes on the wall and insert the plastic wall anchors into
the holes. Secure the mounting bracket to the wall. Make sure the
shoulders at the corners of the mounting bracket are on the outside
and pointing upward.
2. Attach the passive PoE adapter to the mounting bracket by sliding
the adapter in the direction of the arrows until it locks into place.

Other manuals for TP-Link PHAROS SERIES

Questions and Answers:

Question and Answer IconNeed help?

Do you have a question about the TP-Link PHAROS SERIES and is the answer not in the manual?

TP-Link PHAROS SERIES Specifications

General IconGeneral
ModelPHAROS SERIES
CategoryWireless Access Point
Frequency5 GHz
Wireless StandardsIEEE 802.11a/n
Operating Temperature70°C
ManagementWeb-based
Wireless SecurityWPA/WPA2, WPA-PSK/WPA2-PSK, WEP
Interface10/100M Ethernet
Operating ModesAccess Point, Client, Repeater
MountingPole Mounting

Related product manuals