See training videos at TrackMyOps.com Page 5
©Output Technology, Inc. Jan15.—All rights reserved. Specifications subject to change. TRACKER™ Real-Time, Real Results
HUB Overview
HUB Input/Output Panels
Please note: additional in/out ports not listed are not used for HUB operation.
Front Panel
2 Female USB 3.0 Ports
1 Female USB 2.0 Port
Power ON/RESTART Button
Power (Rear)
Power Supply
Power ON/OFF Switch
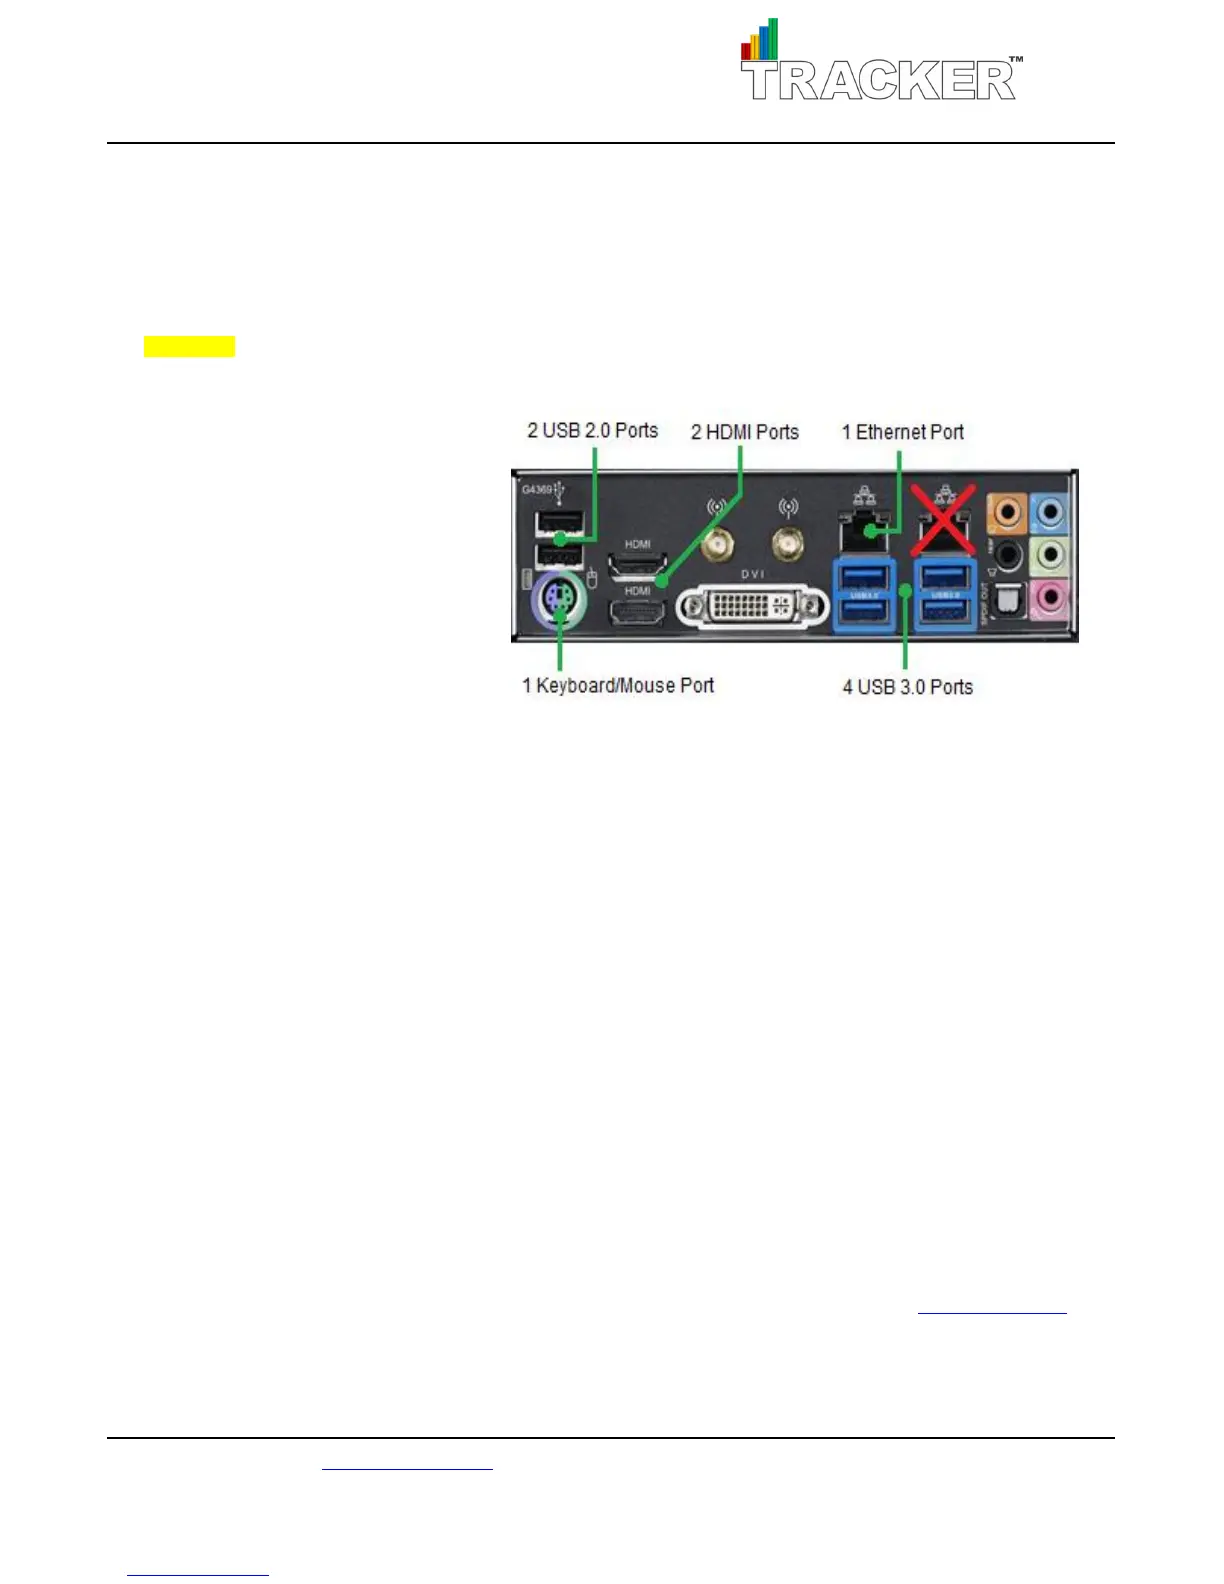
Rear Panel
See figure 1.
Powering Up Your HUB
1. Plug in
power cord from HUB power supply to standard 115V/230V wall outlet.
2. Plug in keyboard and mouse.
3. Plug in HDMI Cable to the lower
HDMI port of your HUB.
4. Plug in HDMI Cable to TV HDMI port. Note which HDMI input number.
5. Turn ON TV and set to correct HDMI input number.
6. Switch the power switch ON in rear power supply, then press the POWER ON button in front.
7. You will be asked to enter a password.
a. Default password: Tracker2014
8. HUB program will load automatically.
a. The OTI-HUB program shortcut is located on the Desktop.
Powering Up Your TRs
For power-up and complete operating instructions, see TRACKER™ TR User’s Manual at TrackMyOps.com
Fig. 1: Rear Input/Output