42
MAINTENANCE
Wheel Installation
NOTICE: To decrease the risk of component damage, do not tighten the lug nuts
to more than the specified torque.
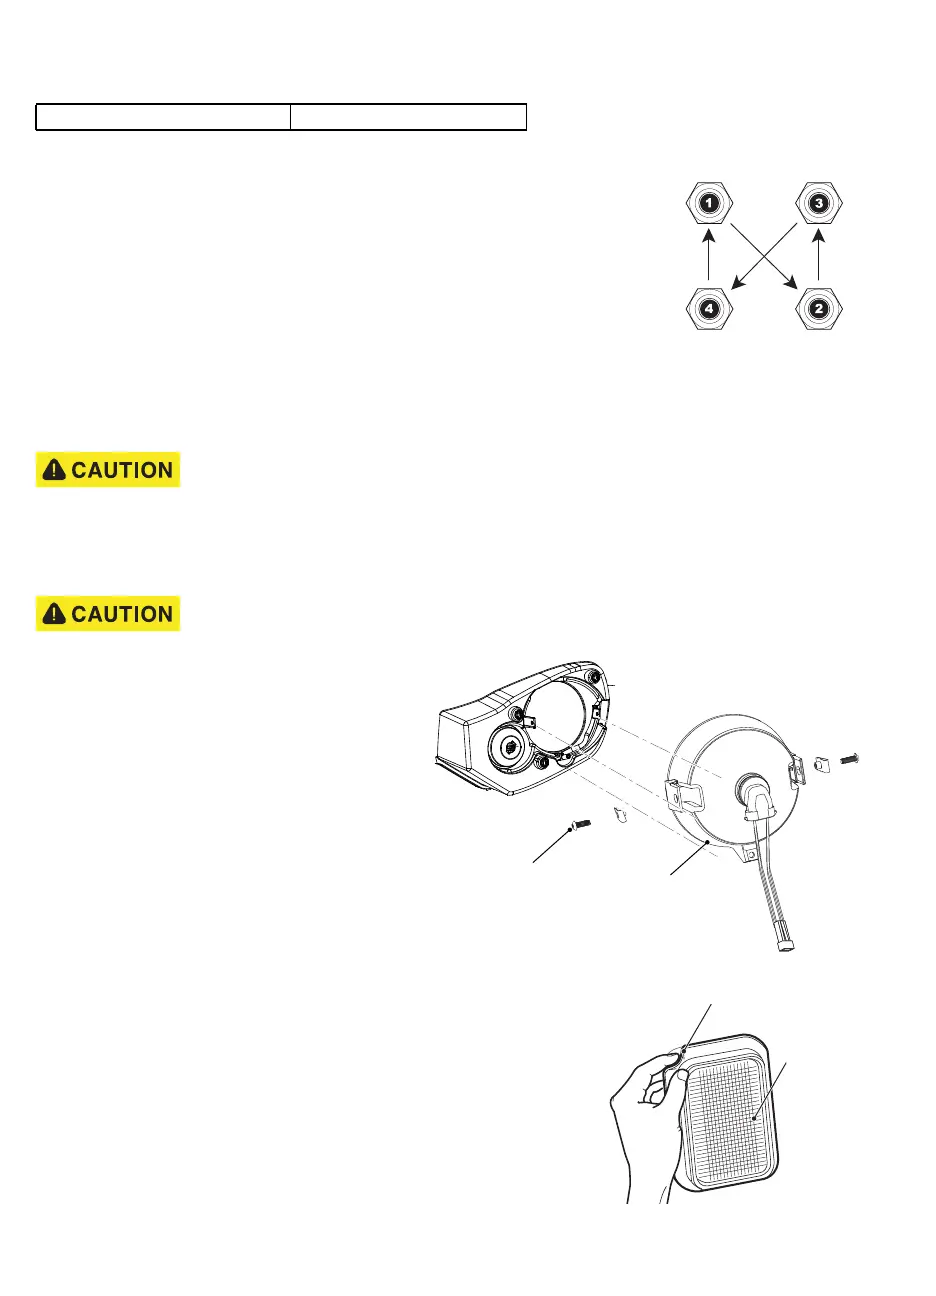
Always install lug nuts using a cross sequence pattern to ensure the
even seating of the wheel against the hub.
1. Install the wheel on the hub with lug nuts. Make sure the valve stem is to the out-
side.
2. Finger tighten the lug nuts.
3. Using the cross tightening pattern shown to the right, tighten the lug nuts to 65 - 85
ft.lbs. (88 - 115 Nm). Tighten in increments of 20 ft. lbs. (27 Nm).
LIGHTS
• Clean the lights frequently to maximize visibility.
• Replace burned out bulbs promptly.
Do not operate this vehicle at nightorinlow lightifanybulbsareburned out. Poor light-
ing reduces visibility that couldcause an accident resulting in severe injury or death.
NOTICE: Replacement bulbs are available from a local Distributor, an authorized Branch or the Service Parts
Department.
Halogen Headlight Bulb Replacement
Light components can get hot if they have beeninoperation. Allow the lights to cool
before servicing to prevent burns to the skin.
NOTICE: Do not touch a halogen bulb with bare
fingers. Oil from skin leaves a residue
that causes a hot spot and will diminish
the life of the bulb.
1. Disconnect the headlight harness from the head-
light.
2. Rotate the bulb 1/4-turn to remove the headlight
bulb from the housing.
3. Insert and rotate the new bulb to lock into place.
4. Connect the harness to the bulb.
Taillight
1. Roll the rubber bezel from around the edge of the taillight and remove the
lens.
2. Install the new bulb.
3. Replace the lens.
Lug Nut Torque 65 - 85 ft.lbs. (88 - 115 Nm)
Lug Nut Tightening Pattern
Screw
Headlight Housing
Taillight
Brake Light
Roll rubber bezel
away from body.