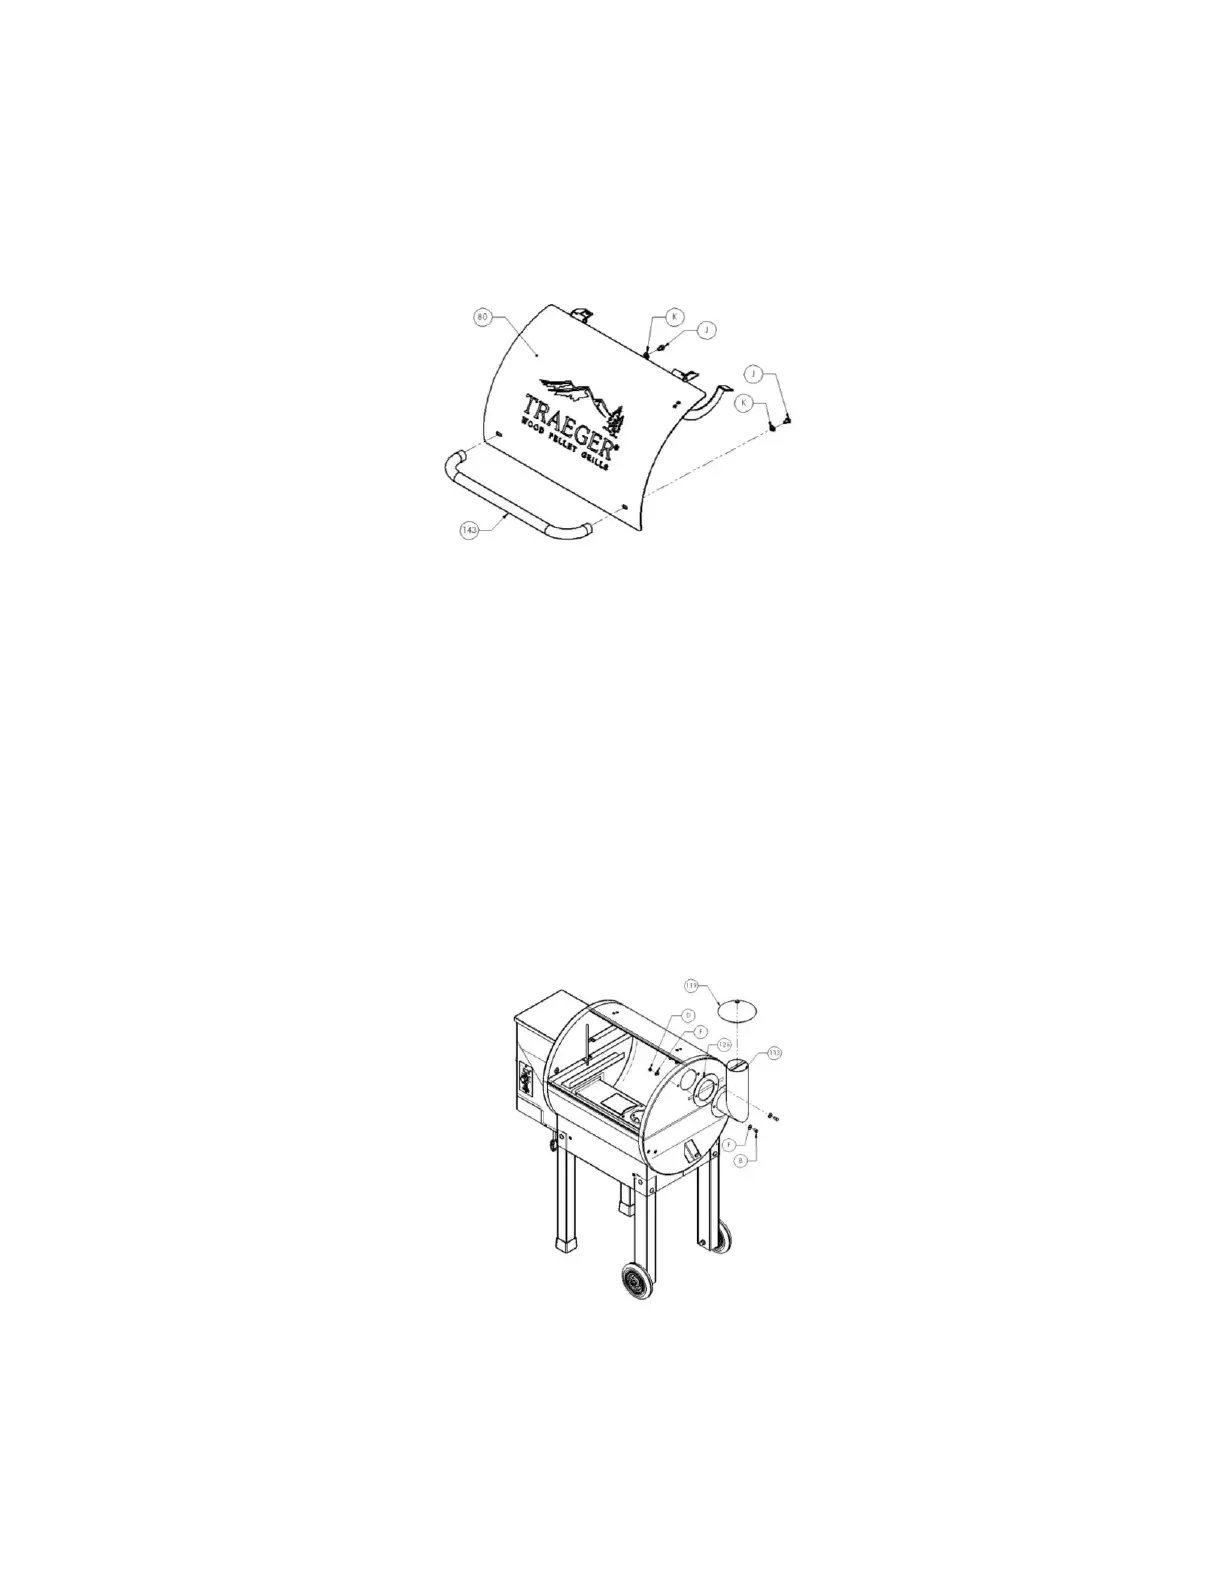
ATTACHING THE CHROME DOOR HANDLE:
1) Insert the bolt (J), flat washer (K) into the slot in the door and thread into the
handle (143). Repeat the process on the other side.
2) Do not over tighten the bolts to the handle
ATTACHING THE FLUE PIPE AND CHIMNEY CAP ASSEMBLY:
1) Align the holes in the Flue Pipe (113) with the holes in the Flue Pipe Gasket
(126), which fits between the right end of the Grill and the Flue Pipe (113). From
the Hardware Kit, place Zinc Flat Washers (F) on two of the 1/2” long Hex Head
Bolts (B) and insert the Bolts through the holes in the Flue Pipe (113) and the
Flue Pipe Gasket (126).Align the Bolts with the corresponding holes in the Grill.
Place a Zinc Flat Washer (F) on each Bolt inside the Grill and secure with Zinc
Hex Nuts (D) using the Wrench supplied.
2) Screw the Chimney Cap Assembly (119) into the Bracket in the top of the Flue
Pipe. Hand tighten the cap to the desired height.
NOTE: If at this point you are ready to start your Grill, refer to the INITIAL FIRING
INSTRUCTIONS in Section Two of this manual or on a separate sheet in the Pellet
Hopper before proceeding with further assembly.