2 88-A4AH4TXV-1C-EN
COIL THERMAL EXPANSION VALVE INSTALLER'S GUIDE
Installation Instructions
1. If air handler has never been installed, go to Step 2.
If air handler has been previously installed, recover
system charge or “pump-down” system charge into
the condensing unit to comply with EPA regulations.
NOTE: Minimize the amount of movement of the liquid
and distributor tubes to prevent work hardening.
2. Using a back-up wrench, loosen mechanical fittings
on the orifice housing of the distributor.
3. Remove the cap from the equalizer port and then
REMOVE the Schrader valve from the port.
4. Remove the Teflon
®
O-ring from the existing flow
control assembly. O-rings may be attached to the
TXV or the fittings.
IMPORTANT: Proper installation of TXV is critical for
preventing leaks. DO NOT oil any threads on TXV,
distributor, or liquid line ttings.
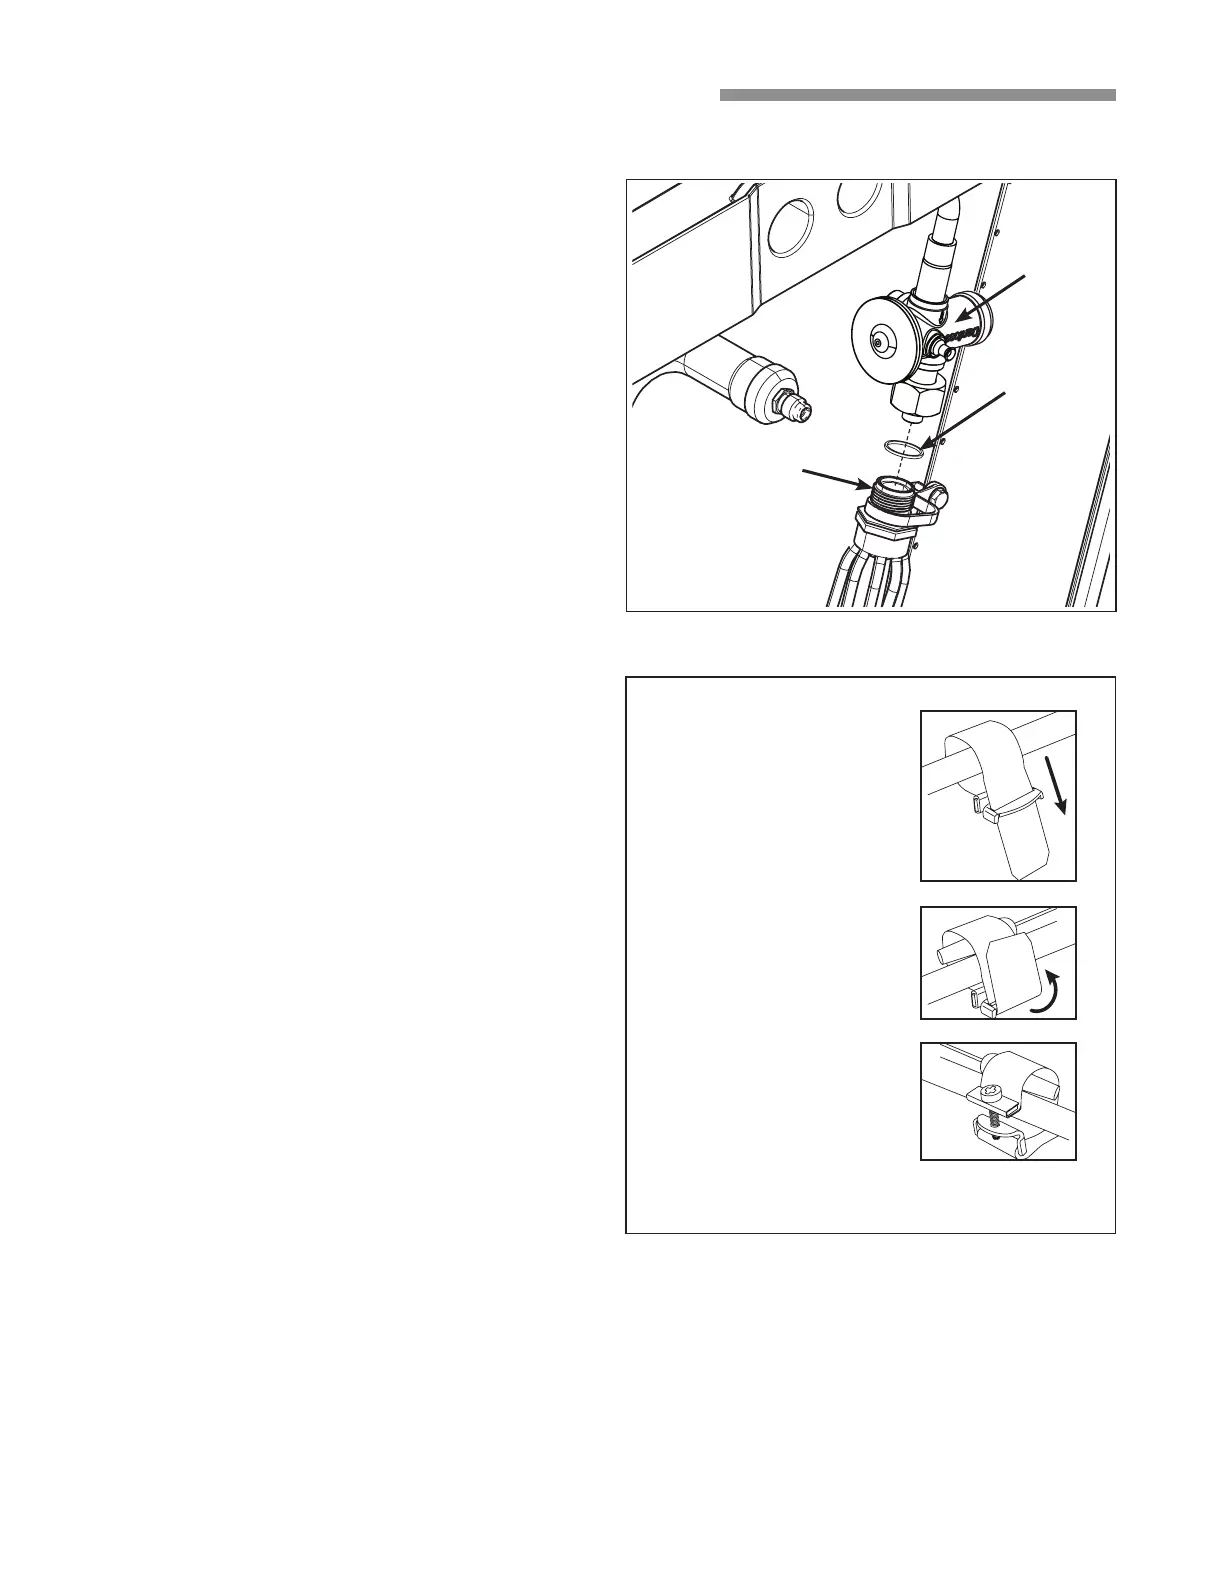
5. To install the coil TXV, install the new O-ring over the
distributor fitting (Figure 2). Hand-tighten the nut to
make sure there is proper mating of threads. Tighten
until bodies “bottom” or a definite resistance is felt.
Use a back-up wrench and tighten an additional 1/4
turn. Wrap supplied push-in cable tie around TXV
and then insert cable tie barb into coil housing hole.
IMPORTANT: Correct tightening of the nut is very
important. Under- or over-tightening may result in a
leaking connection.
6. Connect the TXV equalizer line to the equalizer
port. Hand-tighten until flare bottoms. Use a back-
up wrench to tighten securely (Figure 4).
IMPORTANT: Replacing the liquid line lter drier is
recommended if system has been commissioned. This
is not necessary if this kit is being installed on a new air
handler.
7. To avoid damaging the TXV, braze the field gas line
to the air handler gas manifold prior to attaching the
TXV bulb.
8. After completing the brazing operation, allow the
lines to cool. Attach the bulb to the gas line as
shown in figure 3.
Distributor
Fitting
Figure 2
Teon®
O-ring
TXV
Make contact tight.
• Clean the suction line
thoroughly before
clamping the bulb in
place.
• Bulb has to be mounted
in tight contact with pipe.
(TIP: Shine a flashlight
between bulb and suc-
tion line, realign the bulb
if light is visible.)
• Align the bulb with cop-
per gas line and position
at 10 or 2 o’clock.
• Pull the bulb strap tight
around the copper gas
line and bulb before
tightening the screw.
• After tightening, it should
not be possible to move
the bulb by hand.
Figure 3