24
SSA-SVX06H-EN
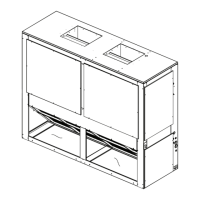
Installation
Horizontal Suspension
If the air handler will be suspended, use a suspension
mounting kit to isolate the unit from the structure. This
is usually accomplished with spring or rubber isolators,
which are offered as an accessory.
Mounting rods must be field supplied. Isolator
selection is dependent upon total unit weight including
accessories — see “Weights,” p. 21 for approximate
unit and accessory weights.
NNOOTTIICCEE
EEqquuiippmmeenntt DDaammaaggee!!
BBeeffoorree hhaannggiinngg tthhee uunniitt oonn ssuussppeennssiioonn rrooddss,,
rreeiinnffoorrccee tthhee ccaabbiinneett aarroouunndd tthhee ssuussppeennssiioonn hhoolleess
bbyy uussiinngg aa llaarrggee wwaasshheerr iinnssiiddee tthhee ccaabbiinneett..
WWaasshheerrss sshhoouulldd bbee bbeettwweeeenn tthhee sskkiinn ooff tthhee aaiirr
hhaannddlleerr aanndd tthhee nnuutt oonn tthhee ssuussppeennssiioonn rroodd..
Align holes in the cabinet with structural supports and
secure suspension rods to the structure, then to the air
handler cabinet. If hole locations do not permit proper
alignment with existing structure, it may be necessary
to field fabricate cross members on existing structural
beams.
NNoottee:: When other than bottom return is to be used,
side panel removal for return duct installation
must be secured over the bottom opening.
Leveling
This air handler has a double sloped drain pan. In order
to assure proper drainage along the length of the drain
pan, it is important to have the unit properly leveled. Be
sure the air handler is level.
Auxiliary Drain Pan
A field fabricated, auxiliary drain pan should be
installed under the unit for all horizontal applications
and when air handlers are installed above ceilings or in
other locations where condensate overflow may cause
damage.
This drain pan will eliminate any excess condensation
that may be due to extreme humidity or an obstructed
drain in the primary drain pan. Drain lines from this
pan must be installed, but should not be connected to
the primary drain line from the unit. Isolate the
auxiliary drain pan from both the air handler and the
structure.
Refrigerant Piping
Installation, brazing, leak testing and evacuation of
refrigerant lines are covered in the installation
instructions that shipped with the outdoor unit. Read
the instructions before beginning installation of
refrigerant lines.
NNOOTTIICCEE
EEqquuiippmmeenntt DDaammaaggee!!
EEnnssuurree tthhaatt tthhee rreeffrriiggeerraanntt lliinneess ppaassssiinngg tthhrroouugghh
tthhee ccaabbiinneett aarree nnoott rreessttiinngg oonn sshhaarrpp sshheeeett mmeettaall
eeddggeess aanndd tthhaatt tthhee bbuullbb((ss)) aarree aattttaacchheedd ttoo tthhee
ssuuccttiioonn lliinnee ooff tthhee ssaammee cciirrccuuiitt..
1. Locate cloth bag(s) that contains a stainless steel
clamp and insulation material (approximately 9”
long by 4” wide) for each refrigerant circuit. This is
for attaching and insulating the expansion valve
bulb(s) to the suction line(s).
2. Attach the expansion valve bulb(s)
oonn aaiirr hhaannddlleerrss tthhaatt wwiillll hhaavvee rreeffrriiggeerraanntt lliinneess
eenntteerriinngg tthhee ccaabbiinneett ffrroomm tthhee lleefftt ssiiddee::
a. Remove the split rubber grommet from the
knockout in the end of the air handler. Uncoil
the cap tube with the bulb attached at the
expansion valve and place the grommet on the
cap tube.
b. With the grommet around the tube, push the
bulb through the hole and position the grommet
back into its original position (one bulb and cap
tube on single circuit units, and two bulbs and
cap tubes on dual circuit units).
oonn aaiirr hhaannddlleerrss tthhaatt wwiillll hhaavvee rreeffrriiggeerraanntt lliinneess
eenntteerriinngg tthhee ccaabbiinneett ffrroomm tthhee rriigghhtt ssiiddee::
a. Attach the bulb(s) to the suction tube(s) inside
the cabinet, approximately 10” from the right
end of the unit.
3. Attach the bulb(s) on a horizontal section of tube
where the entire length of the bulb is in contact with
the tube (see Figure 18, p. 25), approximately 45
degrees off vertical (a 10 or 2 o’clock position).
4. After attaching to the suction line(s), either inside or
outside of the cabinet, wrap the insulation around
the bulb(s) and suction tube(s).
NNoottee:: Suction piping should be insulated.
 Loading...