EasyManua.ls Logo

Trane Schlage LiNK TZEMT400BB32MAA User Manual

Trane Schlage LiNK TZEMT400BB32MAA
12 pages
To Next Page IconTo Next Page
Page #1 background imageLoading...
Page #1 background image
Thermostat
Model TZEMT400BB32MAA
Installation, System Setup, and
Enrollment Instructions
Customer Service: (877) 288-7707
1
WARNING
Voltage hazard. Can cause electrical shock or equipment damage. Disconnect power to heating and cooling
equipment before beginning installation.
2
Remove the existing thermostat cover from the wall plate. Leave
wires attached.
Consult instructions that came with existing thermostat as needed.
Wall plate
Thermostat cover
The look of your existing
thermostat may vary
Physical Installation and Wiring
The Trane Thermostat is compatible with single and multistage forced air
systems, including:
• Gas furnace systems
• Oil furnace systems
• Electric furnace systems
• Heat pump systems
• Air conditioning systems
The Trane Thermostat may be compatible with some other system
types, including:
• Boiler systems
• Geothermal systems
• Multi-zoned systems
Call (877) 288-7707 to verify compatibility.
The Trane Thermostat is not compatible with the following system types:
• Radiant floor systems
• Wall heating systems
Also, the Trane Thermostat is not compatible with dual fuel systems
(gas furnace & heat pump combined) without adding a special kit. See
Note below.
• Note about dual fuel systems: This thermostat is not compatible
with dual fuel systems (heating system with both heat pump
and gas furnace), unless the system is controlled with a dual
fuel accessory relay kit. If you are unsure whether your dual fuel
system is controlled with this accessory or if you need a dual
fuel kit, please contact a qualified heating and cooling contractor.
Tools Needed
1/8”
#2
Bridge requires one 9-Volt battery for
enrollment process. Battery not included.
For professional installation service, instructions, operation guide, and installation video modules, please visit link.schlage.com
Customer Service hours of operation:
•Monday-Friday9.00am-7:00pmEST
•Saturday11:00am-6:00pmEST
•Sunday11:00am-4:00pmEST
To use the remote features of this thermostat, a Schlage LiNK
TM
account is required. Schlage LiNK™ online setup requires
broadband internet service and router with available port.
Question and Answer IconNeed help?

Do you have a question about the Trane Schlage LiNK TZEMT400BB32MAA and is the answer not in the manual?

Trane Schlage LiNK TZEMT400BB32MAA Specifications

General IconGeneral
Product TypeThermostat
BrandTrane
ModelTZEMT400BB32MAA
CompatibilityCompatible with most HVAC systems
ProgrammableYes
Humidity ControlNo
Energy Star CertifiedNo
ConnectivityZ-Wave
DisplayLCD
Power Source24V AC
Remote AccessYes, via Schlage LiNK system

Summary

Physical Installation and Wiring

Voltage Hazard Warning

Voltage hazard. Can cause electrical shock or equipment damage. Disconnect power before installation.

Remove Existing Thermostat Cover

Remove the existing thermostat cover from the wall plate, leaving wires attached. Consult original instructions if needed.

Common Wire Installation

Determine 24 VAC Common Wire Requirement

Check if your system requires a 24 VAC common wire, skipping if it's a heat pump or already has a C wire.

Connect 24 VAC Common Wire

Connect a 24 VAC common wire to power the thermostat, typically using a blue wire.

Wiring and Wall Plate Removal

Label Existing Thermostat Wires

Label wires on the existing thermostat to match terminal names, not colors. Note special cases.

Remove Wall Plate

Remove the existing wall plate, ensuring wires do not pull back into the wall. Note mercury notice.

System Type Identification

Identify System Type Using Wire Labels

Determine system type (Gas, Electric, Heat Pump, Single/Multi-Stage) by checking wire labels.

Mounting the Thermostat

Separate Thermostat Face

Separate the new thermostat face from the wall plate by applying pressure at the top tabs.

Mark and Prepare Mounting Holes

Mark, drill, and prepare mounting holes for the new wall plate, ensuring level placement.

Install New Wall Plate

Pull wires through the wall plate hole and attach the wall plate to the wall using two screws.

Wiring Connections

Review Wiring Table

Consult wiring tables for Gas/Electric or Heat Pump systems to match existing thermostat terminals to new ones.

Attach Wires to New Thermostat

Securely attach wires to the correct terminals on the new thermostat, ensuring bare wires don't touch.

Final Installation Steps

Adjust Internal Jumper Wire (JP1)

Cut the internal JP1 jumper wire if wires are connected to both 24RC and 24RH terminals.

Attach Thermostat Face to Wall Plate

Tuck wires flat, align the thermostat face with the wall plate, and press firmly to secure.

Restore Power to System

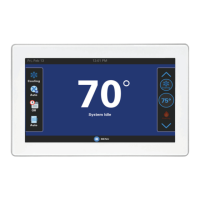
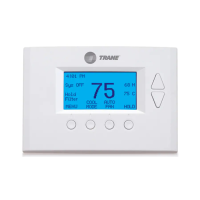
Turn power back on to the heating and cooling system. Check thermostat display for initial information.

Thermostat Settings and System Type

Set Time and Date

Set the current time and date on the thermostat via the System Settings menu.

Select System Type

Follow prompts to select the correct system type (Gas Furnace, Electric Furnace, Heat Pump) for proper operation.

Mechanical Settings Configuration

Gas Furnace - Multistage Settings

Configure settings for Gas Furnace Multistage systems, including 2nd Stage Heat and Cool.

Electric Furnace Settings

Configure settings for Electric Furnace systems, including Fan Type and 2nd Stage Heat/Cool.

Heat Pump Settings

Configure settings for Heat Pump systems, including System Type, Fan Type, C/O Type, and 2nd Stage Heat/Cool.

System Checkout Procedure

Test Fan Operation

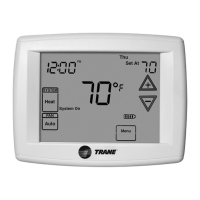
Test fan operation by setting the fan to ON and then AUTO, verifying air movement.

Test Cooling Operation

Test cooling by setting mode to COOLING and lowering setpoint below room temperature.

Test Heating Operation

Test heating by setting mode to HEATING and raising setpoint above room temperature.

Enrollment and Online Control Setup

Prepare Schlage Bridge for Enrollment

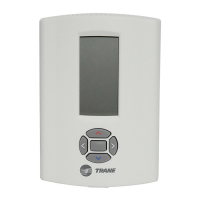
Prepare the Schlage Bridge for enrollment by installing a battery and verifying its status.

Enroll Thermostat into Schlage Bridge

Enroll the thermostat into the Schlage Bridge by holding them close and following on-screen prompts.

Verify Thermostat Enrollment

Check the ZNID value in Thermostat Info. A non-'000' value indicates successful enrollment.

Establish Online Control

Complete Online Setup

Complete online setup by connecting the Bridge, logging in, and configuring climate settings.

Related product manuals