ENGLISH
40
www.trapp.com.br
Maintenance Instructions
Belts
It is recommended to weekly check usage
conditions and stretching of all transmission belts
of the animal ration shredder (motordriven or with
tractor accessories).
Attention!
All maintenance and cleaning shall be
done with the equipment off.
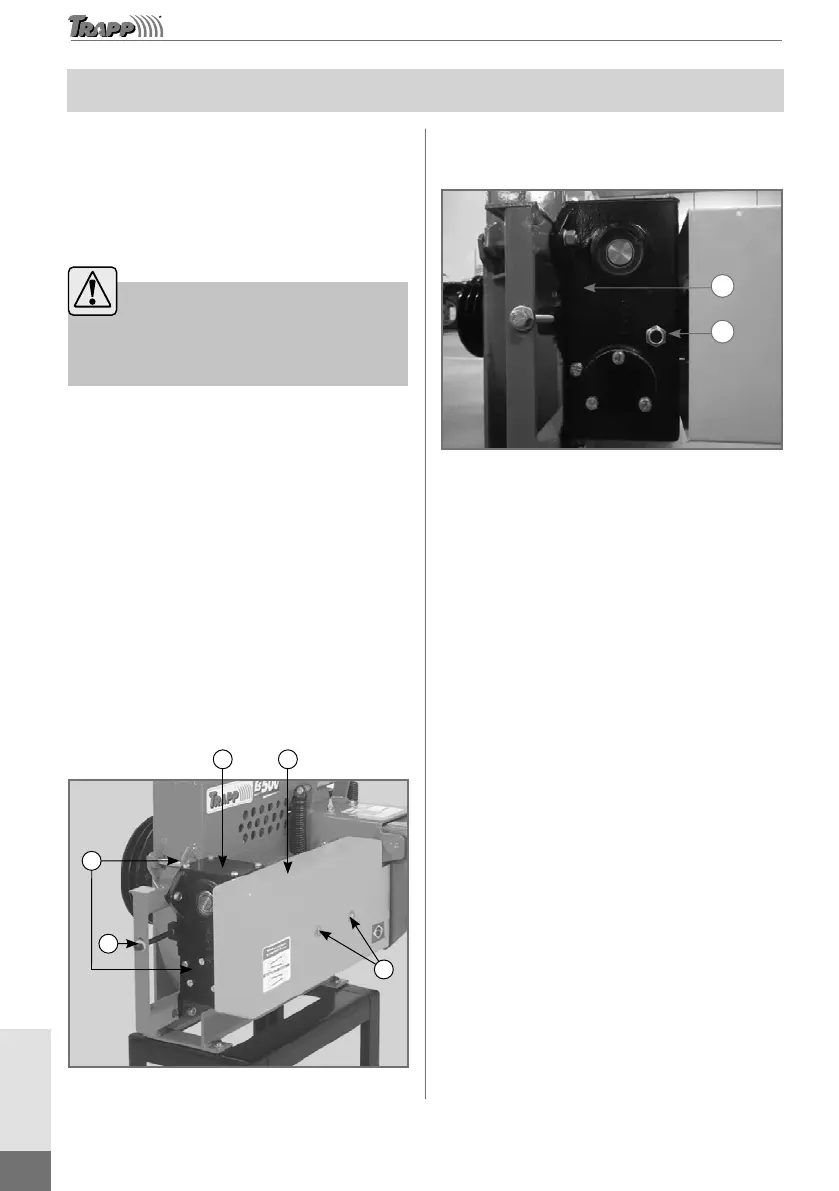
How to tension the belt(s) that activate
the feeder cylinders
In order to change the pulley cavity and change the
material cutting size, you must move the machine
transmission box, following the directions
according to Figure 13:
Remove the 2 screws (A) and the protection (B).
Loosen the 4 screws (C) that secure the transmission
box (E).
Turn the screw (D) in order to increase or decrease
tension on the belts, as required.
Then reassemble all the unassembled items and
tighten them as required.
BE
A
C
D
Image merely
illustrative
Figure 13
Lubrication
Gearbox (A)
2
1
Image merely illustrative
Figure 14
When performing any maintenance, do not allow
any foreign material to enter into the transmission
box (1).
To drain the oil it is necessary to remove the drain
plug located on the bottom of the gearbox.
Whenever performing an oil change, use 800 ml of
SAE-140 oil.
After placing the oil check the level through the oil
sight glass (2). Since it must be immersed in oil. Use
the oil sight glass to check the oil level regularly.
Change oil after the rst 50 hours of use.
The following oil changes shall be made every 300
hours of use.
Periodically check the oil level, and ll up if
necessary.
Sharpening of blades
To keep cutting quality and to obtain the best
performance of your animal ration shredder, keep
blades in good working conditions. Periodically
check the status of the blades, sharpening them
whenever necessary.
To sharpen or change blades, follow the directions
according to Figure 15:
Open the cover (A).
Disassemble all rotor blades (B), removing securing
screws (C).