-11-
EN - KWJ700/900
7a) Setting up for the Right Hand 45
O
Male Joint.
7b) Routing the Right Hand 45
O
Male roughing cuts x 5.
7c) Routing the Right Hand 45
O
Male Joint finishing cut.
7d) Cutting bolt recess slots for Male 45
O
connecting
bolt.
8a) Setting up for the Left Hand 45
O
Female Joint.
8b) Routing the Left Hand 45
O
Female Joint roughing
cuts x 6.
8c) Routing the Left and 45
O
Female Joint finishing cut.
8d) Cutting bolt recess slots Female 45
O
connecting bolt.
9a) Setting up for the Left Hand 45
O
Male Joint.
9b) Routing the Left Hand 45
O
Male Joint roughing cuts
x 6.
9c) Routing the Left Hand 45
O
Male Joint finishing cut.
9d) Cutting bolt recess slots for Male 45
O
connecting
bolt.
Square End Routing of Worktops
The jig can be used to square cut the worktop using the
central slot. Engraved lines on the jig correspond to the
edge of the worktop. Up to 650mm wide worktops can
be square cut using the central slot with the KWJ700 as
a router guide and up to 850mm wide with the KWJ900.
Follow the cutting instructions on previous pages to cut
the worktop.
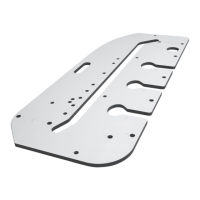
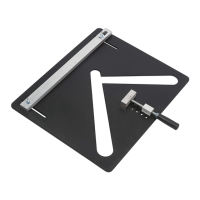
Peninsular Joint
CL
CL
Engraved lines
Start Here
PF
Rout cuts and before routing
the curved peninsula
Routing the Curved Peninsular
Routing 3/4” BSP Hole
Please check hole size is suitable for
mixer tap.
• Mark position of hole for tap in worktop.
• Place jig in position so that hole in jig is over
hole position.
• Secure the jig with clamps.
• Set the depth of cut for 8-10mm and plunge cut.
• Repeat at different depths until hole is routed.
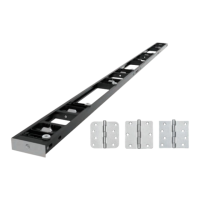
Routing 35mm Circular Hinge Recess
• Mark the position of the hinge on the door. The centre
of the holes should be roughly 100mm from the top
of the door to give the required support, ensure this
measurement is as accurate as possible.
• Position the jig on the door.
• Set the depth for 10mm.
• Repeat operation increasing the cut by 1mm, therefore
setting the total depth for 11mm. (This should be
enough clearance for most hinges. Adjust this
measurement if you require holes for thicker hinge
heads).
CL
CL
8.5mm
8.5mm
Start Here
PF
5.5mm
100mm
Male Male
Female
2 4
1 3
Male Male
Female
5 3
4 2
Cut with
laminate up
Cut with
laminate down