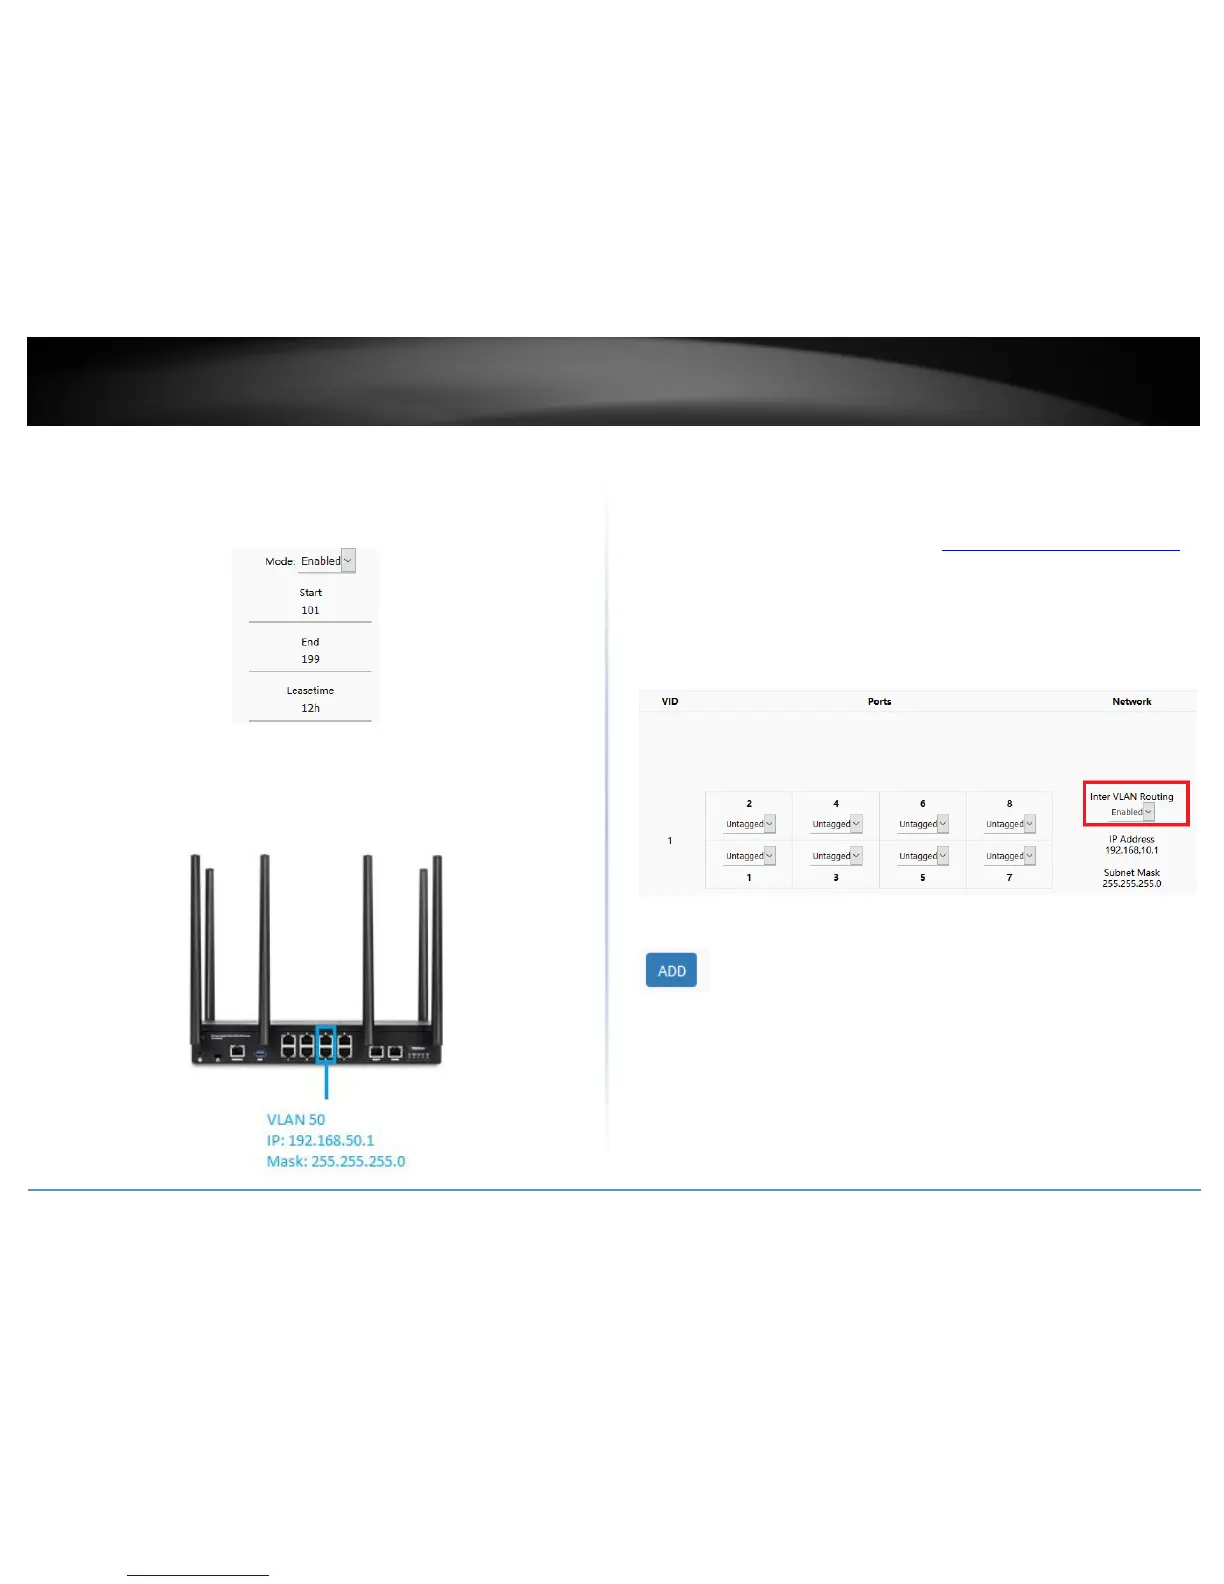
7. Under DHCP Server, click the Mode drop-down list and select Enabled to enable the
DHCP server on the VLAN. Click Apply to save and commit the changes.
Example: In the example below, we will enable the DHCP server on VLAN 50 and leave IP
address range and lease defaults. This will assign a DHCP IP range of 101-199 to ensure
any devices connected to this VLAN obtain IP address information via DHCP.
If following the port-based VLAN configuration example, any computers or devices
connecting to ports 5 & 6 will obtain 192.168.50.x/255.255.255.0 address settings and
use the VLAN 50 IP interface 192.168.50.1 as the Internet gateway and gateway to other
local IP subnets.
Create a port-based VLAN with 802.1Q tagging
Your router supports 802.1Q VLAN tagging/trunking to other 802.1Q VLAN devices such
as managed switches.
1. Log into your router management page (see “Access your router management page”
on page 8).
2. Click on Network and click VLAN.
3. Under VLAN VID:1 (LAN), click the Inter VLAN Routing drop-down list and select
Enabled and click Apply to commit and save the changes.
4. To create a new 802.1Q VLAN, under the VLANs section, click Add.






 To Next Page