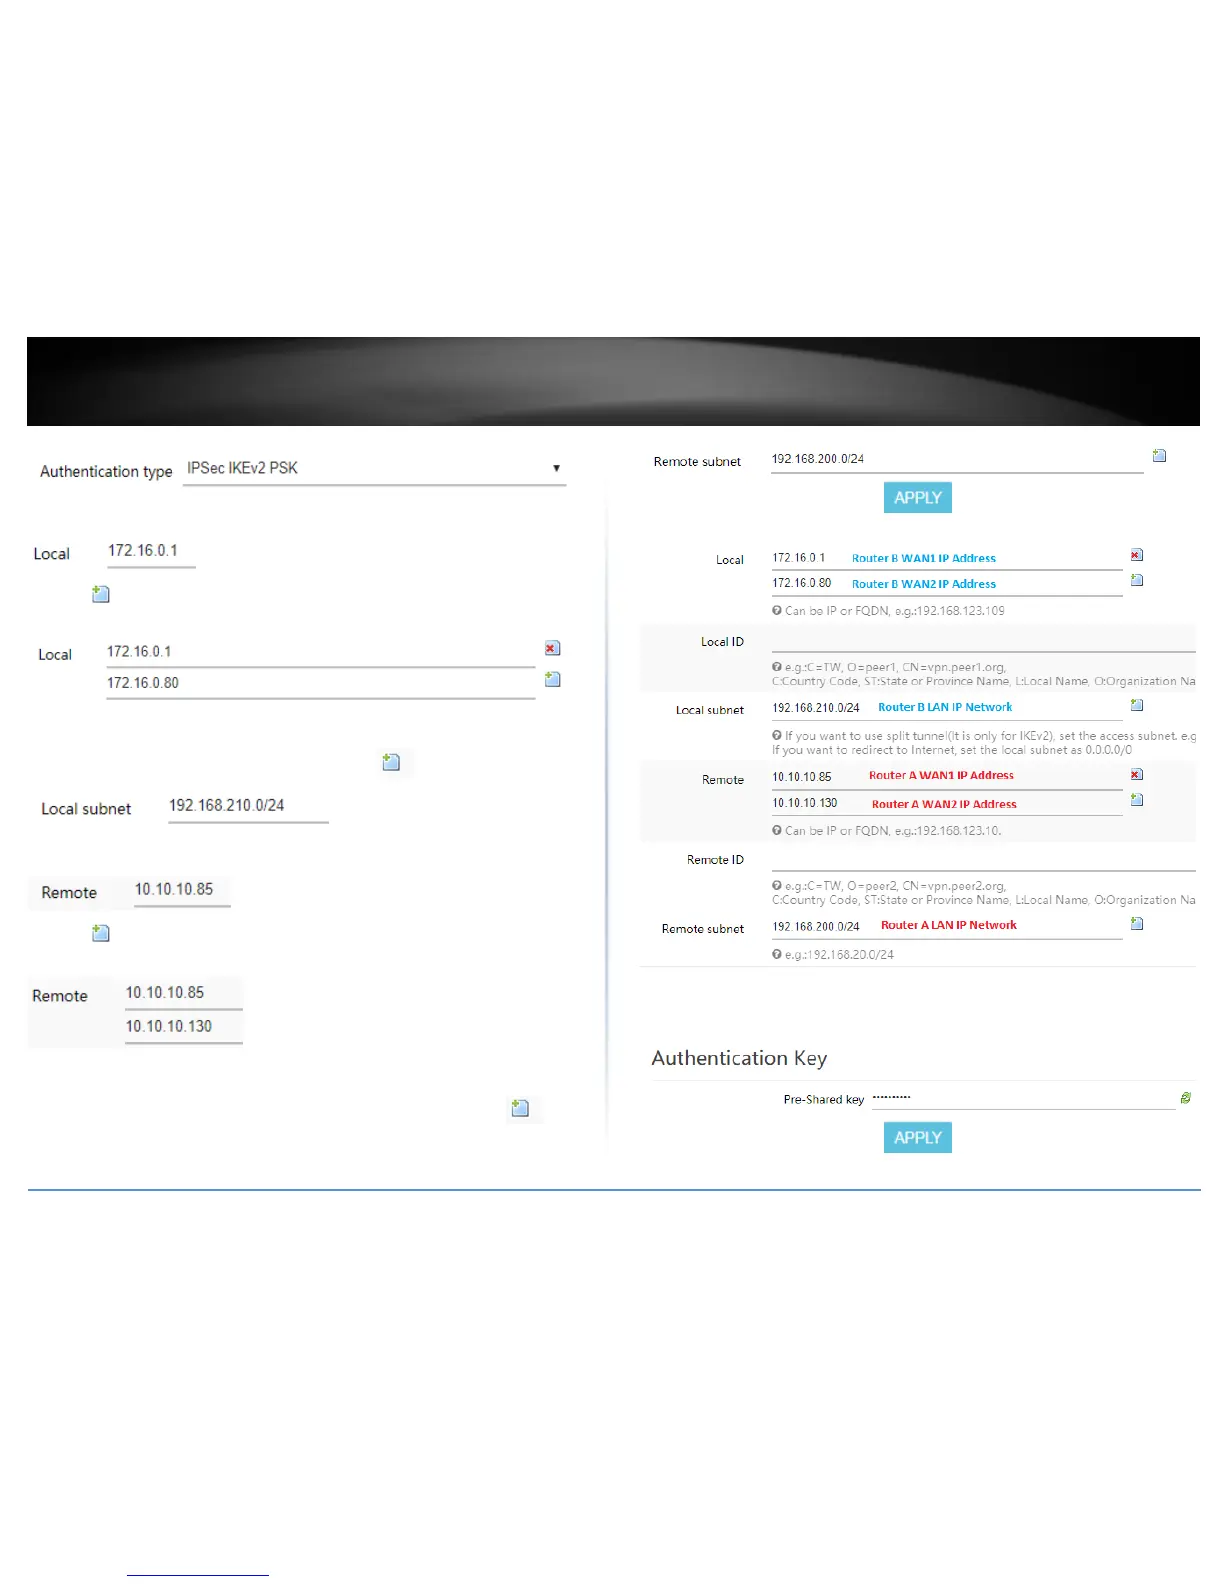
11. In the Local field, enter the local WAN1 IP address. (e.g. 172.16.0.1) This can also be
a domain name (ex: dynamic DNS host name)
12. Click to add an additional IP address and enter the local WAN2 IP address (e.g.
172.16.0.80).
13. In the Local subnet field, enter the local LAN IP subnet. (e.g. 192.168.210.0/24) You
can add additional local subnets by click the add icon (e.g. 192.168.30.0/24)
14. In the Remote field, enter the remote WAN1 IP address. (e.g. 172.16.0.1) This can
also be a domain name (ex: dynamic DNS host name)
15. Click to add an additional IP address and enter the remote WAN2 IP address
(e.g. 172.16.0.80).
16. In the Remote subnet field, enter the remote LAN IP subnet. (e.g. 192.168.200.0/24)
and click Apply. You can add additional local subnets by click the add icon (e.g.
192.168.20.0/24)
Based on the example, the network settings will be the following:
17. Under Authentication Key, enter the Pre-Shared Key (PSK) for the IPsec VPN tunnel
and click Apply. (e.g. 1234567890)