B
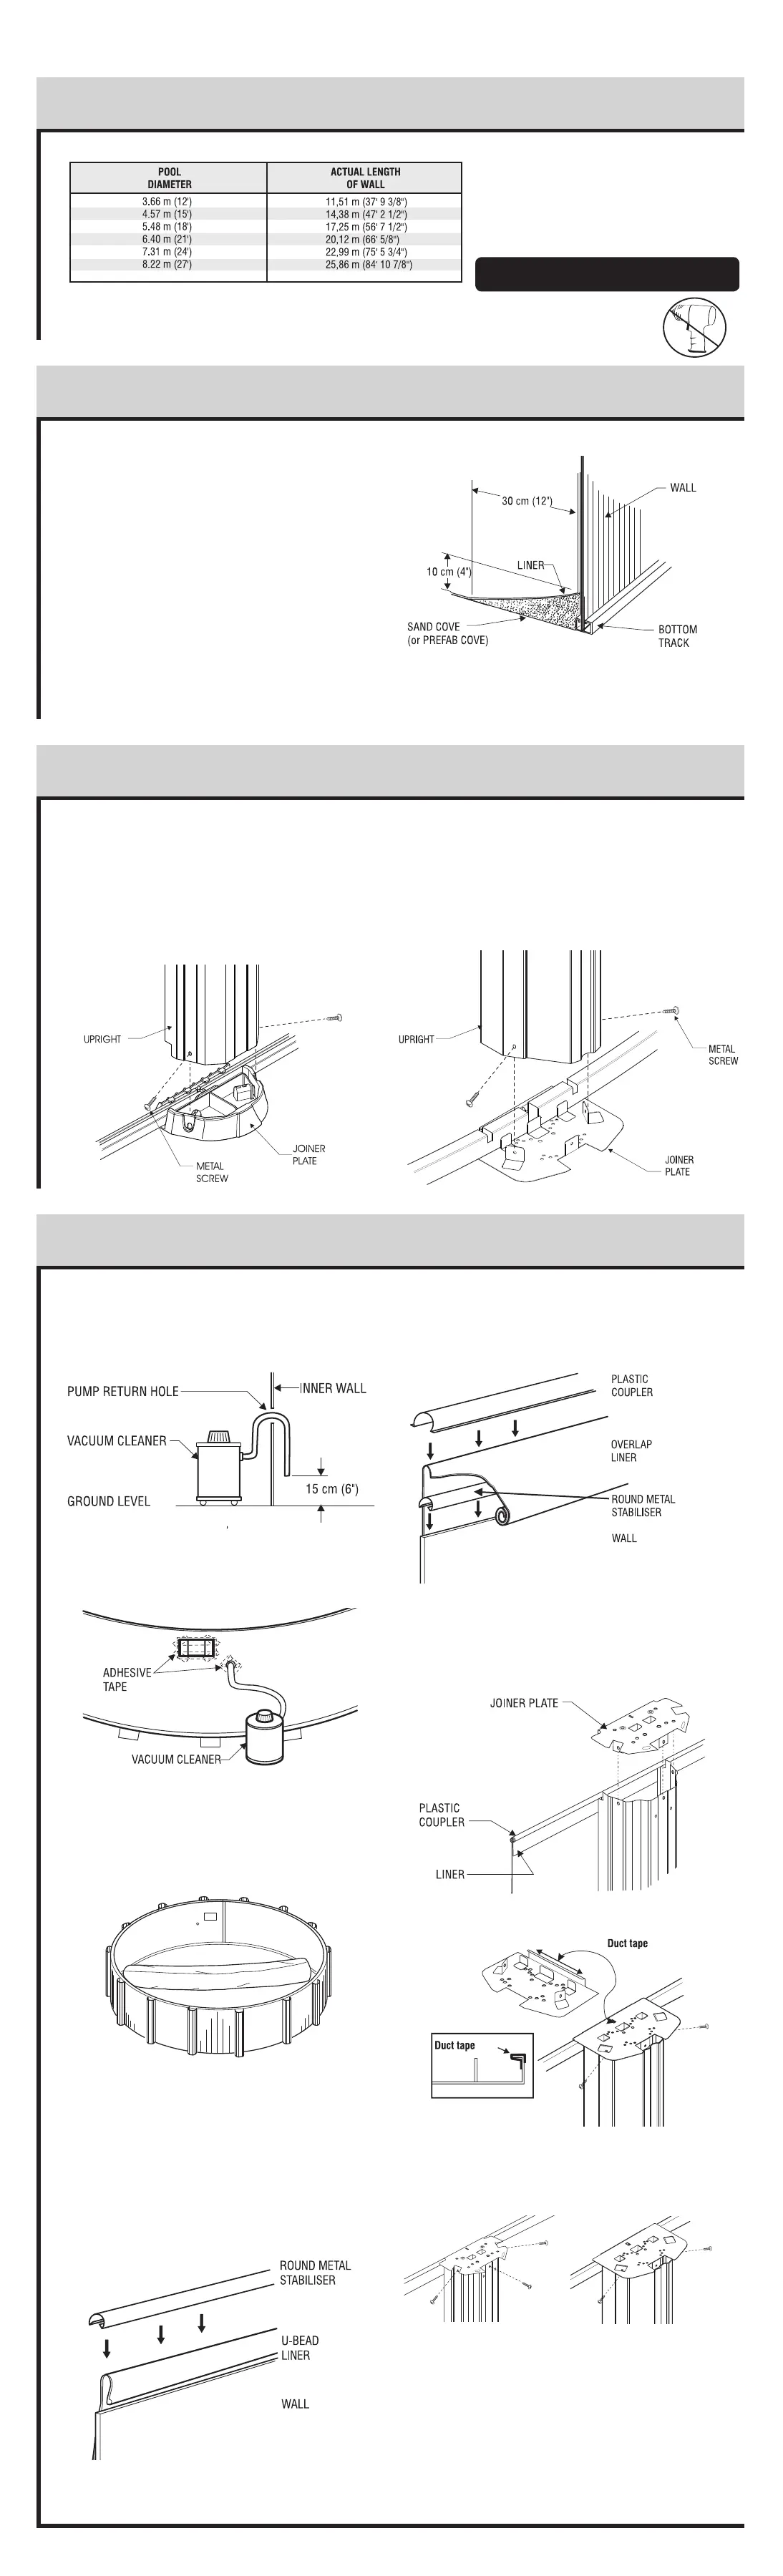
efore pulling the liner up against the wall, insert a va-
cuum cleaner hose down into the pump return hole to
approximately 15 cm (6") from the ground.
M
aintain the hose in place with adhesive tape. Don't for-
get to block the skimmer hole with adhesive tape to pre-
vent air from leaking in.
Place the unfolded liner in the center of the pool area.
Make sure you wear light, flat-soled shoes to walk on the
sand as the slightest heel mark could be visible once the
pool is filled.
Carefully unfold the liner (u-bead or overlap), bringing the
bottom-sidewall seam close to the wall base. Make sure
that the side with the protruding seams faces downward
or that the patterned side faces upward.
Hang the u-bead liner on the top of the wall and install the
round stabiliser to secure.
L
ift up a section of the overlap liner over the top of the wall
lea-ving a 10 cm to 15 cm (4" to 6") fringe outside the
wall. Secure the liner with a plastic coupler.
At this point, the liner may be too tight, making it difficult
t
o drape the overlap or, on the contrary, too loose. In such
cases, you will have to redistribute the tension in the liner
by removing some of the couplers and readjusting the
liner.
NOTE : Stick the duct tape on the border of the joiner plate
to protect the vinyl liner when you fill up the pool.
Remove the riban once the pool is filled.
Install the joiner plates on top of each upright then install
metal screws at the top of the support post, making sure
the support posts are perpendicular to the ground.
Start the vacuum cleaner to allow the liner to adhere to the
wall and check for excess tension at the bottom or for
wrinkles. Adjust the liner by removing couplers if needed,
to lift or lower it in order to ensure a perfect fit.
VINYL LINER INSTALLATION
8
TREVI 106/ 186 /
206 MODELS
TREVI 217 / 218 MODEL
You can now spread approximately 10 cm (4") of com-
pacting sand all around the inside base of the wall in order
to protect the liner from the cutting edges of the bottom
wall tracks and the stone dust (if applicable). Or install a
p
refabricated cove, if available.
SAND BASE FINISHING
L
evel finishing sand one last time. Make sure that any
sharp stones, debris or roots have been removed from the
surface. For better protection, spray sand with water and
pack it once more until the base is nicely even.
S
AND BASE FINISHING
6
WALL INSTALLATION (continued)
5
Attach the uprights to the bottom joiner plates with the
metal screws. You will find them in the hardware bag.
Uprights must be installed outside the flanged part of the
joiner plate.
NOTE: Top and bottom joiner plates are the same for the
217 and 218 models.
UPRIGHT INSTALLATION
7
TREVI 106 / 186 / 206 MODELS
TREVI 217 / 218 MODELS
9
.14 m (30’) 28,75 m (94’ 4’’)
Chart
TREVI 217 / 218 MODELS
(
OPTIONAL)
Do not use impact gun for wall screws.
Minimum clamping force of 60 inch pounds
to maximum of 85 inch pounds
WARNINGWARNING