9
Quick Guide
Before turning on the power
Initial auto installation
When the Receiver is powered on for the first time, the Initial Installation screen appears.
Follow the on-screen instructions to search for all available channels.
Confirm the following before turning on the power
• AretheTerrestrialandSatellitecablesconnected?
• Isthepoweradapterconnectedandpluggedin?
• IstheHDMIcableconnectedbetweenthereceiverandyourTV?
1 Ensure the aerial and satellite cables are connected before switching on.
2 Press the enter key on the Receiver or Remote Control.
• The Initial Installation screen is displayed.
3 Highlight Start Search, and press ENTER to start the channel search.
• The Receiver will search for, sort and store all Terrestrial channels according to their LCN numbers.
NOTE
• After the Initial Installation has been completed,
the default PIN is automatically set to ‘0000’.
To change the PIN setting, refer to Page 25.
1
3
2
4
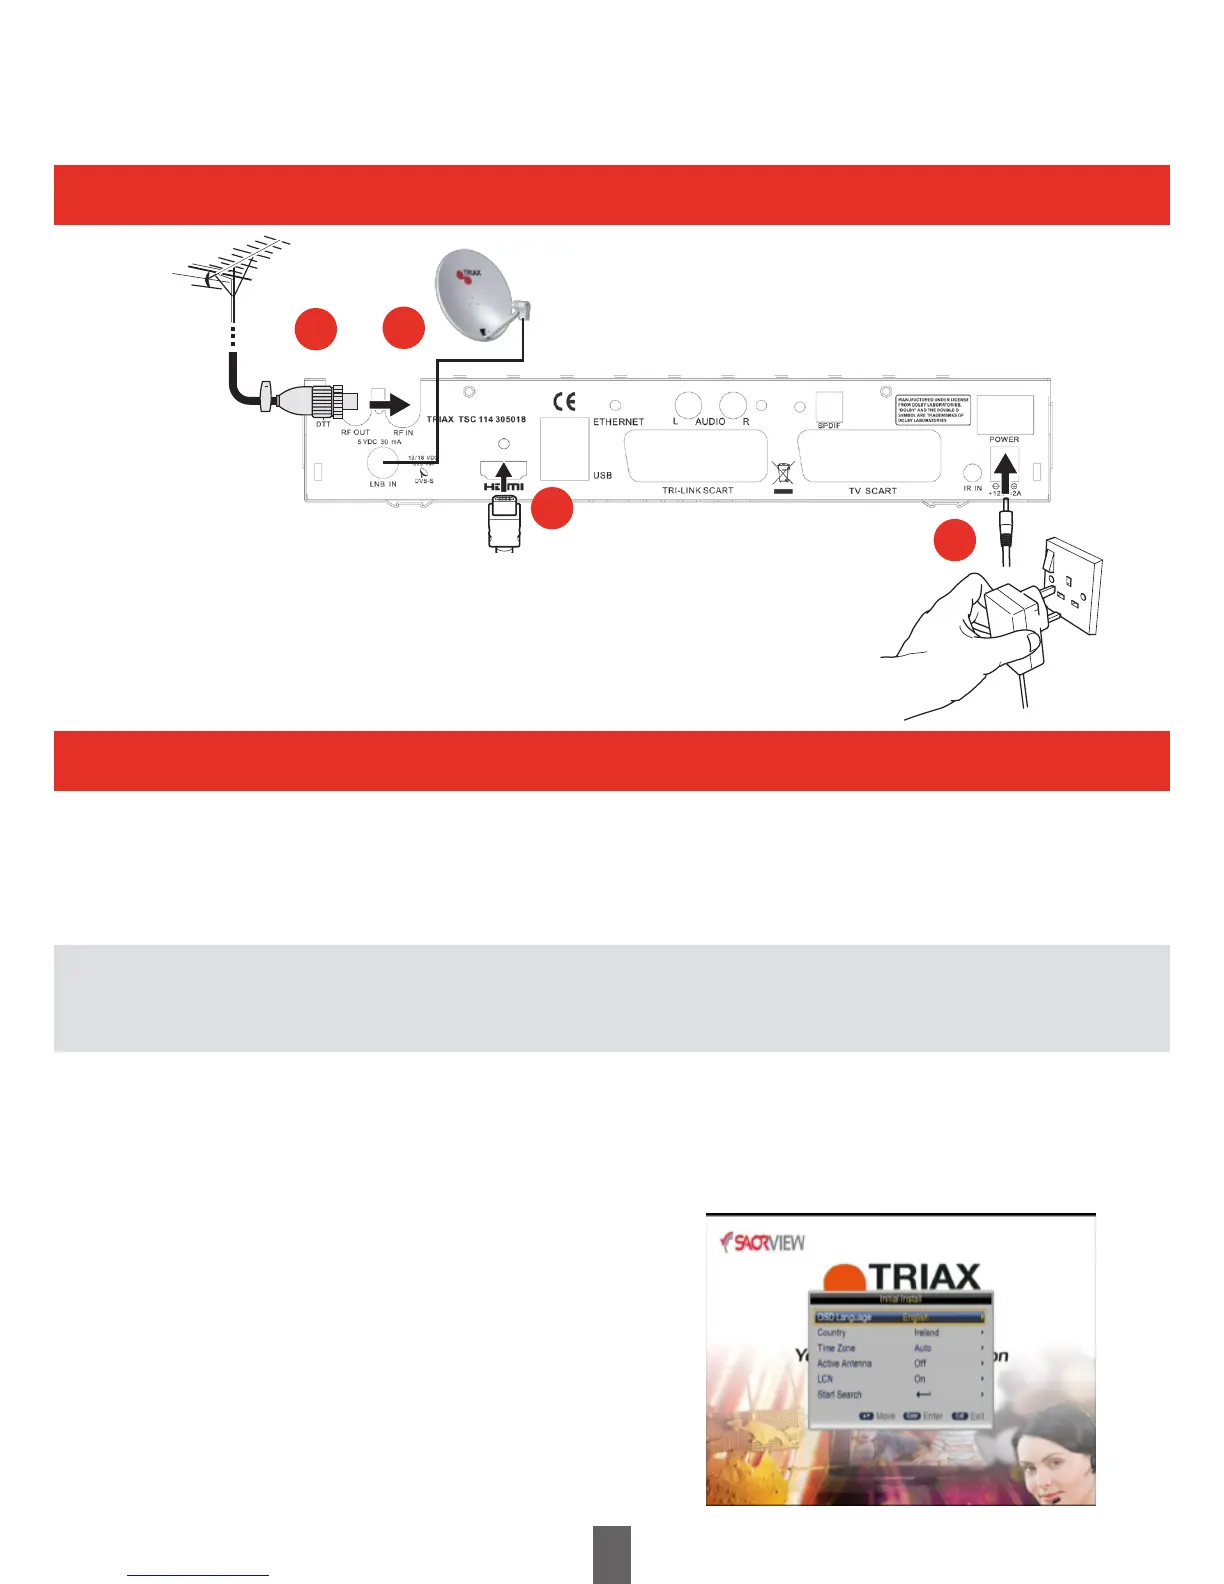
1 Connect the antenna (Coaxial Plug), 75ohm coaxial
cable, (CAI Benchmarked cable such as Triax TX100)
2 Connect the satellite dish (F-Type Plug), 75ohm coaxial cable,
(CAI Benchmarked cable such as Triax TX100)
3 Connect the HDMI cable
4 Connect the power adaptor and switch on at the socket
 Loading...