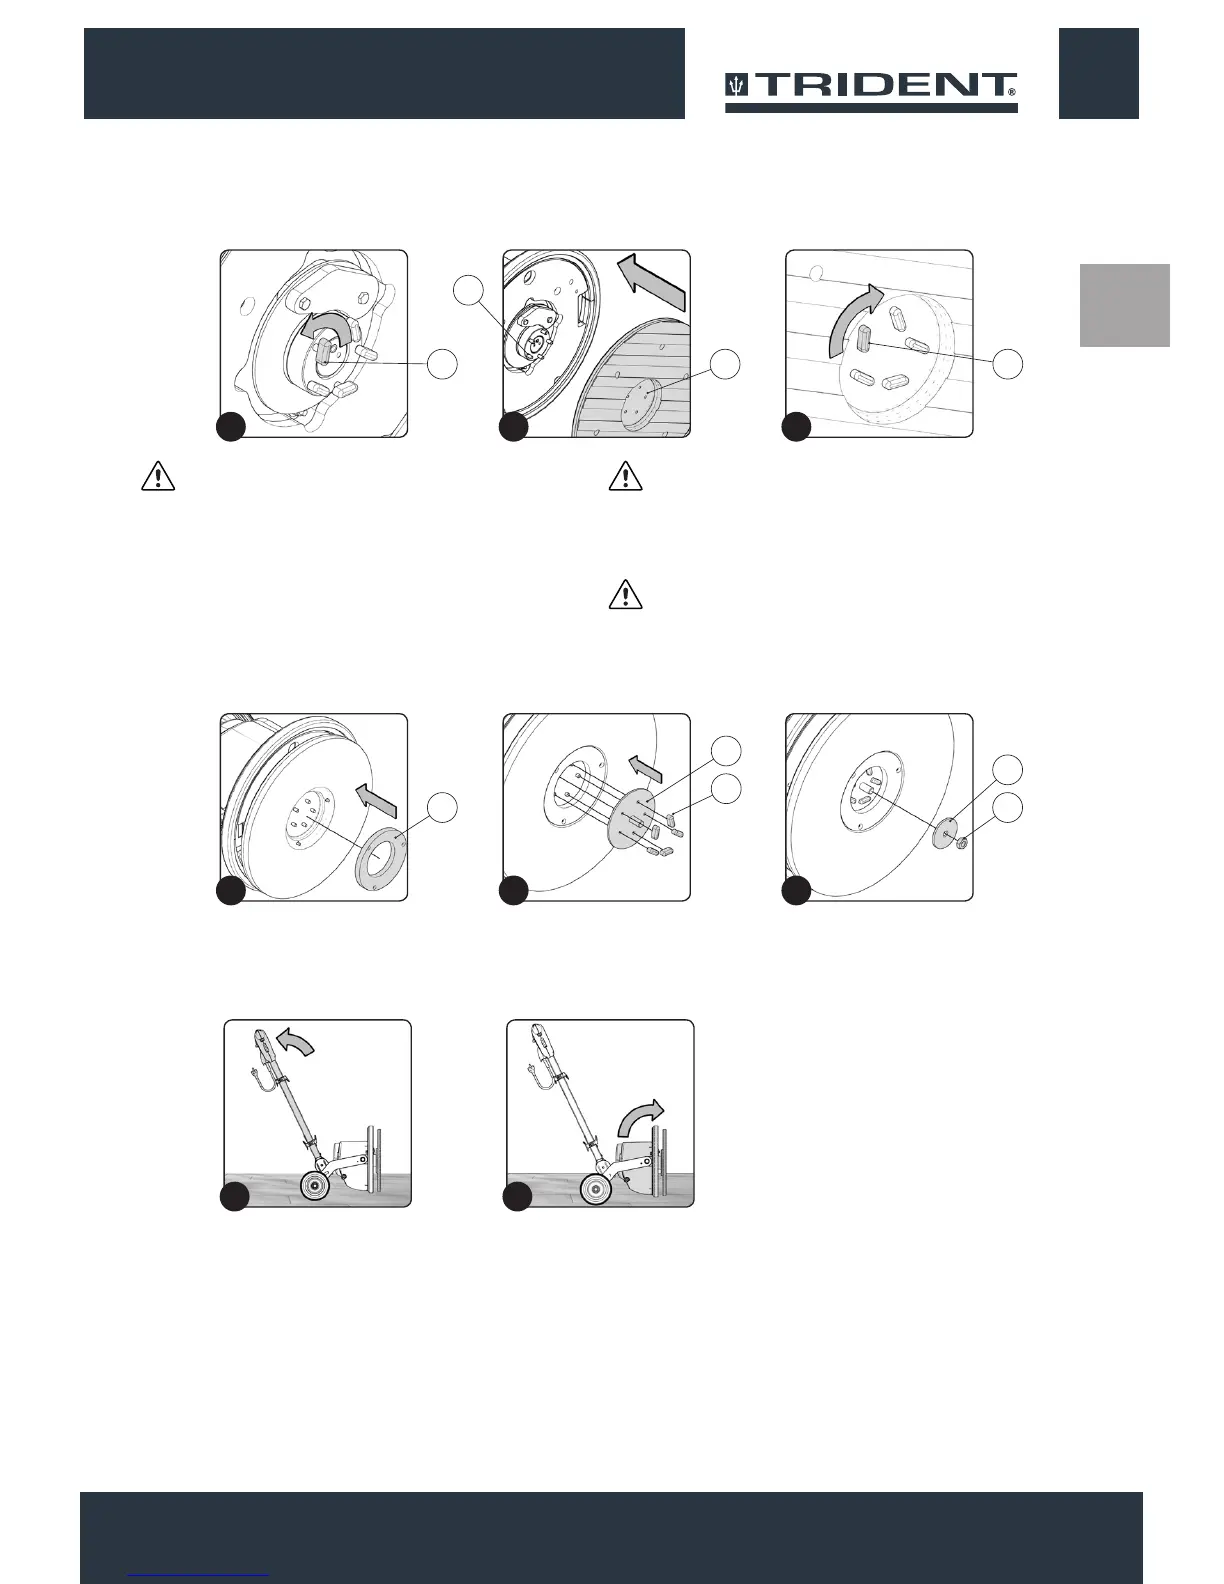
6. Unscrew and remove the tightening keys (5) (Fig.7).
7. Insert the pad holder, being careful to centre the xing pins (6) in
the appliance with the holes (7) in the pad holder (Fig.8).
8. Screw in the tightening keys (5) (Fig.9)
ATTENTION: To tighten the keys correctly use a tightening
clamp.
If the pad holder is used for emery paper, proceed as follows:
• Unscrew and remove the tightening keys (5) (Fig.7).
• Insert the pad holder, being careful to centre the xing pins (6) in
the appliance with the holes (7) in the pad holder (Fig.8).
• Insert the centring ange (8) (Fig.10).
• Insert the threaded grab (9), making sure to centre the xing pins
in the appliance with the holes in the threaded grab (Fig.11).
Screw in the tightening keys (5).
ATTENTION: To tighten the keys correctly use a tightening
clamp.
• Insert the emery paper disc above the pad holder.
• Fix the emery paper to the pad holder using the nut (10)
remembering to also insert the washer (11) (Fig.12).
ATTENTION: To correctly tighten the nut, use a suitable tool.
9. Lightly tip the machine back (Fig.13), block one of the rear
wheels and shift the control column backwards.
10. Turn the brush head into the work position (Fig.13).
1313
13
5
8
8
11
5
10
7 5
6
7
11 1210
8 9
1413