Do you have a question about the Trimax Snake and is the answer not in the manual?
Review hazard identification table and take necessary precautions before maintenance.
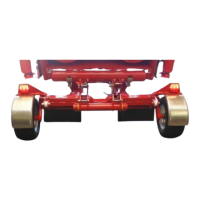
Position mower on flat ground; wings are optional but recommended down.
Raise mower using jack/crane, secure, remove wheel nuts and wheel from hub.
Remove the Bearing Buddy or grease cap from the wheel hub.
Remove the split pin, castle nut, and washer from the axle.
Slide the complete hub assembly off the axle.
Guidance on skipping steps when replacing the entire hub versus just bearings.
Remove old bearing race and press in new race using appropriate tooling.
Critical warning: ensure bearing race is pressed square into the hub.
Grease bearings using tool or by hand, ensuring complete coverage of rollers.
Grease races, install large bearing, then install and grease the seal.
Important: Ensure the seal insert is fitted squarely into the hub.
Fit washer and seal onto axle, then slide hub assembly onto axle.
Fit castle nut, torque to 68Nm, back off, then retorque to 14Nm.
Avoid impact guns; ensure correct torque and final castle nut adjustment.
Insert and bend split pin to secure castle nut; trim if necessary.
Fit bearing buddy, ensuring it is fully seated and pre-filled with grease.
Fit the wheel, loosely tighten nuts in a pattern, then lower the mower.
Safely lower the mower and remove any support blocks or jacks.
Torque wheel nuts to the specified 110Nm following the tightening pattern.
This document outlines the procedure for replacing the wheel bearing on a Trimax Snake mower, identified as "SPARE PARTS INSTRUCTIONS #79." The process is detailed with step-by-step instructions and accompanying images, emphasizing safety and proper technique.
The primary function of this document is to guide users through the replacement of a wheel bearing on a Trimax Snake mower. This maintenance task is crucial for ensuring the smooth and safe operation of the mower, as worn or damaged wheel bearings can lead to poor performance, increased friction, and potential mechanical failure. The instructions cover the entire process from preparing the mower to final assembly and torque specifications.
The instructions are designed for a user performing maintenance on a Trimax Snake mower. Key usage features include:
!) are used to highlight critical safety information, such as reviewing the hazard identification table in the Operator Manual, positioning a block under the chassis when raising the mower, and avoiding impact guns for certain torque steps.Note:) provide additional context or recommendations, such as having wings down during initial positioning or trimming the split pin's short leg if needed.The document itself is a maintenance feature, providing a structured approach to a common repair.
| Brand | Trimax |
|---|---|
| Model | Snake |
| Category | Farm Equipment |
| Language | English |