7
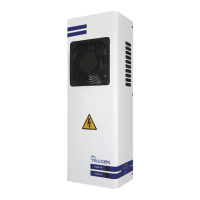
OZONE GENERATOR (CONT’D)
fter mounting, the ozone generator air outlet should be connected to the side
connection of the water trap assembly utilising the 8mm O.D. flexible tubing
supplied with the unit and supported at 300mm centres to prevent the tubing from
kinking under it’s own weight, particularly at the side connection to the water trap.
The air flowmeter included with the ozone generator should be connected to the
air inlet of the ozoniser utilising a 25mm long piece of the 8mm O.D. flexible
tubing supplied.
When selecting a location for the ozoniser, the following instructions should be
adhered to:
The ozone generator should not be located in a position that subjects the
equipment to rain or moisture.
The ozone generator should not be located in the vicinity of any chemical storage
tanks that are likely to emit chemical fumes.
The ozone generator should not be located in the vicinity of any other equipment
that emits heat. The unit operates with fan-assisted cooling and therefore an
obstruction of ventilation or excessive heat will cause damage and shorten the
life of the equipment.
If the ozone generator is being installed in an unheated outdoor plantroom fo
use with a seasonal outdoor pool, then the unit should be removed at the end o
the season and stored indoors until required.
The ozone generator produces high voltage electricity, therefore never remove
the outer cover while the unit is connected to the mains power supply.
AIR DRYER
The air dryer should be wall mounted adjacent to the ozone generator at the
same height, leaving an air gap of 50mm between the units. The units should
only be mounted side by side and never above or below each other.
The air dryer MUST only be wall mounted utilising the two screw fixings included
with the unit.
When the position of the air dryer has been ascertained, the two hole centres
should be marked and drilled in accordance with the fixing centres on the unit.
Insert the plastic rawlplugs into the drilled holes and then insert the roundhead
screws until the screw head is protruding 3mm above the surface. The air drye
is then hung on the screw fixings utilising the keyhole slots on the rear of the unit.